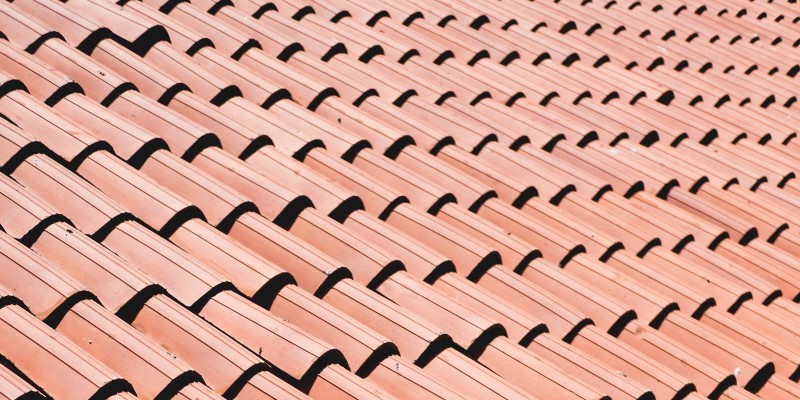
How to Tile a Roof
Whether you’re on a tight budget and want to cut labour costs, or you’re an avid DIYer looking to get stuck into a big project, tiling a roof by yourself can seem like a daunting task. However, when armed with the right tools, materials, and knowledge, it’s well within reach for a handy homeowner to achieve a professional finish when fitting their own roof tiles.
We’ve broken how to tile a roof down into a series of practical steps. We’re going to cover everything from tools and materials, to choosing the right roof tile, along with preparing your roof for tiling, before taking you step-by-step through how one tiles a roof. We cover all common questions, as well as safety advice, and tips to help you get the job done right.
Table of Contents
- Tools & Materials
- How to Prepare Your Roof for Tiling
- How to Tile a Roof: Step-by-Step
- How to Care for a Tiled Roof
- Choosing the Right Roof Tile
- How Many Tiles Do You Need?
- Can I Walk on Roof Tiles?
- How to Cut Roof Tiles
Tools & Materials
Here’s a list of tools, equipment, and materials you’ll need to tile a roof:
- Roof tiles
- Timber battens
- Under-tile membrane/underlay
- Suitable ladder
- Roofing Hammer
- Roofing nails
- Tape measure
- Tool belt
- Appropriate PPE: Hardhat, harness, goggles, gloves, dust mask
- Wet tile cutter/circular saw
- Pencil
- Scoring blade
- Tile nippers
How to Prepare Your Roof for Tiling
Before you begin to fit any roof tiles, it’s vital to check that your roof structure is in good condition. Ask yourself the following questions:
Is the Roof Structure Sound?
An unstable roof frame is not only difficult to tile but can also be very dangerous. This is why you must ensure the structure is completely solid and robust with no indication of damage. Look out for the following warning signs when inspecting your roof structure:
- Water damage & leakages
- Mould & moss growth
- Rot & decay
- Cracks
- Sagging
- Warping
- Signs of repositioning/movement
- Damaged flashing
- Debris in guttering
- General aging
- Rotting existing underlay
- Broken gutters
- Dark patches
Do I Need to Carry Out Any Repairs?
If you have noticed that any part of your roof structure is compromised, you must carry out necessary repairs/replacements before tiling. This may involve fixing leaks, replacing parts of the wood structure, removing debris, or dealing with rot.
How to Tile a Roof: Step-by-Step
Step 1: Fitting the Under-tile Membrane
The primary function of roofing underlay is to provide an additional layer of protection against moisture and external weathering. On older properties, you’ll often find a layer of reinforced roofing felt underneath the tiles or slates. In recent years however, breathable roof membranes have become a much more popular option. This is thanks to their ability to act as a vapour barrier and fight condensation in your roof space.
Installing the underlay correctly will ensure optimum protection for your roof and the highest quality finish for your tiles:
- First, check that your roof rafters are completely free of splinters, cracks & loose nails. Any leftover will need to be removed to avoid tearing the membrane.
- Starting at the bottom, lay the first membrane roll across the trusses. Secure one end using 25mm galvanised clout nails, then gently pull the rest of the roll across to the other side.
- Make sure the membrane is laid evenly, but not too tightly. This can be achieved by leaving a slight sag between each rafter.
- After attaining the desired tautness, fix the other side of the membrane using more nails. Also be sure to fix a few on the rafters in between too.
Step 2: Laying the Battens
Laying your roof battens correctly is another crucial step when tiling a roof. This step when done properly, will allow you to achieve the correct, even spacing between your roof tiles for maximum aesthetics, performance, and longevity.
This spacing between the tiles is known as the “gauge” and depends on your roof’s pitch as well as the size of tiles you’re using. Most manufacturer’s guides should provide a suggested gauge.
How Do I Calculate Batten Spacing?
- Place a single tile onto one of the timbers and another onto the tile batten below. Position without fixing, as this will allow you to adjust spacing as required.
- Ensure the tiles are correctly seated and hooked onto the battens. The bottom tile should overhang by around 50mm over the guttering. This will allow effective drainage and prevent water from going over onto the soffit or fascia.
- Measure the distance between the top of the second batten, up to around 30mm from the apex. This gap will accommodate contraction and expansion of the roof without damaging the tiles.
- Divide this distance by the gauge of the original two battens. Round this number up to the next whole number.
- Divide the rounded number by the total distance once again to calculate the necessary gauge for the rest of the battens.
Do I Need to Nail the Battens Down?
Generally, it isn’t necessary to nail your battens down. This is because the weight of the tiles along with their fixings will keep them firmly in place. Should you wish to fix your battens in place, ensure you use nails with at least 40mm of penetration into the rafters.
How Much Should Roof Tiles Overlap?
Your tiles should overlap one another by between 75mm and 100mm, depending upon their size as well as the pitch of your roof. This should mean that the gauge of your roofing battens will be around 32-35cm, measuring from the top of one batten to the top of the one below it.
Step 3: Fixing the Roof Tiles
With the underlay and roof battens correctly in place, you can now begin fitting your roof tiles. There are two methods generally utilised in modern tiling practice: wet fixing and dry fixing.
Wet fixing involves the use of mortar and cement and is commonly used for the installation of concrete roof tiles. Dry fixing makes use of specially designed nails and is typically quicker to complete. It also gives you the freedom to install in virtually any weather condition (although we always recommend that you judge whether the weather is safe for tiling or not).
In this guide, we will be focusing on dry fixing methods.
How to Dry Fix Roof Tiles
Here in the UK, we generally nail every third row of tiles down, starting from the bottom, as well as the top row. Most roof tile manufacturers will supply their own specialised fixings for use along with their tiles. These will have been designed to work perfectly with their range.
When fixing your roof tiles, you must ensure that you achieve good penetration into the roofing batten, but not into the membrane. This is to prevent damage which can lead to leaks and other issues.
Allowing for Overhang
If your roof features an overhanging edge known as a verge, try to allow for a 40-50mm overhang with your tiles. This will allow any rainwater to drain down into your guttering system, and not over the side of your property. It’s best to finish the verge piece using the highest part of your tile profile, as it forms the most effective edge.
Step 4: Fixing Verge, Ridge, and Hip Tiles
Verge, ridge, and hip tiles are just some of the accessory tiles that can be applied to your roof. These are usually added after the main courses of tiles for a much more aesthetically pleasing finish. Verge tiles are designed for use along the edges, ridge tiles are used on the very top along the apex, whilst hip tiles are designed for “hip” areas of your roof.
These tiles should be fixed in the same way as your main set of roof tiles, whether they’ve been wet or dry fixed.
Other decorative accessory tiles include products such as finials, which are often used at the top of a roof or over porches for a more unique aesthetic. End caps can be added to the ends of ridges to cover up the end sections and protect the tilework from the elements even further, as well as giving your roof a professional finish.
How to Care for a Tiled Roof
With installation complete, you can now enjoy your stunning new tiled roof for many years to come. Thanks to smart modern design and the use of highly durable materials, roof tiles can now last for up to 60+ years with the correct maintenance and care! So, what are some of the ways you can fulfil this full life expectancy?
Cleaning
Although it will depend on the type of roof tile you have fitted, most experts recommend that you clean your roof at least every 2 or 3 years using a pressure washer, or gentle brush and garden house for more fragile areas. Of course, if you notice a build-up of moss, algae, or debris, you should cut this time shorter to remove.
For more information on how to keep your roof tiles looking spotless, check out our handy blog post on How to Clean Roof Tiles.
Repair & Replace
Knowing when and how to replace your roof tiles is a valuable skill that will help to keep your roofing structure on top form all year round. Whether a heavy storm has blown a few tiles from the surface or falling debris has led to breakage, make sure to replace any missing or damaged roof tiles as soon as you can.
To get you up to speed on the replacement process, have a read through How to Replace Roof Tiles.
Choosing the Right Roof Tile
With such a vast selection of colours, profiles, sizes, and materials out there on the market, it can seem virtually impossible trying to pinpoint which is the right roof tile for your property. The tile you choose will have a huge impact on not only the visual appeal of your roof but also its durability, strength, weather resistance, efficiency, functionality and more.
We highly recommend that you take the time to carefully research each type of roof tile and weigh up the benefits and drawbacks to judge which is the best choice for you. To help you with this, we have created a comprehensive and informative guide, providing an in-depth insight into each type of roof tile.
How Many Tiles Do You Need?
With the perfect tile picked out, you are now faced with the task of calculating how many you will need to cover your entire roof structure. This involves measuring and calculating the following:
- Roof Area
- Roof Pitch
- Rafter Length
- Tile Cover Width
- Tile Batten Gauge
- Tile Headlap
Although this may seem daunting, it’s actually relatively simple. To help you out, we’ve written a handy blog on how to calculate how many roof tiles you need.
Can I Walk on Roof Tiles?
During the installation process and after, we highly recommend that you avoid walking on the tiles as much as possible. Although tiled roofs are exceptionally sturdy and resilient against the elements, they are not designed to be walked on as foot traffic can be very damaging to the tiles.
If absolutely necessary however, here’s the safest way to do so:
- First, try to distribute your weight evenly as best you can.
- Walk on the balls of your feet, and step gradually onto tiles, never stamp or jump.
- Always walk on the lower-third of roof tiles, as this is where they are strongest.
- Be sure to always place your feet on the peaks of your roof tiles.
- NEVER step onto ridge or hip tiles, as these are especially vulnerable.
We’d also recommend that you wear the correct footwear when working on top of a roof. This is especially important when it is wet or cold outside, as this can severely impact your level of grip. We stock a fantastic range of safety boots that are perfect for rooftop work.
How to Cut Roof Tiles
To create the perfect fit for your roof structure, you’ll often find that you need to trim down the roof tiles on-site. The difficulty of this will depend on the tile material you have chosen. For example, high-strength concrete tiles will require a wet-tile cutter, whereas some lightweight roof tiles need only hand tools.
To safely cut your roof tiles:
- Take measurements so you know how much of the tile you’ll need to cut away.
- Draw or score a line along the underside of the tile using a straight edge and pencil or blade to mark out where you’ll be cutting.
- Carefully cut along this line using a diamond-tipped wet tile cutter or circular saw.
- Use a soft cloth to clean the cut edge, and sand smooth if necessary.
Do make sure that you wear all appropriate PPE when cutting roof tiles, including goggles, gloves, and a dust mask. If you aren’t comfortable doing this task, you should consult a professional.
Starting Your Own Project?
If you’re thinking of tiling your own roof, why not take a look at our range of high-quality roofing tiles? We stock roof tiles in a wide range of materials, including metal, plastic, clay, slate, concrete, and fibre cement. For any further questions on how to tile a roof, or help with anything else, get in touch with our customer service team. Call them on 01295 565565, email [email protected], or use the handy live chat below.