Guide to Replacing a Shed Roof
The roof is one of the most important parts of a garden shed. No matter what you use your shed for, having a safe, secure roof overhead will keep its contents dry, safe, and intact. You may be looking to replace your shed roof for a few reasons. Your current shed roof material may be reaching the end of its useful life, or you might just fancy a visual change.
Whatever the reason, installing a new shed roof is well within your grasp (if you're not sure whether you just need to recover or replace the underlying boards/support as well, check out our DIY guide to shed roofing, this covers all the general planning aspects you need to know).
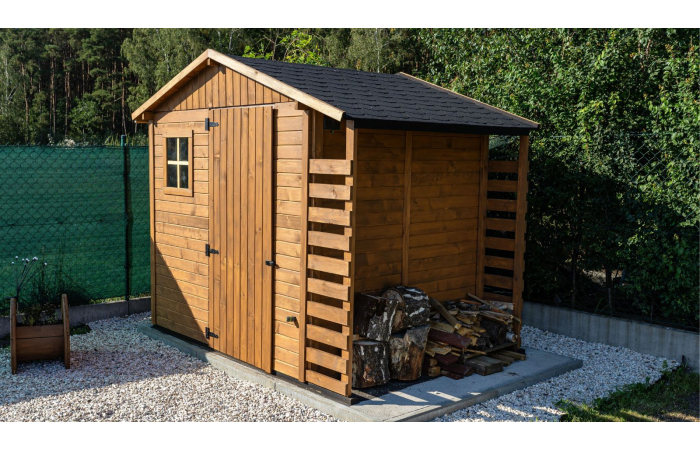
Shed Roofing Materials
The first choice to make when replacing a shed roof is which material you’re going to use. There are many fantastic options available, whatever style of roof you have. We’ve compiled a handy list of the most common shed roof materials below.
- Roof tiles and shingles
- Bitumen roofing sheets
- Metal roofing sheets
- Polycarbonate roofing sheets
- EPDM membranes
- Shed felt
For more in-depth information about each material, take a look at our Guide to the Best Shed Roofing Materials.
How to Replace Shed Roof Felt
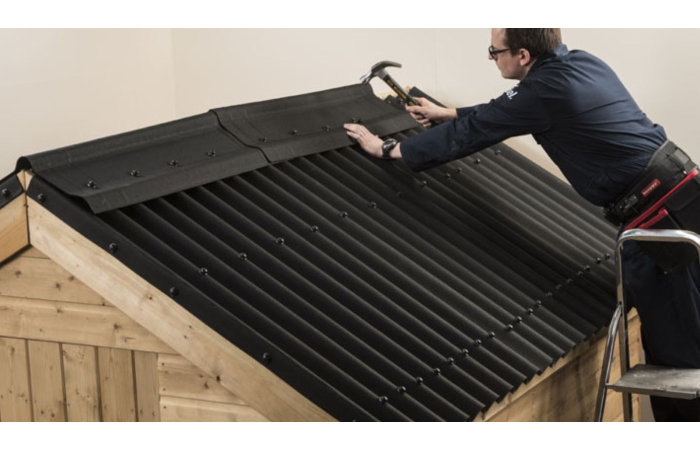
In this article, we’re going to focus on how to replace a felt shed roof (check out our DIY guide on how to install corrugated bitumen sheets here). Below you’ll find a step-by-step guide including necessary tools, how to prepare, safety tips, and more.
Tools You Will Need:
Ensuring that you’ve got the right tools to hand is one of the easiest ways to make a job run more smoothly. You’ll need the following for a shed roof felt replacement:
- Hammer
- Builder’s knife
- Ladder
- Tape Measure
- Pencil
- Straight Edge
Safety Equipment & Advice
As with any DIY project, the safety of the people involved should always be prioritised over anything else. It is vital to take all of the necessary steps to prevent potential injuries and accidents during the replacement process.
- Protective Wear – Although full head-to-toe protective clothing won’t really be necessary for a job such as this, we highly recommend that you utilise safety gloves, goggles, a dust mask and appropriate footwear when working. Protecting your eyes, hands, mouth and feet will lessen the potential for avoidable accidents, especially when you are up on the roof. Also ensure that you are wearing appropriate clothing that isn’t likely to catch or snag.
- Ladders – Working at height on a ladder can come with risks. Make sure the ladder you are using is in good-quality condition and is 100% structurally safe. Only place ladders on stable ground and have someone hold the bottom section to increase stability.
- Children – If you are working in a family environment, be sure to keep children clear of the area during the replacement process. Ladders, sharp nails and tools can be very dangerous if handled by a young child.
- Assess the Area – Before beginning work, take a good look across the surrounding area to flag up any potential hazards. Is this ground stable or soft/sloping? Are there any cables which could be a potential tripping hazard? Is there debris that needs to be cleared?
- Weather – It is always frustrating when you set aside an afternoon for a DIY project and the weather is not cooperating. It isn’t necessary to have blazing sun and blue skies, however if you are experiencing very heavy rain, hail, snow or icy grounds, then you will need to assess if the conditions allow you to carry out the job safely.
What You’ll Need
Below is a full checklist of everything you will need material-wise to get your shed roof replacement project underway.
- 40mm Wood nails
- Felt nails
- Fascia boards cut to the appropriate size of the roof
- Shed roofing felt
How Much Shed Felt Do I Need?
Shed felt usually comes in a handy meter rolls with a variety of sizes available. Before purchasing, use your tape measure to carefully measure the size of your shed roof to ensure you have the right amount of felt for the job. To make this easier, measure in sections then add together to cover the total space.
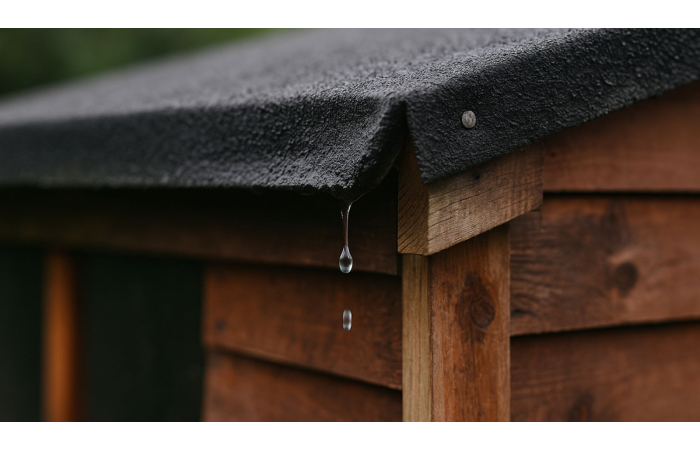
Keep in mind that you need to allow for a 50mm overhang on the eaves as well as a 75mm overhang on the gable ends when felting a roof. These overhangs will allow you to tuck the shed felt in to create a clean and professional-looking finish.
Once you have measured your shed and purchased the felt, we advise that you check to ensure the roofing felt fits with the overhang included. With most shed designs, you will be cutting the shed felt into 3 sections – two for both sides and one over the top to join the side pieces together. It is always better to have a little left over for touch ups and repairs rather than too little.
Setting Up
With your shed felt bought and measured, it is time to get your tools and ladder ready for work. As discussed in the safety section of this post, set your ladder up on completely solid, stable ground with a second person stationed to hold at the bottom. Make sure the ladder is securely slanted on the roof structure, positioned to provide easy accessibility. You will likely need to move your ladder around to complete the different sections of the roof, so ensure all of the surrounding ground is safe for this.
Have your tools and materials within reach in clear view. A tool belt may be handy to store your hammer, nails, tape measure etc when up on the roof to avoid the constant need to come up and down the ladder. Do one last scan of the area to ensure everything is prepped and safe, then you are ready to begin.
Re-Roofing Your Shed Step-By-Step
Removing the Old Shed Felt
Before you can install your new shed roof felt, you first need to remove the existing material.
1. Fascia Boards
Using your hammer, remove existing fascia boards on the shed, being cautious to not damage the remaining roof structure. Handle these carefully when passing down the ladder.
2. Remove the Nails
Use a claw hammer to pull up the old nails holding down the existing roofing felt. If the nails are old and rusted, using pliers might help to loosen any that are stuck.
3. Remove the Old Felt
Strip the old felt from the surface of the roof. Ensure that all debris and leftover nails are completely removed from the roof before moving onto to re-installation.
Installing the New Shed Felt
Now you're ready to re-roof your shed with a brand new layer of shed roof felt.
1. Marking Up
To give you a clear picture of where the shed felt will begin, mark up the roof to create a guideline for installation. Using your tape measure, measure where the felt pieces will start, then mark this place on both ends of the roof. Next, use a straight edge to draw a line across the full length of the roof, joining the marks up to make your guide.
2. Cut the Felt
Once you have your measurements, cut your felt pieces in line with these using a builder’s knife. Roll the felt out across a flat surface and use your tape measure to show the point at which the cut should be made. Cut in a smooth, straight line across the width of the felt.
REMEMBER! – Include the 75mm gable ends overhang and 50mm eaves overhang in your measurements.
3. Installing the First Piece
Starting on one side of the shed, install the first piece of shed felt. Lay the shed felt across the span of the roof side, making sure it is accurately aligned on all edges.
Again, make sure you leave the 50mm overhang on the eaves and 75mm overhang on the gable ends. Use your hammer and felt nails to fix the felt in place once happy with positioning.
4. Move to the Opposite Side
Now you have one side installed, its time to move across to the other. Measure the opposite side using the same method as mentioned before and cut the appropriate amount of shed felt from the roll. Don’t worry if you need multiple sections of the shed felt to cover the roof, it will all be dependent on the scale of the roof structure.
5. Secure the Second Piece
Install the piece/pieces of shed felt to the second side of your shed roof. Carefully align the felt with the edges, incorporating the 75mm overhang on the gable ends. If you are using multiple pieces, ensure each piece overlaps slightly. Overlap the top piece with the previously installed section on the opposite side. This will prevent water from moving beneath the sheets when running off the roof.
6. Nail Along the Eaves
Using your tape measure, measure 100mm intervals along the eave and hammer in felt nails. Repeat this for the bottom section too to ensure your shed felt is securely fitted in place.
7. Overhang
Use your builder’s knife to make a cut at the centre point of the overhang. Fold this down and fix the overhang to the side of the shed using felt nails. Once again, we recommend measuring and nailing at 100mm intervals for the most optimum security.
8. Fascia Boards
Secure fascia boards to the front of the shed using a hammer and 40mm wood nails. To allow for re-positioning once all fascias are up, fix the nails only partly. Once you are completely happy with the alignment of the boards, then secure the nails fully.
9. Neaten up the Excess
Trim off any excess felt that is hanging below the fascia using your builder’s knife to create a clean finish. Fold the felt that hangs over the edge of the eaves under the overlay. Use felt nails underneath to secure in place.
Finished!
Now your shed roof has been successfully replaced and is looking clean, smart and brand new. Tidy up your tools and ladder, saving any leftover materials for future repairs and maintenance.
Cost of a Shed Roof Replacement
Cost is a fundamental consideration of any project such as this. The overall price of a roof replacement job covers materials and labour, with both removal and re-installation falling under that. In this section we have broken down the estimated costs for all of these components to give you a better idea of what you will be paying for and how much.
Materials
The overall material costs for a project such as this will depend on a few variants including:
- Type of material used
- Quality of material used
- Size of shed roof structure
There are a multitude of shed roof materials available to choose from, each with varying costs. Below we have included a table with the most popular shed roof types and estimated costs based on ballpark averages in the UK.
|
Type of Shed Roof Material |
Average Cost (per m2) |
|
Shed Felt |
£3 |
|
EPDM Rubber |
£6.50 |
|
Metal Sheets |
£12 |
|
Felt Tiles/Shingles |
£10 |
|
Clay Tiles |
£40 |
|
Fibreglass |
£15 |
(Source: checkatrade.com)
Removal
Part of the labour costs will cover the removal process of the existing shed material. For an average garden shed, the cost of removing the old roof is estimated at around £80 per m2. Obviously, this will vary dependant on the type of roof you already have as some will be quicker and easier to remove than others.
Re-installation
The next part of labour pricing will account for the re-installation of the new shed roof material. The labour costs for fitting are usually estimated at around £18 - £25 per hour.
Extra Costs
In some cases, there may be extra costs. For example, if there is any structural damage to the roof itself, this will need to be fixed before replacement can begin. The additional pricing for this will again depend on the scale/type of roof damage.
FAQ & Helpful Tips to Remember
How Long Will My New Shed Roof Last?
The lifespan of your new shed roof will depend on the material you have chosen and how well it is maintained after installation. Below we have included the average lifespans for various shed roof materials to give you a better idea of longevity:
- Clay roof tiles: 60 years
- Felt shingles: 20 years
- Wood shingles: 30 – 40 years
- Bitumen sheets: 20 years
- Metal sheets: 25 years
- Polycarbonate: 10 – 15 years
- EPDM: 50 years
- Shed felt: 10 – 30 years
How Do I Maintain My New Shed Roof?
Correctly caring for and maintaining your shed roof is the fundamental way to enhance its life expectancy. Maintenance requirements will differ with the varying materials, however there are a few steps you can follow with every roof type to keep it in top condition.
Cleaning: Not only does a clean roof look far more appealing, but it also can help to minimise damage to your shed roof. Dirt, leaves, moss and algae can cause significant damage to your shed roof structure if left to build-up over time. Use a bristle brush to remove debris and a pressure washer or soapy water and a mop to clean further. Always check cleaning recommendations based on the roof material you have.
Did You Know? – When bird droppings are left uncleaned, they can cause shelf roof materials such as felt to rot.
Repairs: Repairing damaged sections of your roof as you spot them will help to avoid the need for full scale replacement in the near future. Give your shed roof an inspection after very stormy conditions to check for weather damage. After original installation, it is a good idea to save leftover material for touch-ups and repairs to your shed roof.
Clear the Area: A common cause of shed roof damage is falling debris from trees above. Trimming branches that are hanging over your shed will prevent them from potentially breaking off and damaging the roof material.
Where Can I Purchase Shed Roof Materials?
If this post have inspired you to give your own shed roof an upgrade, take a look at our high-quality range of brilliantly affordable shed roofing materials to get your project started.
If you have any further questions or queries, please don’t hesitate to get in touch with our friendly customer service team who will be more than happy to help. Just give them a call on 01295 565565, email at [email protected] or leave a message in our handy live chat.