How to Paint Decking
No matter where you are in the country, if you have exterior decking then the chances are that it has been battered by the different weather. This is why it can be particularly disappointing when – at the beginning of summer in particular – you realise your decking looks to beaten and weathered to be used to entertain guests or even just to relax on.
If your decking is looking under the weather – don’t panic, it is likely due to the fact that needs a paint job rather than a full repair. With spring and summer being the most important times for your deck to look its best, any time in the run-up to, or during, these months is an ideal period to get to work painting it up and making it look as good as new.
We know how important it can be for you to get your deck looking its best and so we’ve put together this handy guide to make things simple. Read on for more.
Contents
- How Do I know it is Time to Paint My Decking?
- Should I Use a Roller or a Brush?
- What Paint Do I Use?
- Do I Need to Remove Paint First?
- What will I Need to Paint My Decking?
- How Do I Paint My Decking?
How Do I know it’s Time to Paint My Decking?
It will be obvious when your decking needs some TLC, with the most glaring evidence being the peeling and fading of the existing paint or finish. If you’re decking is newly laid, then try to avoid painting it at this stage. In fact, it may be best to allow it to weather for around 6 – 8 months before staining, painting, or oiling the deck. This allows any existing coating to effectively erode, which will ensure the best results when you apply your own product.
However, if your deck is newly laid and untreated, or it has been six months since it was last painted, you should be able to get to work right away. You shouldn’t need to do anything major beforehand in this instance – simply gather the tools listed below and you can start following the steps.
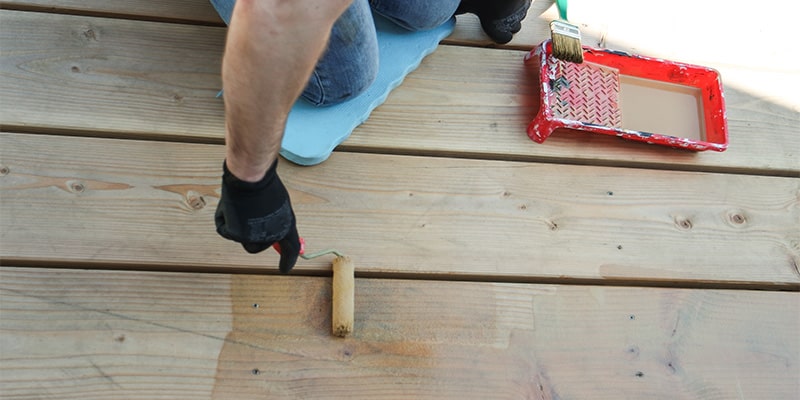
Should I Use a Roller or a Brush?
There is great debate amongst many outdoor decorators and DIY enthusiasts alike over what gets the best results when painting a deck – a roller or a brush. The answer? It’s both, depending on which area of your decking you are working on. This means that in order to get the best results you’ll need to accommodate space in your budget for a roller, its accessories, and a couple of differently-sized brushes.
Roller covers much more ground than brushes, allowing you to distribute paint across your decking quickly and efficiently. They can also take on more paint, meaning you’re going to get more out of one ‘dip’ into your tray of paint than you are from one application of your brush in a bucket. Extension poles can also be used to help cover extra ground.
It’s better to use a brush for small corners and more intricate sections of your decking such as the railings or the steps. This allows you to get into all the nooks and crannies and ensures there are no unsightly gaps in the paintwork.
However, if you feel more experienced using either of these tools (especially a brush, as it is technically more versatile than a roller), then you can choose one over the other. Just keep in mind that you may leave gaps in the paint with a roller, and the project with generally take much more time with a brush.
What Paint Do I Use?
There are plenty of choices when it comes to compatible paints for wooden decking. Of course, you’ll want to prioritise a colour to suit your personal preferences. However, you’ll also want to keep an eye on other features of the paints, such as lifespan, application method and the appropriate conditions for application.
A number of compatible paints include acrylic, with its UV-resistant film, flexible and versatile formula, and its overall durability. Acrylic can be used on multiple common wood types as well, making it perfect for those with decks made from an array of different timbers. It is also mildew resistant, which is ideal for increased endurance.
There are other more specialised paints as well, with a collection of decking paints on the market. These tend to be limited to common, more natural deck colours such as browns and oranges, although you may also come across blues, reds, and greens too.
Do I Need to Remove Paint First?
To maximise the lifespan of your decking’s finish, you will need to remove the old layer of paint before applying anything new. This is because that old layer will serve as a barrier that will stop the new layer from seeping deeper into the wood, which will give the wood more all-around protection as well as grant the paint a lengthier lifespan.
To remove the paint from your decking, it is best to use specialised formulas such as chemical paint strippers. Using these will ensure less physical strain on yourself as it will remove a lot of the paint and make the remaining residue easier to remove. It will also make sure that paint is erased from those hard-to-reach places, so long as it is applied with an appropriate brush.
Another useful accessory you may want to invest in is a scraper tool. This will help you to tackle that aforementioned residue with greater ease, allowing you to get your deck ready for a fresh coat of paint in no time. You may also want to sand down the decking to prepare the surface for this new layer.
What Will I Need to Paint My Decking?
You can paint your decking using a variety of tools, but below we’ve listed some of the most important, including several that we have already mentioned. You’ll find everything you need to carry out the job quickly and efficiently. To make sure the proceedings run as smoothly as possible, ensure you have all of these products before starting painting.
- Sanding belt
- Screwdriver
- Pressure washer or garden hose
- Filler/screws
- Masking tape
- Decking paint
- Bucket
- Decking cleaner
- Primer
- Stiff bristled broom
- Decking paintbrush

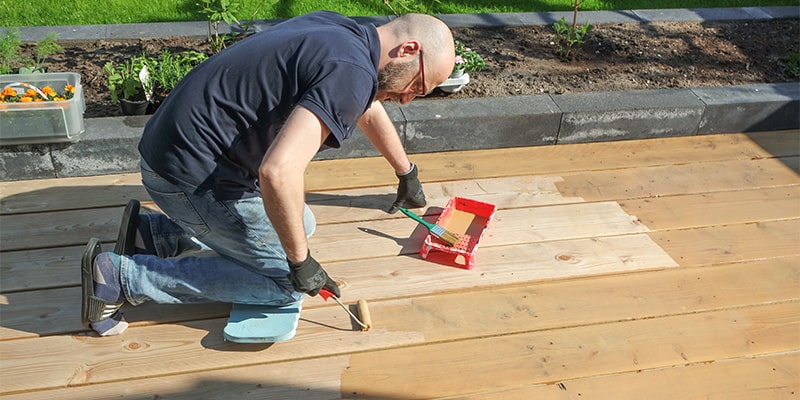
How Do I Paint My Decking?
- The first thing to do is to clean your deck and get it into the best possible state before you start painting. To do this, make a note of the next consistently dry day for you to get started.
- Remove all items from the decking, including furniture, plants, decorations, children’s toys etc.
- Use your broom to clear all debris, including patches of dirt, dead leaves, and other types of debris. This will be crucial at any time of year but may prove a particularly lengthy process if this is the first time you’ve tackled your deck since the winter.
- Take your chosen decking cleaner to remove mould, moss, algae, and dirt from your deck, following the instructions on the back of the product or on the manufacturer's site.
- Use your pressure washer or hose to wash the entire formula away once it has run its course, per the instructions on the back of the bottle.
- Wait until everything is dry.
- This newly cleaned deck should give you a better idea of the condition your deck is in. Search for loose screws and damaged boards, as well as any other areas that may require additional work before you continue with the painting.
- Remove the old paint with the paint-stripping chemical.
- Sand the surface. Wear protective clothing throughout the sanding process – these tools can be very dangerous.
- Apply a primer if needs be, but bear in mind that most paints double as primers if they are designed for decking.
- Prepare the paint, following instructions on the packaging, or again consult the manufacturers' site page.
- If you don’t want the paint to touch certain areas, use masking tape to protect them. Brickwork, metalwork, and fencing are three such examples.
- It is best to start in the area furthest away from your ‘base’ area and work backwards, so you don’t have to travel over painted sections. This will make the process more straightforward.
- Paint in the direction of the grain at all times – this will keep everything uniform.
- Focus on around 3 to 5 boards to avoid encountering major overlap marks. These can always be painted over with a second coat later on, once you have left the first to dry for at least 4 hours, or however long the paint’s instructions suggest.
- Once you are finished, be sure to leave everything as it is until the decking is completely dry. Do not put furniture or plant pots back just yet. When you do put them back, raise the plant pots off the ground to prevent mould from growing underneath them.
And there you have it – you should now have a freshly painted deck. We hope this guide has helped you out, and don’t forget to check out our other guides to decking to learn more about keeping your deck in good shape for longer.