How to Install a Skylight
Skylights are ideal for just about any home. Allowing in plenty of sunlight to brighten up your rooms and corridors, they are a great alternative light source and offer plenty of benefits to you and your home, not least of which are their stunning aesthetics.
However, one of the most challenging issues with skylights is the installation process, which can vary in difficulty depending on the size of the window you are trying to install. Especially so, if you’re relatively new to DIY and have had only minimal time working up on a roof. You may not even be sure that it’s possible without professional assistance.
This guide is going to look into the installation of a skylight, as well as weigh up the pros and cons of attempting to install a skylight yourself. We’ll also touch on some other important subjects, including a brief look at hints and tips on maintaining your skylight during those crucial first few months.
Contents
- What is a Skylight?
- What are the Benefits of Installing a Skylight?
- Do I Need an Expert to Install a Skylight?
- How Do I Install a Skylight?
- What Next? – Caring for Your Skylight
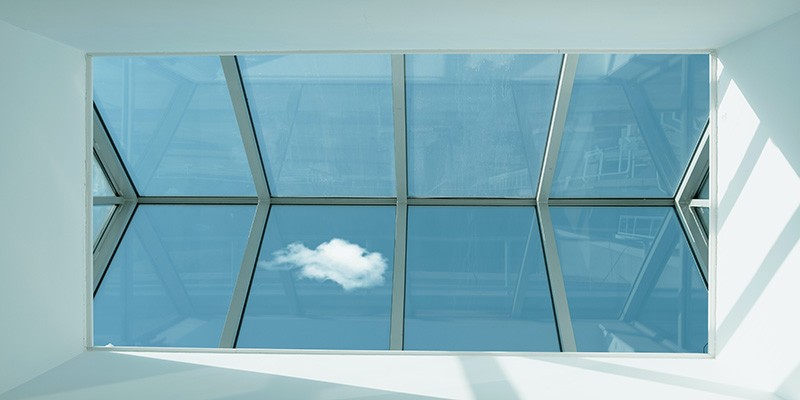
What is a Skylight?
A skylight is also known as a roofing window, but while all skylights are considered roof windows, not all roofing windows are thought of as skylights. Notably skylights, like roof lanterns, don’t usually open, which means they are ideal for letting in natural light but don’t allow for ventilation and fresh air like other types of roof windows.
What are the Benefits of Installing a Skylight?
There are several benefits to adding a skylight to your home, but by far the most advantageous is all the extra sunlight they let in. This is a fantastic alternative to artificial light during the daytime and is more environmentally friendly and effective even during cloudier days.
Skylights are also excellent conversation pieces. They offer excellent views of the sky above, and several more sophisticated models boast exciting contemporary designs – perfect for modern homes and renovations alike.
Do I Need an Expert to Install a Skylight?
The important thing to understand about skylight installation is that it is no easy task. It Involves physically removing a section of your roof and installing an additional structure onto it, all with precise measurements, advanced cutting techniques, heavy lifting, and roof work.
Many of you reading this will be relatively new to DIY, while others may be apprehensive about taking on a large, complex task such as skylight installation. While installing is possible yourself, we recommend that you only attempt to install one if you are confident in your DIY abilities, have experience with the necessary tools, and have a safe way to access your roof.
If you don’t meet these criteria, it is best to call a professional to get your skylight installed. The biggest skylight manufacturers such as Velux and Fakro, offer certifications to approved installers endorsing their services, making these tradespeople the best ones to contact when working with products from these brands. Alternatively, check online or ask locally for established roof window installers – be sure to check reviews and research beforehand to avoid problems later on.
How Do I Install a Skylight?
- You will be starting on the underside of your roof. Drill a deck screw up through the roof at each corner of the measured-out space you plan to add your roof window to.
- Move up onto the roof itself and strip your roofing material (such as shingles or tiles) about 7 inches beyond the drilled screws. You will then want to snap a chalk line between each pair of screws to mark down the outlines of your skylight.
- Using a circular saw, plunge-cut through the sheathing along the chalk lines on three sides. You will then need to stay off the cut-out.
- This step will require an extra pair of hands. You will need to carefully lower the cut-out into the roof as you finally cut that fourth side.
- Nail your sheathing down around the perimeter of the opening and then stick down a strip of self-adhesive membrane across the bottom edge of the opening.
- Cut the top 1 inch of the strip and fold it back over onto the exposed sill.
- You’ll need those extra pair of hands again to stand inside with the skylight, and lift it through the opening, resting its bottom edge against the sill. Then, you’ll want to lower the unit onto the roof.
- Drill in your 1¼ inch nails through the holes in the skylight’s flange, ensuring they continue into the roof.
- You’ll then want to cover the bottom flange with a strip of membrane, taking care to ensure that it extends 6 inches past the skylight’s sides. Follow this up by cutting the extensions at a 45° angle out from both corners of the skylight.
- Wrap the top part around the skylight’s frame and press the other part against the roof. Cover the side flanges in the same way, and finally repeat again for the top.
- With some new roofing shingles/new or replacement tiles, you will want to begin returning your roofing material to the roof. With shingles, you will want to nail over the bottom membrane, with the membrane sealing around the nails shortly after installation.
- Place the U-shaped sill flashing over these shingles and then over the bottom end of the skylight. Nail this piece to the roof, preferably at the top outer corners of the u-shape.
- Cover the exposed sides of the piece with shingles.
- Get an L-shaped step flashing piece and cover the top half of the shingles that cover the sill flashing. Insert one nail near the top outside corner, following with another nail a couple of inches below that. Be sure not to leave the gap to wide – 3-4 inches will suffice.
- Cover the flashing with another shingle before applying the next piece of flashing on top of that. Continue this pattern up both sides of your skylight.
- Use strips of counterflashing to cover the vertical legs of the step flashing. These should snap straight onto the rims of the skylight. Counterflashing is crucial when it comes to sealing out wind, rain and snow.
- Finish up by lifting the first course of shingles above the skylight and slitting the underlayment before slipping in the saddle flashing’s top edge through this new cut. Ensure that the flashing is fitted against the skylight, then lift the shingles and nail the flashing at the top corners. Finally, your final step should be nailing a final course of shingles over the flashing, making sure you only leave about 4 inches of it exposed.
What Next? – Caring for Your Skylight
Now you have a brand-new skylight, you will need to maintain it to keep it looking its best. This will also help it to continue to function as intended, helping you to avoid any early-onset problems.
Whether or not you took part in adding a roof window to your build, one thing you can do is give your skylight an inspection every couple of months to look for any mould ingress or dirt build-up, as this happening so soon could indicate a problem. Various window cleaners are also available to choose from to keep the panes of your glass clean and clear.
Have More Questions About Skylight Installation?
There is a lot to think about before embarking on a skylight installation project. It’s no easy feat, no matter the size of your skylight. You could have a very small model, and it will still be vital to get the handling, measurements and installation correct to avoid problems further down the line.
Despite being possible to finish up the job with just a couple of pairs of hands, it is nevertheless one of the more difficult DIY projects to complete. Do not hesitate to contact a professional if you feel the need to, as the risks of an incorrectly installed roof window are considerable, and the alterations that you need to make to your house are nigh-on impossible to reverse.
Don’t forget – if you have any questions about skylights and skylight installation, do not hesitate to get in touch with our award-winning customer service team on 01295 565565 or via the chatbox below. They’ll do their best to help you get the answers to any DIY questions you have and point you in the right direction when you're looking for materials for your next build.