How to Fit Fibre Cement Roof Sheets
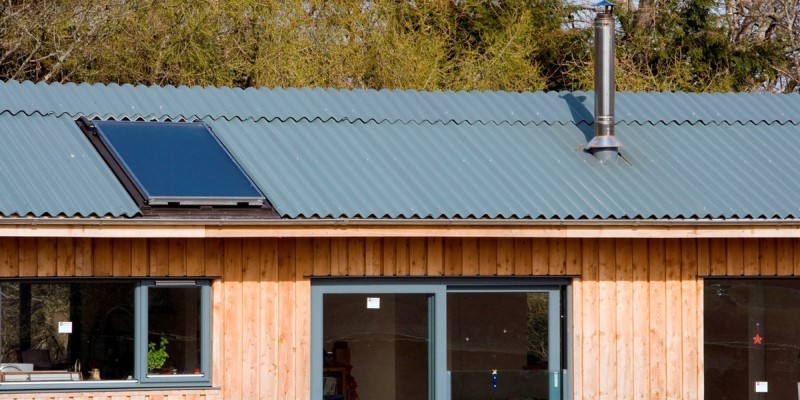
Fibre cement roofing sheets, also known as fibre cement board or cement sheets, are a very reliable, versatile roofing solution. They’re especially popular for agricultural buildings but can also be used on commercial or industrial premises, as well as on residential projects. We’re proud to offer a fantastic range of fibre cement roof sheets at great prices, from leading brands such as Eternit. While all corrugated roofing sheets are prized for their simple installation process, this can differ between materials, and fibre cement is no exception.
That’s why we’ve written this guide, to help teach you how to fit fibre cement roof sheets. With the right tools and a bit of DIY ability, it’s well within reach. Fibre cement sheets are known for their quick and easy installation thanks to the large sizes that are available, so read on and you’ll be well on your way. As always, be sure to consult the manufacturer’s guide, and don’t undertake any work you’re uncomfortable with or for which you lack the proper safety equipment.
Table of Contents
What are Fibre Cement Roofing Sheets?
Fibre cement has been used as a building material since its invention the late 1800s, where it was originally use as siding for residential properties. Since then, its uses have only grown thanks to a number of remarkable benefits. Fibre cement sheets are extremely sturdy, with an exceptional lifespan of over fifty years. They also have fantastic fire resistance, and work incredibly well as a roofing material, or as both internal and external cladding.
Fibre cement sees use in all building types, including agricultural buildings such as barns or stables, warehouses, garages, garden outbuildings and many more. Its ability to withstand the most extreme weather conditions and temperatures has also made it popular worldwide in all climates. Fibre cement sheets come in all shapes and sizes and are rather simple to cut and install. Unlike other types of roofing sheet, they come in generously large sizes, making them ideal for use on large buildings.

How to Fit Fibre Cement Roof Sheets
Step 1: Planning
Before you begin, it’s best to come up with a solid plan to work to so the whole process can run as smoothly as possible. You should first ensure that you have everything you need, from the fibre cement sheets themselves to fixings, tools, and any other equipment. Carefully read the manufacturer’s guide to ensure you have all the materials you need, as well as for confirmation on the installation process.
It’s also important to put all necessary safety measures in place to minimise your risk of injury or any damage to your property while you work. Ensure all of your equipment is functional and stable, and that your tools all operate properly. Check the sheets for any damage, cracks, or sharp edges. If you’re unsure about how to fit fibre cement roof sheets or don’t feel completely comfortable undertaking the work, always consult a professional.
Step 2: Laying
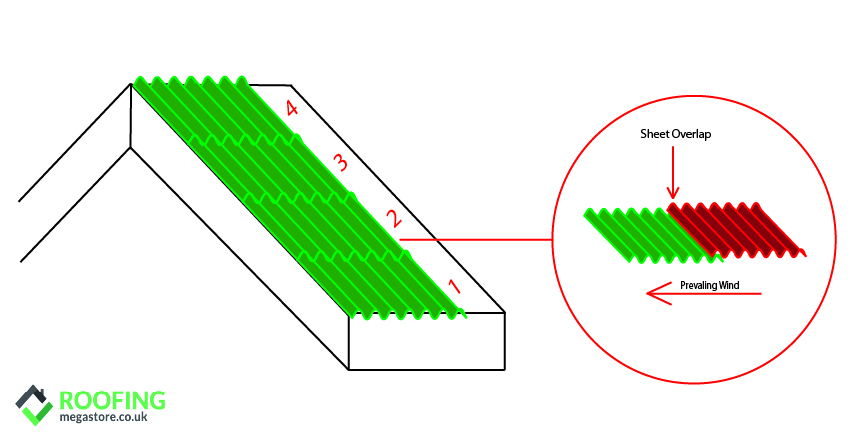
When fitting fibre cement roof sheets, the best way to lay them in order to avoid any damage to the sheets themselves or to your roof, is to lay them in columns from the eaves of your roof to the ridge. Be careful to ensure that you’ve got a consistent layout across your roof for the sheets to perform to the best of their ability.
Always remember to lay fibre cement sheets according to the wind direction, as trying to place them with the side lap against the wind could cause uplift and potentially serious damage. If you’ve laid all of your sheets down and find that areas are still exposed, you need to acquire more sheets before moving on. Simply clear away your sheets in the meantime, as leaving unsecured sheets on your roof could be dangerous.
Step 3: Mitring
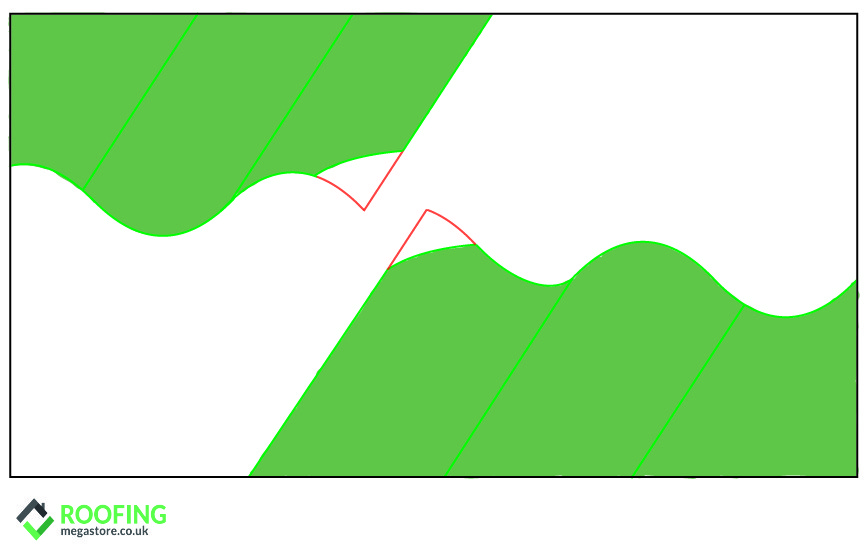
Unlike most other sheet roofing, when fitting fibre cement roof sheets some corners will need to be mitred. This process involves cutting opposite corners of some fibre cement sheets to prevent unnecessary overlapping.
This can be done using a hand saw or power saw, and you’ll need to cut a straight line across the corners of the sheet, removing them completely. Each sheet you use should have two mitres, except for those on the edges of your roof. The first and last sheets you fit should be left untouched. Always perform this process on the ground, never at height.
Step 4: Drilling for Fixings
Pre-drilling holes for the fixings you’re going to use to secure the sheets is a vital step that should be done before fixing the fibre cement sheets to your roof. Using the fixings themselves will cause damage and potentially severely decrease their performance and lifespan. The holes should be drilled into the purlins, with each sheet fixed twice on each purlin.
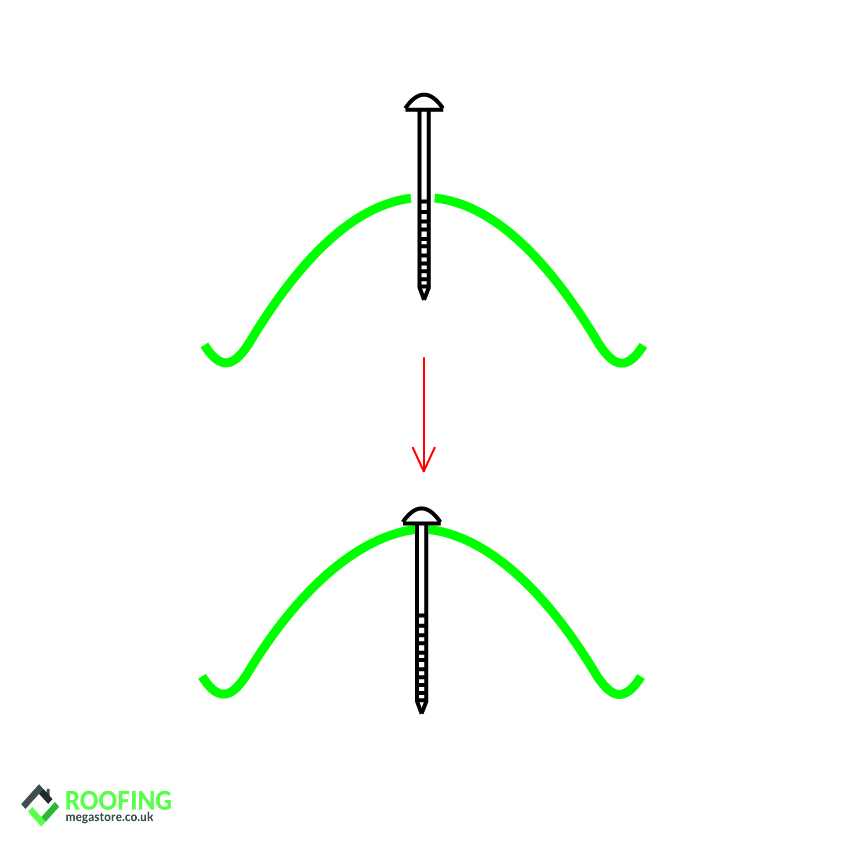
A hole around 2mm larger than the fixings should be drilled at the peak of each profile (never between the corrugations). It’s not a good idea to fix your sheets at the valley because this will leave a large gap between the sheet and your roof, leaving both exposed to the elements. This is particularly important when fitting fibre cement sheets, as they may shatter under impact.
Do always remember to use sealing washers along with the fixings, and never drill fixings through two sheets. This is both to weatherproof and allow thermal movement, as if the sheets cannot do so, they may become damaged. Insert the fixings once these holes have been pre-drilled, ensuring that they are properly tightened, and any accessories such as washers and caps are present.
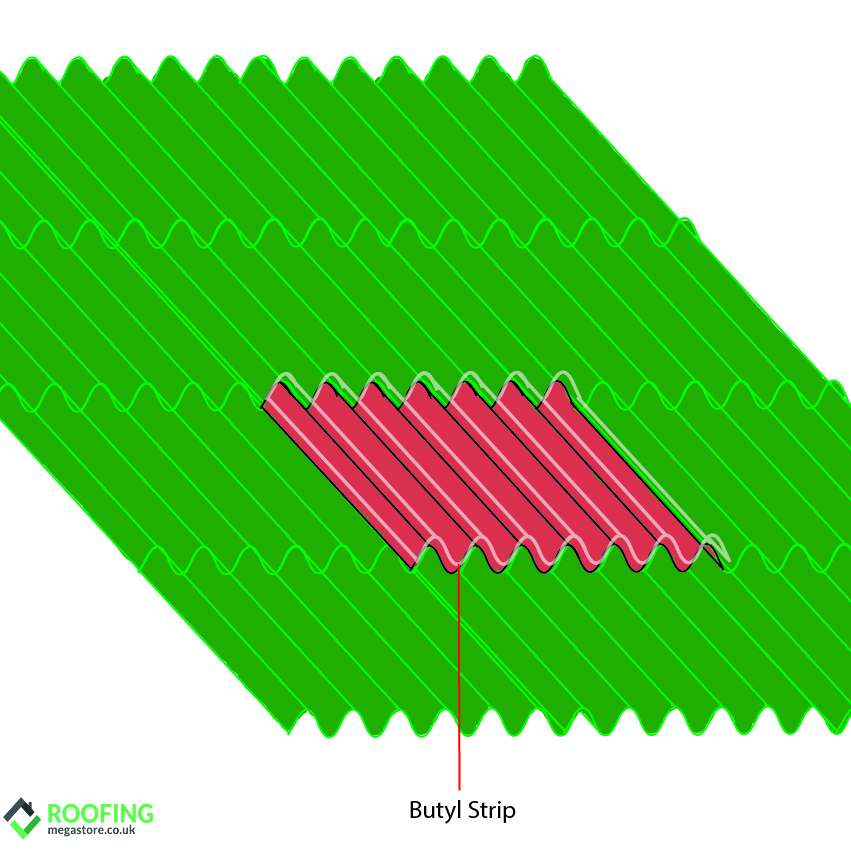
Step 5: Seal any overlaps
The final step in fitting fibre cement sheets to your roof is sealing any overlaps. This is a vital step as not doing so may lead to water ingress and debris entering your roof space, which can both lead to serious structural damage.
Butyl strips are the most effective way to seal any overlaps in a fibre cement roof, particularly for roofs with a shallow pitch. Not only will these strips keep moisture at bay, but they’ll also prevent wind damage and uplift. We’d advise using double lap sealing on roofs with pitches below 5°. The exact method of fixing butyl strips can depend on the manufacturer, so always consult your guide.
Extra Advice
Now that we’ve gone through all of the major steps in how to fit fibre cement roof sheets, there are a few more things to consider:
- While fibre cement roofing boasts fantastic longevity and durability, they can prove fragile. Always take care while handling them and ensure any pathways or ladderways are clear. We’d suggest having someone else there to help you carry the sheets and support your ladder.
- Avoid working in intense weather conditions such as heavy rain or wind, as this will make your roof far more treacherous to walk on and may make the sheets themselves more slippery and difficult to handle.
- Tidy up as you go. As you’re working on your project, try to clear things up as you go along, and keep anything you may need later safe and out of your way to prevent unnecessary damage.
- Finally, as mentioned, always keep any manufacturer’s guides handy as these will prove invaluable when you come to fit your fibre cement sheets.
Conclusion
You should now have a good idea of how to properly fit fibre cement roof sheets. Bear in mind that the exact method of installation will vary depending upon your roof, and the brand of sheets you’ve chosen.
We stock a range of fantastic, high-quality fibre cement roof sheets that are perfect for a huge range of residential, commercial, and agricultural projects. So be sure to take a look to find the perfect sheet for you.