How to Build a Pergola
Whether you're an avid landscaper looking to expand your outdoor space, or a homeowner looking for a stylish place to relax, building a pergola is the perfect way to upgrade your garden.
Why Build a Pergola?
Although deceptively simple, pergolas can be used for many different purposes:
- Plant Space: Constructing a pergola provides additional space for plants both potted on ground and in the air using boards and hanging baskets. The posts also provide a vessel for plants such as ivy, honeysuckle, grape vines and more to grow upwards from the ground below.
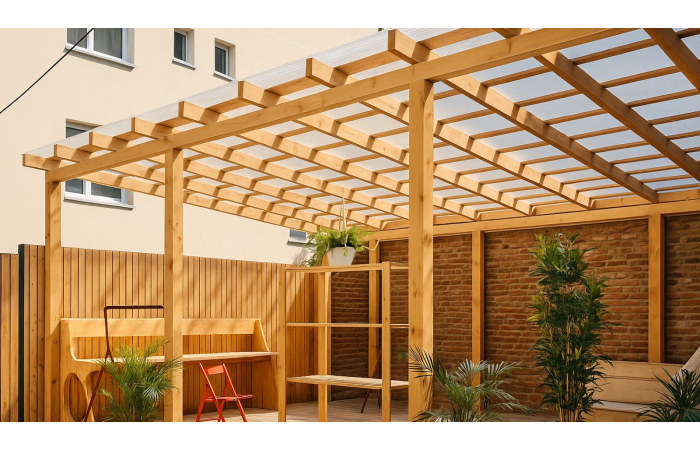
- Shade: Pergolas can provide a covered area of shade, ideal for the summer months. This may be particularly useful if you use your garden as a space for entertaining guests. Plus it's very easy to add cover for those unpredictable rainy days - see our guide on how to add a roof to a pergola here.
- Privacy: If your garden is very open plan, a pergola can create a more secluded area that offers privacy within the outdoor space. You can even utilise drapes, latticework and screens to enhance this further.
- Style: A pergola can simply create a stylish focal point for your garden. Various materials, colours and styles can be utilised to create an aesthetically pleasing structure that suits your taste.
- DIY: For an avid DIYer, building a pergola is a fantastic outdoor project. They are pretty straightforward to install with the correct tools, materials and instructions. We rate this DIY at a medium level of difficulty.
- Home Value: Attractive garden landscaping can increase the value and appeal of your property. A pergola not only improves the aesthetic appeal of a garden to buyers but also increases the usability of the space all year round.
Positioning Your Pergola
The first step when making a pergola is deciding where you want it to go. Before buying any materials, you should ensure that the chosen area is big enough and located in a safe place for construction. Make sure the pergola is built away from major tree roots and does not obstruct buried underground utilities.
Pergolas can be stylishly placed at the entrance/exit of a garden, over a pathway, seating area or deck space. It is also worth considering the orientation (north, south, east or west facing) in relation to the direct sunlight stream into the garden. You do not need diggable ground for construction as post supports allow you to build the structure on a hard surface such as terrace or patio.
Types of Pergola
Depending on the main use of your pergola, you can alter certain features to accommodate. Think about what kind of pergola is best for your space:
- Freestanding: A pergola that stands alone without attachment to any other structure.
- Attached: This can be used to create an extension from the home externally. One side will usually attach directly onto a wall of your property.
- Louvered: Does not incorporate traditional pergola slats but instead has adjustable louvers as rafters which open and close to let in/shut out the sun.
- Awning: Can mount directly on to the wall with no structural requirement for posts or columns.
- Arched: Incorporates an arched roof structure instead of flat to create a different aesthetic.
Creating a Plan
You can either purchase a pre-measured pergola kit or use building materials from scratch.
Decide what kind of pergola you want to build and measure up the area, creating a sketch/plan with all necessary measurements and information for construction. Identify where you want the posts to be placed and mark the exact positions. Measure as carefully as possible to ensure they are completely squared with each other.
For freestanding pergolas, a general rule to follow is placing a post every 6ft (1.8m) which should be even less if the posts will need to support a heavier weight.
Tools & Materials
- Measuring tool
- Post-Hole Digger or Power Auger
- Post-base anchors, hammer drill & screws/expanding bolts (if installing on hard ground surface)
- Treated carcassing timber
- 4 inch screws
- 8 inch galvanised bolts
- Postcrete cement
- Circular saw
How to Build a Pergola Step-by-Step
1. Measure, Mark, Dig & Install
Dependant on the placement of your pergola, at this stage you will need to dig post holes or secure the post base anchors.
Measure and mark the location for each post and measure again diagonally from each corner on both sides. If the posts are perfectly squared, then this measurement should be equal.
Using a Post-Hole Digger or Power Auger, carefully dig the holes in the marked positions. Ensure the depth of the hole is around a ¼ of the post height. Place a post into each hole and shore up temporarily with stakes set at 45 degrees to the ground whilst the postcrete cement sets.
For installation on a hard surface, you may use post-base anchors. Use a hammer drill to bore holes, then use screws or expanding bolts to secure the bases in place. Once secured, drive nails through the anchors, holding each post plumb in place.
2. Assemble the Crossbeams
After leaving to set for 24 hours, it is now time to assemble the crossbeams.
Situate each corner post between two timber lengths and position at the chosen height according to your plans. REMEMBER! - Rafters will later add further height to your pergola structure so factor this in when choosing your preferred height.
If your crossbeams are not long enough, you may need to incorporate a centre splice. At this stage it is also recommended to add an inner and outer beam for additional structural strength and stability.
3. Position & Place
Mark the correct positioning using a circular saw and ensure posts are level using a plumb line. Attach a beam to the outside face of the post using two 4 inch screws, to temporarily secure in place. Repeat with each beam.
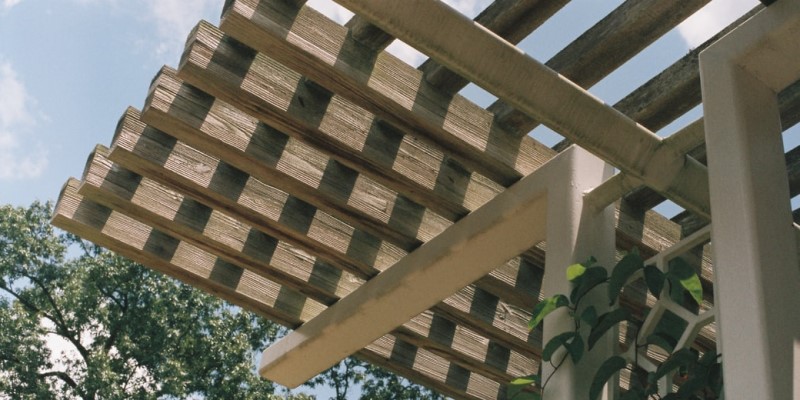
Once each beam is temporarily secured, add the rafters at 1ft intervals or grouped in 2s or 3s. REMEMBER! - If you want decorative rafter ends, cut into the desired shape/pattern before this step.
4. Secure & Finish
One all beams and posts are accurately measured and placed, permanently attach using 8 inch galvanised bolts.
Finishing Touches
- Add Some Colour: To give your pergola a more eye-catching aesthetic, you can paint the structure with a coloured stain and then add a coat of clear water repellent to protect.
- Garden Growth: If you want to add climbing planters to your pergola design, run twine/wires up the structure and wave the vines accordingly to provide support until the plants have started to grow. Ensure you fix the wires securely to support the weight of the plants in the future.