A 360 Look at Flat Roof Extensions
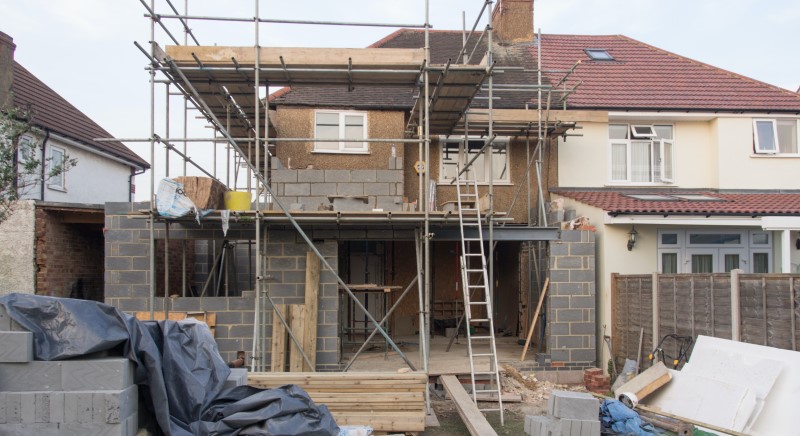
Building an extension is a long and costly job, but when done right can add as much as 20% to the value of your home. To get as much value added as possible, however, you’ll need to make sure your extension meets all recommended building regs and has a roof designed to last.
______________________________________________________________________
Many of you will be feeling the backlash of the housing market. With interest rates falling and the cost of living spiralling upwards, housing affordability has reached its lowest point in 150 years.
That’s why so many have been opting to extend their home as opposed to moving, with flat roofs being the most popular choice. Not only are they on-trend, but also a far more cost-effective solution to adding a bit of space when compared to traditional pitched roofs.
Below we’ll go through everything you’ll need to do when it comes to your own flat roof extension including how to insulate it, the options you have for covering and the all-important cost figure.
Contents
- Does my Flat Roof Extension Need Planning Permission?
- What are the Standards My Flat Roof Needs to Meet?
- Insulating Flat Roof Extensions
- What’s the Best Cover for My Flat Roof?
- How Much Will a Flat Roof Extension Cost?
Does my Flat Roof Extension Need Planning Permission?
When it comes to extensions, planning permission tends to depend on how much your addition will affect the external look of your house. If your extension falls within permitted development rights’ then you won’t need to apply. Your extension may fall within these rights if:
- Less than half of the area of land around your home is covered by your extensions (plus any prior extensions)
- Your extension is lower than the highest part of your existing roof (or higher at the eaves than existing eaves)
- Your extension is 2 meters or more away from your boundary (edge of your owned land)
- Your extension is NOT built forward of the ‘principal elevation or ‘side elevation’
- Work does not include verandas, balconies or raised platforms
- Work does not include a microwave antenna
- Work does not include a chimney, flue or soil & vent pipe
- Work does not include any alterations to the existing roof
- ALL materials used in any exterior work are of a similar appearance to those on the exterior of the existing house
Now, this is not an extensive list and is supplied for guidance only. If you are unsure whether or not you need permission, we will recommend contacting your local authority for confirmation. Bear in mind that the above also only applies to houses and not flats, maisonettes or other buildings.
What are the Standards My Flat Roof Needs to Meet?
Like any other new build, extensions will have to be built to meet certain building regs. This includes making sure that the roof dimension, spans and spacings are Approved Document A compliant. In most cases, building control will require a structural engineer’s calculations to demonstrate that the building can support the appropriate load and resist wind uplift. Something to keep in mind if you are attempting to tackle the project by yourself.
What Materials Do I Need to Use for My Flat Roof?
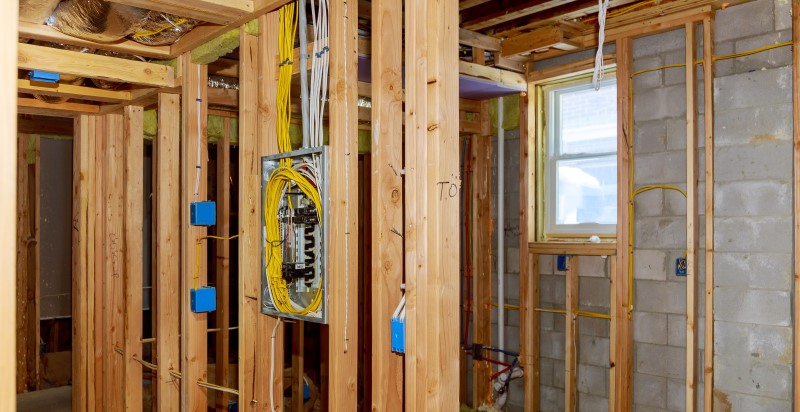
Most flat roof joists will be cut from C16 / C24 treated softwood. These should be placed at roughly 400 – 600mm centres, spanning the shortest distance between your walls. Additional support may need, however, in spans that exceed 2 and a half meters. This is normally in the form of noggins.
Your joists will also need to be supported. Either using steel joist hangers, on timber wall plates or on beams/lintels above any openings.
Getting the Fall Right
Whilst flat roofs may be called flat, the truth they all have a slight pitch. Typically, 10° or below to ensure that rainwater can drain without pooling. The absolute minimum this fall should be around 1 to 80, meaning 1 unit drop in height (feet, millimetres etc.) for every 80 units in length. Most, however, would recommend a slightly sharper pitch of 1 to 40.
One of the simplest ways to achieve this fall is by positioning the joists to slope when your roof is first built. The big issue with this, however, is that your ceiling will also slope. Not the best look if you are trying to make your extension feel like a part of your house as opposed to something tacked on.
Another solution, as is most often standard working practice, is to place firings (wedge shaped timber strips) along the top of your horizontal joists. These can typically be pre-cut for you by a timber supplier to ensure your fall is consistent.
Installing the Roof Deck
With the frame of your extension’s roof built, the next stage is to cover it with a deck or sheathing. This is a surface that your covering will be installed on so it's important to use appropriately strong materials – most notably softwood floorboards with a protective coating.
Whilst it may be cheaper you should always avoid using chipboard for your deck. Not only has it been prohibited but it is also very vulnerable to deterioration caused by moisture.
There are a few options for materials here including profiled metal decking as well as the staple 18mm exterior grade marine plywood or 18mm OSB. However, if you are looking to save some time some ridged insulation boards can also be an option. As long as they are designed to be laid directly over joists, these act as decking and insulation in one – saving valuable height in more compact environments.
Insulating Flat Roof Extensions
Before we look at how you can insulate your roof, let’s first take a brief look at the building regs. Specifically Part L, which specifies a U-value requirement of 0.18 W/m2k or lower. This is a specification that will ensure your extension is adequately protected from extreme temperatures.
Cold vs Warm Roofs
In the past, flat roofs were often built using a cold roof configuration. This meant that the insulation was installed between the joists, keeping the void in your roof cold. The issue with this type of build (and why it’s gone out of fashion) is that, beyond offering a less efficient thermal performance, extra care also needs to be taken to ventilate it properly.
Without proper ventilation in a cold roof, moisture can easily enter the void and cause significant damage to the roof's structure. To avoid this air crossflow is needed and can be achieved using eaves vents.
Warm roofs (the go-to today) have insulation fitted above the roof deck instead, offering greater performance and making it far simpler to replace or add more insulation if needed. One key thing to remember, however, when constructing your warm roof is to first lay a vapour barrier between your deck and your insulation. Once your insulation is installed you should also make sure that a solid base is fitted above it (plywood or OSB).
The space between your joists can then be used for running cables and pipes to keep your extension as neat and tidy as possible. If you have the space, you could also reinforce your joists with additional insulation before the ceiling is plastered in.
A vapour barrier will help to prevent moisture from rising up from the room below and getting trapped in the timber where it could lead to rot.
Best Insulation for a Flat Roof
Whilst each material will have an individual thermal conductivity that can be compared, the required u-values can be achieved with a wide range of different insulations. There is no one ‘best’ material.
If you are looking to save on space, thin PIR boards may the most ideal choice. On the other hand, if you are aiming to reduce your carbon footprint you may instead want to invest in some natural insulation such as hemp fibre or sheep’s wool. Other materials include multi-foil and stone wall insulation.
What’s the Best Cover for My Flat Roof?
There are a wide array of different materials to choose from when it comes to flat roofs, though some are far more popular than others. Below we’ll go through just some of our favourites.
Rubber Roofing (EPDM)
Popular for its long-life span and simple installation, EPDM can normally be fitted in just a single layer. Seeing as most are also supplied in rolls, this layer can be completely seamless without any sightly joins.
Because of this, rubber roofs are extremely resistant to leaks – able to last up to and over 50 years when installed properly. In addition to its quick installation, the material is also lightweight and stretchy enough to avoid tearing whilst it is being handled.
Torch-on Felt
Felt is the traditional option, having been used to cover flat roofs for years. Whilst picking up a somewhat poor reputation in the past, modern felt has seen some significant re-invention being far stronger and thicker than the older materials.
One thing that hasn’t changed, however, is that it is one of the most cost-effective options out there. Often available in multiple colours to suit your tastes. However, with a life span roughly half that of EPDM, it may not be the best choice if you are looking to live in and use your extension long-term.
As the name would have you believe, torch-on felt is installed using a blow torch to heat the underside and the felt and melt it into the roof. This being the case, you should always double-check that your roofer is insured to work with open flames before letting them get to work.
GRP (Glass Reinforced Plastic)
GRP tends to be the first choice for larger, more complex roofs as it is one of the easiest to mould – ideal if you happen to be working around obstacles. Like EPDM it is incredibly lightweight and jointless to better resist leaks.
Its lifespan is equally impressive, with many manufacturers offering guarantees in excess of 20 years. Of course, there is a caveat to all of this in that GRP roofing tends to be on the more expensive side.
Green Roofs
If you really want to make your extension stand out from your neighbours, green roofs are an excellent option. Far more complex and difficult to pull off but, when done right, provide a beautiful finish and can actually improve drainage and thermal performance.
If you do opt for this, just remember to first install a root barrier to prevent your plants from damaging the structure of your roof. A drainage layer will also be necessary to slow down rainwater and give your plants a chance to absorb it.
You will have to consult with your builder to ensure your roof is strong enough to bare the weight of your plants.
Cold vs Hot Applications
There are far more options than just the 4 listed above, though all will either have to be applied hot or cold. In simple terms, using an open flame or not. Keep this in mind if you are planning on working on your roof yourself.
How Much Will a Flat Roof Extension Cost?
As you might imagine, the costs incurred when building a flat-roofed extension from scratch are significant and come from many different sources. We’ll break down the biggest culprits.
- Labour – This includes builders and roofers as well as potentially plumbers, electricians, joiners and even architects depending on the scale and scope of your project
- Materials – All of the brick, mortar, plaster, timber, insulation and roof coverings
- Fittings & Fixtures – Doors, windows, furniture, flooring and other decorations you feel you need
- Additional Costs – This may include scaffolding, delivery costs etc.
In addition to the above, the size and shape of your extension will have the biggest impact on its cost. Size is an obvious one, the largest the extension the more materials needed and the longer it will take to build. Non-standard shapes will also add to labour costs, as more time will likely need to be taken to make sure the structure is sound.
When all is said and done, most flat roof extensions will ring up a total cost of around £30,000 - £75,000, taking roughly 3 months to complete.
This can be further broken down to around £1200 - £2500 per square meter, with a felt roof costing approx. £40 - 60, a rubber roof £60 - 85 and a fibreglass roof £70 - 90 all also per square meter.