How to Fit Lead Flashing
Lead is a versatile material, and though it doesn’t likely come up in too many conversions the simple metal can be found safely in use across many, many facets of modern life. These include in car batteries, pigments, cable sheathing and even storage containers for corrosive elements. However, where you and I would see it most often is across almost every roof we walk by when we leave the house.
Lead flashing has been a staple of roofing for centuries, with many ancient buildings owing their survival to this remarkable element. It is fundamental for ensuring our roofs remain protected from water ingress and, even just in flashing form, finds use across numerous applications - really anywhere there is a penetration in your roof. Chimney stacks, parapet walls and gutters to name just a few. So far does it exceed the solutions that came before that even after hundreds of years it still sees regular use today.
It is difficult to question lead's suitability for your home, so how is it handled and fit? Fortunately, despite its myriad of potential applications years and years of repeated use by professionals around the world have led to some innovations for you to reap to benefits of. First things first however, let’s make sure you order the right kind of lead.
Lead Codes Breakdown
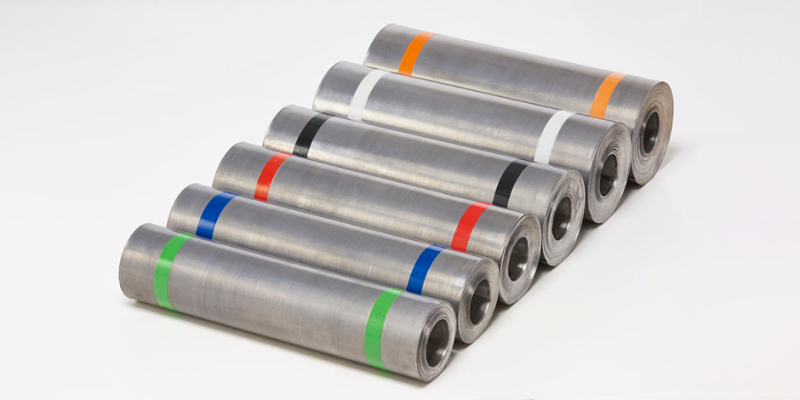
Any cursory glance at google will tell you that lead is more often than not supplied in rolls. More than a glance and you’ll very quickly discover that these rolls have been separated into different categories to make finding the right lead for your project that much easier. These categories are called codes and very clearly denote the lead’s thickness and thus how fit for purpose it is on any given part of your roof.
Choosing the right code is key for achieving a finish that is both long-lasting and secure, as conversely the wrong thickness can result in the lead failing, allowing water to enter the structure and causing potentially costly damage. Damage that could stick you with a bill as high as £1000 -and that’s just to remove the mould.
Needless to say, getting the right lead for your project is always the first hurdle, and pitfall for the unprepared. To help you avoid falling into it, we’ve taken the liberty of creating this simple table.
|
Application |
Lead Code (Approx. Thickness) |
|
Soakers |
Code 3 (1.32mm) |
|
Chimney, Apron, Pitched Valley Gutters, Vertical cladding, Ridge/Hip, Canopies, Soakers |
Code 4 (1.80mm) |
|
Flat/pitched roofing, Dormers, Apron, Parapet, Pitched Valley Gutters, Vertical cladding, Ridge/Hip, Canopies |
Code 5 (2.24mm) |
|
Flat/pitched roofing, Dormers, Chimney, Apron, Parapet, Pitched Valley Gutters, Vertical cladding, Ridge/Hip, Canopies |
Code 6 (2.65mm) |
|
Flat/pitched roofing, Dormers, Parapet, Pitched Valley Gutters, Vertical cladding, Canopies |
Code7 (3.15mm) |
|
Flat/pitched roofing, Parapet, Canopies |
Code 8 (3.50mm) |
As you can see, whilst the breakdown does make clear what code is suitable for use in which area of your roof there is significant overlap – especially amongst the middle codes. This is why, beyond simply understanding what code can be used where, you should take into account the induvial thickness of the lead to narrow down exactly which type is required for your specific needs. Thicker lead can offer greater protection over larger areas, but bear in mind that it can also be heavier and more difficult to work with.
As always if you are ever unsure of which product is right for your project, we would strongly recommend consulting a professional. For more information, read our guide to lead codes.
Working with Lead: What you need & How to Shape
Aside from its astounding protective qualities, lead is also very pliable and can be stretched to cover awkward shapes whilst still being able to fit securely to them. However, to achieve the best results you are going to need the right set of lead dressing tools.
To start with let’s go over some basic safety precautions. Working at height is always a danger so the first thing you need is a sturdy ladder and someone to hold onto it and spot you whilst you are working. For those unfamiliar with roofing, it would also be smart to consider all roofs as fragile surfaces until confirmed otherwise. You will need to know where the supports are and, more importantly, if those supports can hold your weight.
Injuries resulting from roofing work are not uncommon and working on them, especially on lighter roofs which can require more specialised equipment, always carries an element of risk. If you are ever concerned always refer back to a qualified tradesperson who will be able to install your flashings for you.
If you are comfortable however, next comes appropriate gloves, masks, knee pads and eye protection. There is more than a good chance that you’ll encounter a fair bit of dust when working around brickwork so keeping yourself safe from this is priority number two. Finally, you will also want to invest in some patination oil. This prevents lead carbonate from forming. A white powder which, besides leaving stains, can be dangerously toxic.
Cutting Lead
Lead should always be cut and shaped on the ground, ideally on top of a sturdy workbench or plank. Again, because the material is regularly used in roofing, a dedicated tool has been made to make cutting it incredibly easy. This is a called sheet lead knife which often comes with a hooked blade. You can also use a pair of Aviation snips or even a simple hobby knife if you are pressed for time (though this may damage the blade). Either way the most important factor (as is the case when cutting anything) is to ensure your measurements have been double checked and are correct.
As a general rule, you should keep your lead lengths to a maximum of 1.5m. Any longer than this and they become far more difficult to manage and risk increased expansion and contraction in response to changing temperatures that can cause damage which will then harm the integrity of your roof - in much a similar way as if you had used the wrong code.
Shaping Lead
Correctly installed flashing can last a lifetime, in some circumstances even outliving the house it has been fitted to. However, to ensure this correct installation it will need to be shaped. This means creating a lip which will sit in a wall’s chase and potentially an overhang which will sit across your roof. To do this, simply roll of your lead (or beat flat with a piece of timbre) and then use a Stright edge to fold the top of the lead into a lip. We would recommend using a lead dresser or piece of batten when folding to ensure this lip is sharp.
Once you’ve created your lip you can do the same for any necessary overhang. This can be folded by hand as it will likely need to be further dressed onto your roof to account for any irregularities in its surface. Just make too sure to keep in mind the relative pitch of your roof when folding.
Fitting & Dressing Your Lead Flashings
With a better understanding of how to procure, cut and shape your lead let’s take a look at some of the more detailed applications.
Lead Soaker
Vital in the construction of slate or double lap plain tile roofs, lead soakers offer brilliant weather proofing properties and can act as a guttering system to help drain excess rain water away from your structure. They are more often than not used in conjunction with step flashing, acting almost as a second layer of defence.
To determine each of your soakers length, you need not look further the gauge of your tiles/slates. In other words, the distance between your batten centres in addition to your tiles head lap and the necessary turnover at the top end each soaker. For examples sake, let's assume that the distance for our centres if 100mm, the lap is 65mm and that the turnover needs to be 25mm to accommodate our tiles. That would make the total length of the soaker 190mm. As for the width it should really as close to 175mm as you can find, fortunately most rolls with come within this general range.
With your soaker now in hand it can be folded at a ninety-degree angle to ensure that there is roughly a 75mm coverage up the wall, leaving 100mm to sit across your tiles/slates. Depending on your specific project and if the area is particularly exposed you may want to consider extending the tile coverage further*. To create the nib for the turnover simply cut along the crease (in this case it would be a 25mm cut) and fold it down.
With all your soakers cut and shaped, they can now be fitted to your tiles, sitting on each, ready for the next tile/slate to be place over top along the entire course. Do also remember to treat all lead with Patination oil before installing them on your roof.
*When installing below the side flashing of a dormer you may also want to increasing the wall coverage to 100mm
Step Flashing
Once you’ve installed your soakers, step flashings can be fitted over the top of them to provide a completely weather-tight joint at your roof abutment. Again, this is suitable for double lap plain tiles and slates.
The first step here (as with most instances of installing flashing) is to prepare the chase. This is essentially a gap within your brickwork in which the lip of your flashing will sit. Typically, this can be achieved simply by raking out the dried mortar from your brick joints – though, depending on the material used in the building's construction, can also be cut in. In both instances, this can be done with an angle grinder or disc cutter. To ensure enough room for the lead, the mortar should be removed to a depth of 25mm. Bear in mind that as the flashing will be stepped, multiple chases will have to be cut in at the different levels of your mortar joints.
When preparing to cut your lead, take great care when measuring to your mortar joints. You want a water line of roughly 65mm and then an additional 85mm on top of that to account for the steps/ lips that will have to be folded in. As always take care that no single piece of lead exceeds 1.5mm in length.
Once you’re lead has been cut to length, mark out the 65mm water line. You can then bring it up to your roof and mark out where the steps need to be cut along the remaining 85mm area. Each step should be marked at the bottom of the chase with a water-based marker that can later be erased. Once this is done, double check your measurements and then cut out your steps incorporating the 25mm lip. This is best done with a pair of Aviation Snips. After this, fold the lips, and then treat the reverse sides with Patination Oil.
With your flashing/s cut you can take them back up to your roof and fit them into the chase – for roofs which require multiple lengths they should be overlapped as per the table below.
|
Pitch Degree |
Minimum Lap (millimeters) |
|
11° |
395 |
|
15° |
290 |
|
20° |
220 |
|
30° |
150 |
|
40° |
115 |
|
50° |
100 |
|
60° |
85 |
|
90° |
75 |
To further secure your flashings, lead chocks or specialised clips should be employed. A chock can be made simply by rolling up a roughly 20-25mm strip of lead into an oval shape, making sure it is just wider than the chase. It can then be hammered into position above the flashing using a bolster or screwdriver which in turn will keep the lead secured against the bottom. Clips perform much the same function and, being specially made for the job, often perform better being sprung loaded to prevent them from shaking loose. For larger chases (over 18mm) you can also upturn the edge of the lips and secure with screws and washers.
The last step is to seal the flashing into the chase. This can be done with lime mortar, though a propriety lead sealant is almost always preferred, as in most cases it will allow the lead to expand and contract without cracking. Point your chases with this sealant after ensuring that all excess dust has been brushed away. This will make the joint water-tight. After this is done simply apply one more coat of oil to all visible surfaces and you are done. Your abutment should now be weather-proof with a flashing that is both uniform in colour and protected from staining.
Apron Flashings
As opposed to stepped flashing, apron flashing is cut sqaure at the bottom and can overlap the roof’s surface across level abutments. It is often seen in front of chimney stacks, covering soakers on a plain tile roof or even across conservatives and extensions though, like all flashings, performs the same role of keeping the roof water-tight.
The installation of Apron flashing it much like the above. A chase will need to be raked out (roughly 15-25mm), the lead will need to cut and shaped after which it can be overlapped across your roof before being secured with chocks and sealant. The key difference here is that the overhang across the roofs surface will need to be shaped as well.
Ideally your chase should be around 150mm up from the roof, leaving any excess lead, aside from the lip, to be folded to said overhang. As mentioned above, this can be done with your hands and then dressed. Once your lead is installed, you can use a lead dresser to carefully mould the lead into the nooks and crannies of your tiles/slates until it is flush with the surface.
An extra tip here to ensure the flashing is even more secure is to fit ‘lead straps’ to your roof as well. These can be folded up over your flashing to cover the overlapping sections of each length. For a more in-depth look check out our how to fit apron flashing guide.
Ridge & Hip Flashings
Not typically seen too much in newer builds, ridge and hip flashings are generally employed when the structure has been constructed in such a way that prevents tiles from sitting over those sections of the roof. Like any other type they will need to be cut and shaped to fold flush over your ridge or hip before being dressed to the roofs surface.
Each piece of flashing should be kept to 1.5m in length and overlapped across the run of your roof. To secure them and protect them from wind uplift, as no chase would be available, clips of quarter hard cooper or stainless steel can be used and should be folded over the lead by at least 25mm.
This installation would require work at a greater height as well as more precise measurements and the construction/shaping of a suitable end cap. Due to its precarious nature and the high risk of damage to your roof if it is not completed to high standard, we would highly recommend consulting a professional if you feel as though your current ridge/hip flashing needs to be replaced.
Any Questions?
If you are having trouble picking out the right lead for your next project or have any other queries, our award-winning team is here to help. Simply give us a call on 01295 565 565 or talk to us via our online chat.