How To Fit Apron Lead Flashing on a Conservatory

When it comes to flashing, there is rarely anything better than lead. Commonly use around chimneys, vents, windows or anywhere else a horizonal run abuts a vertical surface (otherwise known as an Apron), lead flashing serves to both prevent leaks and stop rainwater from seeping though the joins in your roof.
Below we’ll go through how to determine which lead is best to use, what tools you’ll need to get the job done and a very simple step-by-step to help fit your very own apron lead flashing on your conservatory roof.
What Kind of Lead Flashing You Need
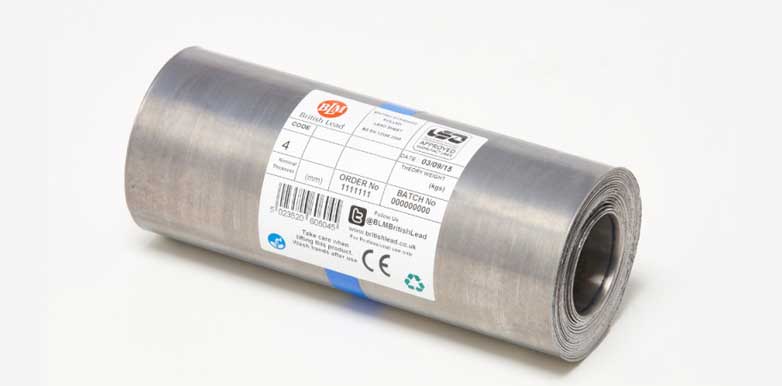
Lead flashing is separated by eight different codes. Each refers to a thickness and weight and has a differing range of applications, with the thinnest and lightest starting at code 3.
In plain English, the thicker the lead the more durable and the better it is at providing protection; however, it also becomes less malleable and far more difficult to shape. Code 8 lead for example while fantastic for flat roofs is not suitable for the precision work that flashing sometimes requires. On the other side of the scale, code 3 lead can be shaped very easily but provides the least amount of protection. We'd recommend using code 4 lead when installing apron flashing on your conservatory. Read our mega guide to learn more about lead codes.
How to Fit Lead Flashing on Your Conservatory
Measuring for the Lead Flashing
Measuring for the lead flashing requires finding four different measurements. All four measurements can be taken with a tape measure.
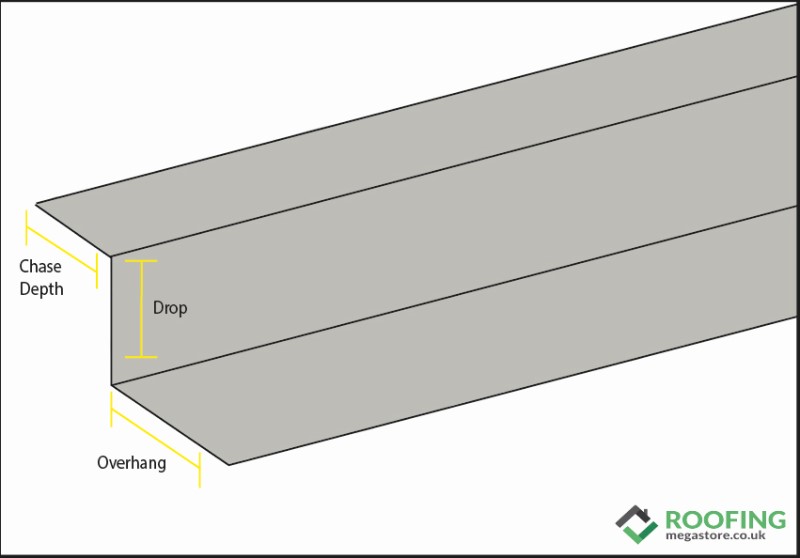
The Chase Depth: The Chase is the line of mortar between the two rows of brick faces where the top of the lead flashing will be inserted
The Drop of the Wall Flashing: This is the drop from the Chase to the top of the conservatory roof
The Width of the Overlap Required on the Conservatory Roof: This is how much the flashing needs to go across the conservatory roof and is typically 15cm/6inches
The Overall Length: This is the length of the seam between the conservatory and the external wall of your house
The Chase depth will influence the thickness of the lead required to some degree, both the lead flashing and a new line of mortar to secure it will need to fit in this space - as mentioned previously typically lead code 4 is suitable. The Drop and the Overlap will indicate the width of the lead required, you will need to ensure that you length of the roll (or rolls) of lead that you purchase are a little longer than the overall length so that it can wrap around the edge of the top of your conservatory, sealing it in place.
Step-by-Step to Installing Lead Flashing
As with any job the first step is to make sure you have the correct tools. Fortunately, the installation of flashing is among the simpler roofing tasks and whilst specialist kit such as a lead dresser can make your life a little easier, they are not a necessity.
Tools Required:
- Lead flashing of appropriate length and thickness
- Claw Hammer
- Screwdriver
- Trowel
- Bolster
- Brush
- Tape Measure
- Sheet Lead Knife or Aviation Snips
- Small Angle Grinder (with diamond tipped mortar raking disc)
- Clean Cloth x2 (one to remove excess mortar and one to apply patination oil)
- Lead Dressing Tool or Piece of Timber
- Off Cut Roofing Batten
- Dust Mask & Eye Protection
- A sturdy Ladder
- Patination Oil
1. Remove the Mortar

If you are working on a new build or have excess mortar remaining after removing your flashing this will need to be taken back to make room for the new lead. From the top of your abutment, measure 150mm up or to the nearest course of mortar to that measurement. The course of mortar can then be dug out using your Angle Grinder (make sure to wear your dust mask and eye protection). You should aim for a depth of 15-20mm to ensure that the structure of the brickwork is not weakened. Any excess dust should then be brushed away to leave a clean area to fit your flashing to.
2. Cutting the Lead Flashing
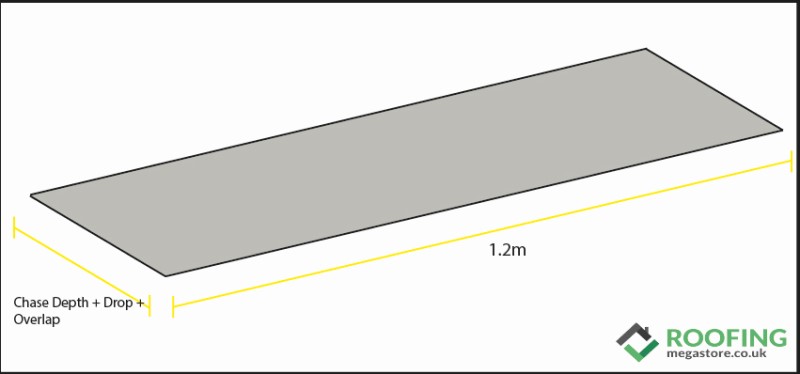
Any cutting should be done on the floor, so once you are safely down from the roof you can then cut a run of flashing using your Sheet Lead Knife or Aviation Snips. The length of each piece of flashing should be a maximum of 1.5m, ideally less (around 1.2 would be best). Any longer and the expansion and contraction caused by changing temperatures can lead to significant damage. The width of your lead will be the chase depth, drop and overhang added together.
3. Shaping the Lead Flashing
With your three measurements in mind the next step is to shape your flashing. Begin by beating your lead flat using a piece of timber. Then you can set the depth of the chase at the top of your flashing. Position the lead over a sharp angle such as a piece of batten, making sure it is hanging over by the necessary measurement of the chase.
Hammer the protruding lead down against the edge of the batten carefully working your way across the entire piece of flashing. Once this is done you can measure the drop and overhang onto the lead and fold by hand. Simply lay the batten at the appropriate location and fold the lead over it. Repeat this process for all of the sections of flashing that you require.
4. Lead Straps
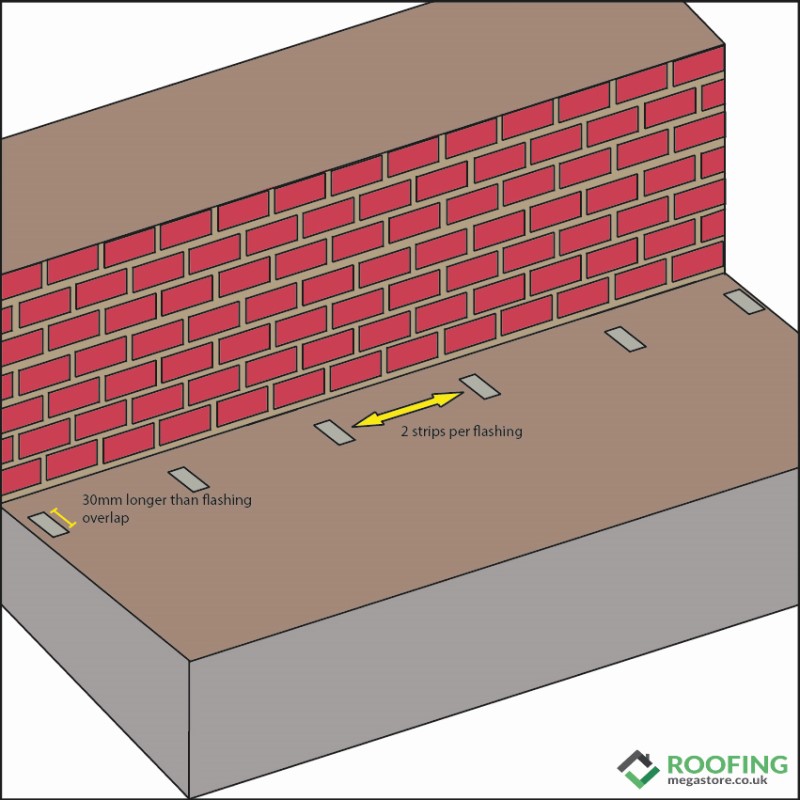
Put all your prepped flashing to one side for now, as before you can install those should first fit some lead straps which will help secure the bottom of the flashing. Your straps can be created by cutting pieces of lead 25 – 35mm in width, with a length roughly 30mm longer than your overhang e.g. if your overhang was 150mm the length of the straps should be 180mm. This will prevent wind uplift from ripping up your flashing thus increasing their longevity. You should cut enough straps to install two for each length of flashing.
The straps can be fixed into the nail holes of your tiles and ideally should be placed 100mm before each edge of each piece of flashing. This should allow you to simply fold them up to cover the overlapping lead.
5. Fitting the Lead Flashing
With your flashing prepped and straps installed, you can move onto the penultimate step. The flashing can be very easily fixed into place by inserting it into the chase and then folding over the straps at the bottom, cutting where necessary. When you come to lay the following pieces of flashing, ensure a minimum overlap of 100mm between each piece. If you find that your straps do not coincide with the flashing overlap and that edge of the flashing pieces do not coincide with each other, simply cut the corner of the underlapped piece and fold over the top of the upper lapped piece.
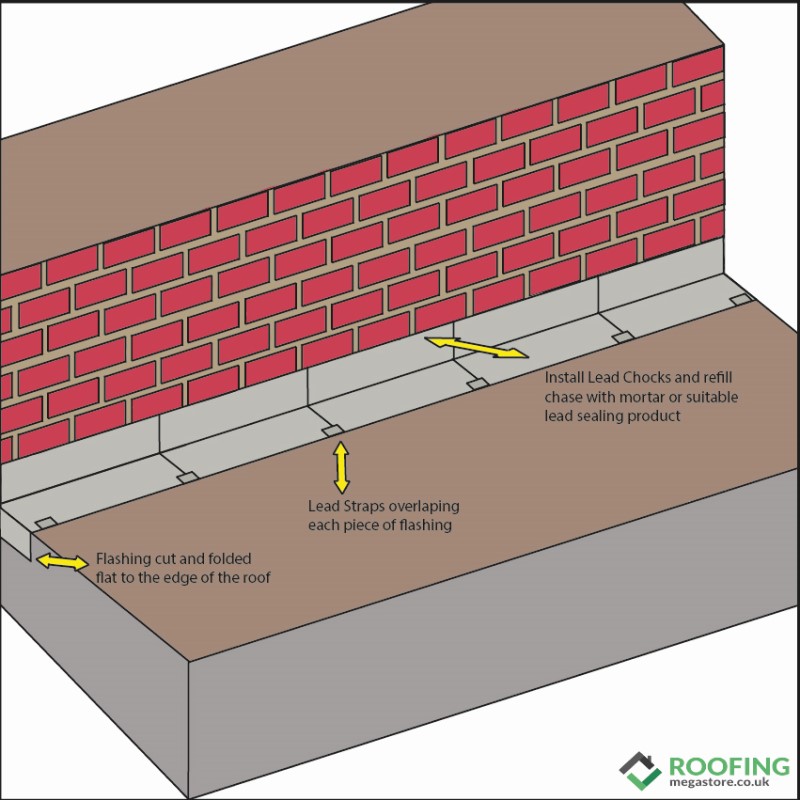
With the flashing secured at the overhang, you can then add fixings to secure it to the chase. This can be done by creating lead chocks. All you need to here is cut a strip of lead and roll it up until it is slightly thicker than the gap in the chase, the gap you will be hammering it into. Hammer down one end to make it a wedge shape and then drive them in using your hammer and a bolster.
This should be done at 450mm intervals. If your run of flashing is particularly long you could also use Hall Clips. Once the chocks or clips are in place across the entire length of flashing, place your timber against the drop and lightly hammer the lead so it is flat against your wall or use lead dressing tools if you have them. Your flashing should also extend past the edge of any roof, so that you can cut the angle into the flashing and fold it flat against side of the roof for a complete seal.
You can beat this into place using the bottom of a hammer. Similarly, when working with profile tiles, the bottom of a hammer can be used to shape the lead into the grooves if you do not have any other suitable tools.
Once your flashing is secured you will then need to fill in the open chase with mortar or alternative lead sealing product. Tap the very top of the lead down using a bolster and then begin filling in the gap using a trowel. Be sure to fill the entire cavity depth as not doing so can lead to leaks down the road. Wipe away any excess with a cloth and you are ready to move onto the final step.
6. Make Sure Everything is Secure
Once all of the lengths are laid tap down the top of the lengths of the lead in the Chase using a bolster and making sure it lays flat against the brickwork. You will then need to push mortar into the chase to fill it back up, making sure that it goes all the way back - it’s very important for the stability of the bricks that it fills the entire gap. Wipe away any runaway mortar with an old rag.
7. Apply Patination Oil
Patination oil is designed to prevent the carbonisation of lead, which can lead to white staining. This can be applied using a clean cloth and should be done on the same day as the installation whilst the surface of the lead is dry.
And with that, your new flashing will be complete. Bear in mind though, each project and installation will be different and should be treated as such. If you are installing flashing on a step or chimney for example the appropriate process may differ slightly.

And That’s It
Your apron flashing should now be complete, bear in mind that if you have a flat roof conservatory or want to install step or chimney flashing the process will differ. We stock a wide range of lead flashings, fixings and accessories, so you’ll be certain to find the right product for your project.
More Information
If you have any questions please do give our friendly customer services team a call on 01295 565 565, email [email protected], or use the handy online live chat below.