How to Build a Carport
Building a carport is a brilliant way of providing protection for your vehicle whilst adding excellent value and kerb appeal to your home. Committing to a full garage construction project can be expensive and time-consuming, so opting for a carport instead is often an easier, faster and more practical alternative that you can complete yourself.
In this helpful article we will talk you through each step of the planning and construction process whilst discussing planning permission, materials, costs and more.
Types of Carport
Carports are available in a selection of different shapes and sizes, so a good place to start is finding the best type for your property. What are the main types of carport?
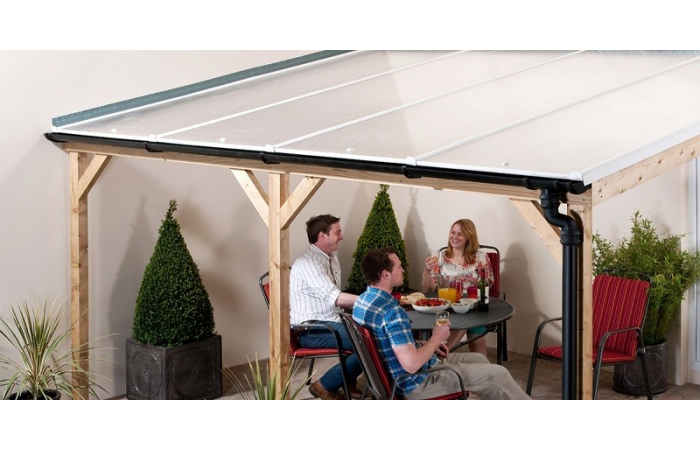
- Wall Mounted/Lean-to – This is the most popular type of carport across the UK. It is quick and easy to install, cost-effective and requires minimal materials for construction.
- Cantilever – Although structurally similar to a lean-to, a cantilever carport takes 100% of its support from the wall with no supporting posts beneath it. It is always recommended to consult a professional when constructing this kind of carport to ensure the structure is stable and sound.
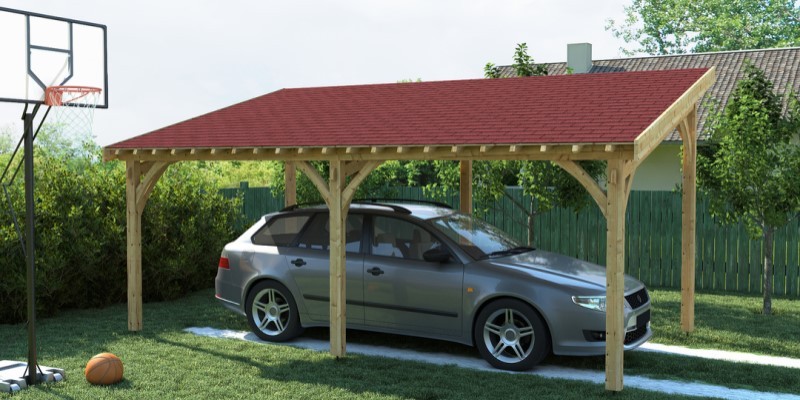
- Free-Standing – A free-standing carport is a stand-alone structure that can be placed anywhere, without the need for support from the property. This type of carport can be more expensive due to the larger volume of materials required but provides freedom in positioning and can offer enhanced space for your vehicle.
Carport Roofing Materials
Along with the timber frame, there are many different materials that can be used to construct a carport roof. Each material creates a different look with varying properties and practical benefits. Here is an overview of the most common roofing materials used in carport construction:
- Polycarbonate Roofing Sheets
- GRP Roofing Sheets
- PVC Roofing Sheets
- Metal Roofing Sheets
- Bitumen Roofing Sheets
- Plastic Roof Sheets
For an in-depth look into each of the materials mentioned above, take a look at our handy guide on the Best Carport Roofing Materials, to help you decide which is the right choice for you.
Will I Need Planning Permission for a Carport?
When carrying out any construction project on your property, it is always best to ask the question, ‘Will this require planning permission?’. Thankfully, in most cases, building a carport does not require planning permission to go ahead. As domestic outbuildings such as carports are considered permitted developments, you will not need planning permission as long as the construction as long as the following rules are adhered to:
- Carport is used for domestic purposes only.
- If there’s a road to the rear of the house, no part of the carport or carport canopy should be within 3.5 metres of it.
- Carport cannot be constructed on land forward of the wall that form’s the property’s principal elevation.
- Carport must be single storey with no balconies/overhangs.
- New carport cannot contribute towards exceeding 50% of the home’s land.
- Carport must have a maximum height of 2.5m - overall height of 4 metres with a dual pitched roof and 3 metres for any other roof type.
- If property is situated within a conservation area, World Heritage Site, Area of Outstanding Natural Beauty or National Park, the carport should not be located between the principal or side elevation of the house and it’s boundary.
If you are unsure whether your project will require planning permission, we recommend that you always seek professional advice from your local council to be sure.
Where Should I Build my Carport?
When building in the surrounding area of your property, it is important to carefully evaluate the location of the structure. You should not only think about visual appeal, but also practicality, accessibility and safety.
You must find out where utility lines such as electricity, gas and water are located to ensure you don’t damage or dig them up during construction. Also, consider how easy is it to reach the chosen location by vehicle, how much space you leave yourself to comfortably enter and exit the vehicle, how the carport looks in relation to your property etc. Remember, to avoid planning permission ensure the location of your carport fits within the rules and guidelines.
How Much Will a Carport Cost?
The costs you may face in a project such as this will depend on a few factors including:
- Type of carport
- Size of carport
- Type of materials
- Quality of materials
- Extra tools/materials that need to be purchased for construction
For a standard single carport including groundwork, you could be looking to spend around £2800 in total, with £1,680 spent on materials, £840 on labour and £280 on waste removal. Below is a table of potential costs for varying types of carports including materials, labour and waste removal. (source priceyourjob)
|
Type of Carport |
Material |
Average Cost |
|
Freestanding Single Carport |
Steel |
£2200 - £2500 |
|
Freestanding Double Carport |
Steel |
£3200 - £3500 |
|
Attached Single Carport |
Steel |
£3000 - £3800 |
|
Curved Attached Single Carport |
Aluminium |
£3200 - £4000 |
|
Lean-to Single Carport |
Wood |
£2000 – £2300 |
What About DIY Projects?
When pricing up a DIY carport job, you won’t have to worry about the extra costs of labour. For example, a freestanding carport can typically cost between £400 and £800 without including labour in the calculations. For supply costs only, lean-to carports can price up between £600 - £900, dependant on the materials you go for.
After carport materials, you may want to think about any additional extras to complete the project. You might need to tarmac your driveway to create a base for the carport which can price up to an extra £2000. Block paving drives come in more expensive at £3000 whilst a resin drive could set you back £2500.
How Long Will It Take?
The timeframe of completion will differ based on the size and type of carport you go for as well as any additional structural/preparation work that needs to be carried out.
Installation of a small carport could take between 2-4 hours whilst a larger one could take up to 6-8 hours.
Below is a table including estimated timeframes of installation for various carport types and sizes. (Source priceyourjob)
|
Type of Carport |
Material |
Estimated Timeframe |
|
Freestanding Single Carport |
Steel |
1-2 days |
|
Freestanding Double Carport |
Steel |
2-3 days |
|
Attached Single Carport |
Steel |
2-3 days |
|
Curved Attached Single Carport |
Aluminium |
2-3 days |
|
Lean-to Single Carport |
Wood |
1 day |
How to Build a Lean-to Carport
In this section of the article, we will talk you through the installation process of building your own lean-to carport using wooden posts and polycarbonate roofing sheets.
1. Planning the Layout
Before beginning any part of the installation, the first step is to lay out the basic positioning of the carport. For this, you will need batter boards and string. Lay out the batter boards in the appropriate positions and connect using the string. To ensure the corners are accurately squared, utilise the 3-4-5 method for each corner. You should also measure the diagonals to ensure optimum accuracy.
What is the 3-4-5 method?
The 3-4-5 method is commonly used for squaring corners and checking for an accurate 90° angle. When determining if two sections meeting in one corner are 90° to each other, measure from the corner three feet from one side and four feet from the other. Then measure the hypotenuse between those points. If the sections are 90° from each other, it would measure five feet.
2. Installing the Posts
To ensure optimum stability and structural strength for your carport, you will need to set the posts in concrete. It is recommended that you excavate down to around 3 feet and pour 2 inches of gravel to cover the bottom. Fit the tube forms to the holes, secure the posts with braces, then fill the forms with concrete.
Installing the wooden posts is an easy step. Use a circular saw to cut to size, then secure the posts with lag screws to the metal anchors. When cutting make sure the ends are right-angled.
3. Support Beams
Now you need to fix the support beams to the wooden posts. Carefully align the beams. The beams should be installed 1 1/4” higher than the posts with a slight overhang of about 1 1/2” on both ends. After double-checking that the beams are completely level, clamp them to the wooden posts.
Carefully drill pilot holes in the beams and posts, then install the carriage bolts.
4. Enhancing Rigidity
To increase the stability and rigidity of the structure, install wooden braces joining the posts and support beams. Cut both ends of the braces at a 45° angle and lock into place using screws. Drill pilot holes through the braces, then insert screws to prevent splitting.
5. Adding the Rafters
For effective water drainage, you should ensure that the carport roof has a slope of at least 15°. To achieve this, cut both ends of the rafters at 15° using a circular saw. Secure the rafters to the crossbeams by drilling pilot holes through the beams, then inserting 3” screws from the outside of the structure.
6. Fitting the Roofing Sheets
Now it is time to fit the roofing sheets. In this example we will be using polycarbonate roofing sheets, although you can use the material best suited to you.
When laying your first few sheets, it is recommended that you do not fully fix to ensure that they are correctly aligned before securing. Glazing bars and eaves fillers will be typically added at the beginning of sheet installation. There should be a glazing bar attached between each sheet to ensure all gaps are properly sealed. Once the sheets have been aligned and attached with the bars, add screw caps and screws to securely fix.
For a full explanation of polycarbonate roofing sheet installation, please check out our handy fitting guide here.
How to Build a Freestanding Carport
Next, we will discuss the steps for building your own freestanding carport using wooden posts and polycarbonate roofing sheets.
1. Planning the Layout
Before commencing construction, it is important to carefully set out the layout of your carport. Mark out the corners and place wood batter boards out from each corner, as well as out from the middle for the two centre points. Set the batter boards back at least 2 foot from the building perimeter of the carport to allow space for digging.
Attach string lines to the batter boards to make a rectangle but remember the posts will need to be off-set in from the building line.
2. Installing the Posts
Dig posts holes at around 12 inches square by 24 inches deep, then pour 4 inches of concrete into the bottom of each hole. Position the posts in the holes, against but not touching the string line and use a spirit level to check that each post is vertical.
Fill the holes with concrete to within a 2 inch depth of the finished ground level. The concrete should support the posts without the need for bracing because of the depth of the hole.
3. Trimming the Posts
Mark the rear posts at a minimum of 2300mm above the finished ground level. Use a spirt level to double-check that the height marks are completely level. Mark the two front posts 100mm higher than the rear posts, then fix a string line between the front and back posts to mark the height of the middle posts. Once all posts are marked, cut the top of the posts at the line.
4. Installing the Beams
Cut two beams and clamp to the posts, so that the tops of the beams are flush with the tops of the posts, whilst extending past the front and rear posts. Drill and bolt the beams to the posts using 12mm galvanised bolts which two at each point of meeting.
5. Adding the Rafters
Cut the two end rafters and fix to the beams with 75mm galvanised nails and then with galvanised angle brackets. Secure each bracket with four 12mm galvanised bolts with two through the beam and two through the rafter.
Cut the six middle rafters and fix to the beams using galvanised metal joist hangers, spacing evenly. Add a row of blocking running lengthwise down the middle in between the rafters.
If the posts are concreted and securely bolt fixed, then additional bracing will not be required.
6. Creating the Roof
Create the roof of your car port structure using roofing sheets. In this example we are once again using polycarbonate sheets.
Glazing bars and eaves fillers will be typically added at the beginning of sheet installation. There should be a glazing bar attached between each sheet to ensure all gaps are properly sealed. Once the sheets have been aligned and attached with the bars, add screw caps and screws to securely fix.
To Conclude
Carports can be built in a variety of sizes and styles using a multitude of different materials. They provide an array of practical, visual and economic benefits for your home and are far less costly than constructing a garage or extension.
If this post has inspired you to build your very own carport, then take a browse through our high-quality range of carport roofing materials to get your project started. We stock an extensive range of roofing materials that are perfect for carports, including polycarbonate sheets, felt shingles, and more; all from leading brands at affordable prices.
If you have any further questions or queries, don’t hesitate to get in touch with our friendly customer service team who will be more than happy to help. Just give them a call on 01295 565565, email [email protected], or leave a message in the handy live chat.