The Complete Guide on EPDM
As with all materials, when scarcity and price put the commonplace out of reach most builders and homeowners will seek out an alternative. This is as true today as it was in the 1970s when, with the cost of asphalt roofs increasing by the day, consumers sought out a new up-in-coming roof covering which promised even better protection. EPDM, more commonly known as rubber roofing.
This simple alternative took the market by storm. And today, with decades of development under its belt, it is still widely considered one of the very best roof coverings that money can buy.
What is EPDM?
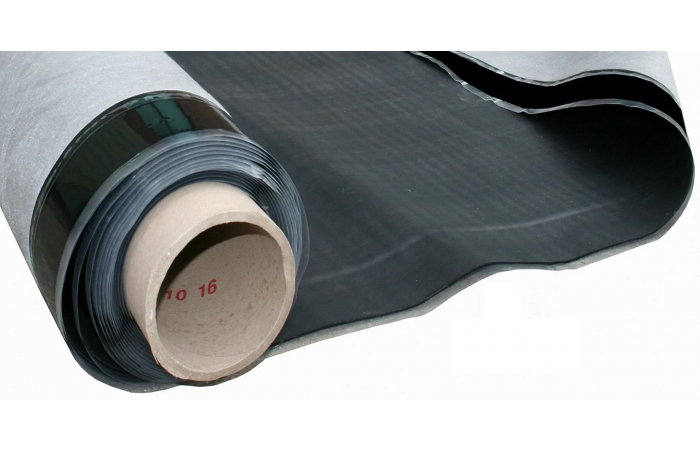
Whilst a catch-all for a wide array of different roofing systems, EPDM itself is a form of synthetic rubber with elastomeric properties. Meaning once stretched it can return to its original shape. Durable, flexible, and resistant to temperature changes and UV, it’s no surprise that it boasts dozens of applications and that its initial creation and developed won scientists Karl Zeigler and Guilio Natta a noble prize in chemistry.
Why Use it For My Roof?
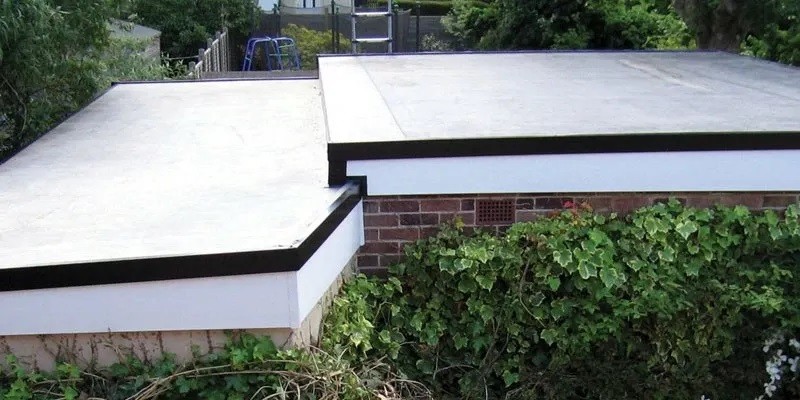
The benefits that this material can offer are varied and numerous, though perhaps its most notable is its ease of use. Regardless of how large or oddly shaped the roof is, EPDM’s elastic properties allow for a consistent application and thickness across your roof.
Add to this, its natural strength, resistance to weathering, tear-resistance and extraordinary life span and its use is a no brainer. Suitable for use the world over, it is also able to maintain an exceptional protective performance even in extreme temperatures and whilst being subjected to high levels of ultraviolet rays.
Benefits of EPDM
- Wide operational temperature range
- Suitable for sub-zero environments
- Outstanding weathering properties
- Sunlight & ozone resistant
- Tear, abrasion & steam resistant
- Long life span
- Easy to install
EPDM vs TPO
If you’ve been looking into rubber roofing for an upcoming project, then you’ll likely have also come across TPO or Thermoplastic Polyolefin. Like EPDM, it is a single-ply roofing solution famed for steel-like strength which itself boasts punction and tear resistance equal to if not surpassing that of EPDM.
It is similarly energy efficient and suitable for use in most environmental conditions. In fact, being available in a range of colours, TPO can actually reflect far more heat than EPDM leading to the need for less insulation. Naturally, this also means that its aesthetic value tends to be higher as well – with more options to choose from to suit the style of your building.
However, whilst arguably more durable, TPO does suffer from a slightly more complicated installation. Often requiring mechanical attachment or electromagnetic welding. On the other hand, EPDM typically only needs tapes and adhesives not only making them a more suitable choice in many residential applications but a safer one too.
|
|
EPDM |
TPO |
|
Approx. Life Expectancy |
Over 40 years |
20 – 30 years |
|
Environmental Impact |
Low |
Low |
|
Durability |
Resistant to blistering, cracks, rot, UV & extreme temperatures |
Protected against punctures & tears with steel like strength |
|
Colour options |
Black |
Multiple options available |
Is EPDM Easy to Install?
One of the reasons why EPDM has remained a popular choice for decades is the money it can save you after its instal purchase. Of course, this includes the decades of reliable protection without the need for a replacement but also the lack of labour costs. That’s right, if your project is a suitably small scale and you feel confident enough in your DIY skills, then EPDM is perfectly suitable for you to fit yourself.
The process itself is a simple one. After brushing down the surface of your roof to remove any excess dirt and grease, you need just position your EPDM and leave to rest for 30 minutes for it to naturally expand. With this done, suitable water-based and contact adhesive can then be applied, the material can be swept to remove trapped air and any corners or seams can be sealed with tape. With this done, finish up with wall and edge trims and you’re done.
Cleaning & Maintenance
Thanks to the materials' inherently durable nature, not much in the way of maintenance is really needed, assuming your EPDM has been installed correctly. With that being said, it is always important to keep apprised of your roof's condition.
In this case, that means semi-regular inspections just to clear any dirt or debris that may have settled as well as taking the time to apply a suitable rubber roof cleaner OR a simple mixture of dish soap and water. Gently scrub with a soft to medium bristle brush to remove any stains and then just leave to dry. The only thing to be wary of here is making sure to avoid products with petroleum solvents or citrus – these run the risk of damaging your roof.
Whilst a rare occurrence, it is still possible that your rubber roof can get damaged – especially when moisture gets trapped between the surface and membrane. If this does happen, it should be relatively evident with blisters growing across the rubber. Whist inspecting, it is best to keep this in mind and, in the event that you notice them, contact a professional as soon as is convenient.
The final job to be aware of, and one that is often overlooked, is taking the time to trim back any trees that may overlook your roof. As the main culprit for dirt, leaves, twigs and other debris keeping on top of these is by far and away the best way to ensure your roof stays in tip-top condition.
Common Questions
What Does EPDM Stand For?
Ethylene propylene diene monomer is EPDM’s full name. Given because of all the chemicals that are mixed to form it – ethylene, propylene, and diene. Most of the composition tends to be ethylene, with diene monomers added in smaller portions to provide the materials with its famous resilience and flexibility.
Can EPDM Be Installed on Plywood?
Yes. In fact, alongside OSB, plywood is one the most suitable materials to install EPDM on top of. Other suitable surfaces include lightweight concrete, fibreglass, and other non-porous materials. It is not suitable for application atop bitumen or asphalt, however, as these can lead to damage down the line.
Can EPDM Be used on a Pitched Roof?
Yes. Whilst commonly seen in use on flat roofs (garages, extensions, or commercial builds) EPDM is perfectly suitable for most roof types making it ideal for virtually any outbuilding.
Can EPDM Be Painted?
Many EPDM rubber roofs are suitable for painting, though it is important to make sure the roof is clean and undamaged before applying. The paint itself will also need to be suitable – durable, able to settle on rubber and resistant to sunlight.
Can EPDM be installed in cold weather?
EPDM can be installed in most conditions, including cold weather, though it is important to be aware of a few extra considerations. Your adhesives may have their own temperature requirements and will need to be kept warm before application. You will also need to avoid leaving puddles or globs of adhesive, re-rolling any wet areas so that the solvents can flash off.
Can EPDM Be Recycled?
Not only is EPDM 100% recyclable, but it is also green roof compatible – meaning you can even grow fruit and vegetables on top of it. Just a couple of the ‘after-life’ uses for this roof covering are rubber mats as well as fuel.
Can EPDM Be Heat-Welded?
Alongside a suitable adhesive, EPDM CAN also be safely joined and sealed using a hot air gun and seam roller.
Will EPDM stick to lead?
Most EPDM is suitable for use on lead as well as aluminium and zinc. However, it is always recommended to check the manufactures guidance before beginning any work.
Any more Questions About EPDM?
Looking to replace a garage roof? Or perhaps you’re working on a new outbuilding? Either way, EPDM could be just the roof covering for you. Whether you need advice on ordering or just have a few more questions about this wonder material, our award-winning customer service team is here to help. Simply call us on 01295 565565 or talk to us directly using the chatbox below.