How to Paint Roof Tiles
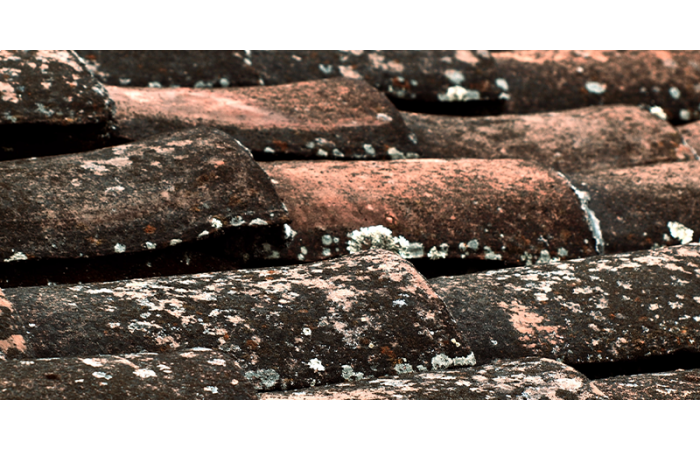
Is your roof looking a little worn out after years of exposure to the elements? Or maybe you are just tired of staring at the same faded brown tiles and are in need of an upgrade? Whatever the reason, giving your roof tiles a fresh lick of paint is a fantastic way of completely transforming your roof space without the need for a full scale renovation.
Although painting your entire roof may seem like a pretty time-consuming (and pricey) task, most homeowners find that it is actually a great investment that provides a variety of practical benefits as well as just visual appeal. If you are still unsure and in need of a little more information, take a read through this handy guide packed with everything you need to know.
We’ll talk you through the benefits and advantages of a freshly painted roof, as well as the best products for the job, important tips to keep in mind and a comprehensive step-by-step walkthrough.
Table of Contents
- Why Paint Roof Tiles?
- Are all Roof Tiles Suitable for Painting?
- Which Type of Paint is Best for Roof Tiles?
- Choosing the Right Paint Colour for Roof Tiles
- What Will I Need?
- Things to Bear in Mind
- How to Paint Roof Tiles – Step by Step
Why Paint Roof Tiles?
A good place to start is giving you an insight into the reasons why painting your roof tiles is worthwhile.
Kerb Appeal
A fresh coat of paint will instantly bring new life to even the most tired and faded roof structures. The roof is a fundamental part of any property, so keeping it looking fresh and new is a great way of enhancing the overall look of your home.
Lower Energy Costs
Believe it or not, a painted roof can actually provide enhanced insulation for your home. Some specialist paints are expertly formulated with smart insulative properties which help to keep your home at a more comfortable internal temperature. This in turn means reduced energy bills and less money out of your pocket.
Extended Lifespan
By using a high-quality roofing paint, you can look to extend the lifespan of your roof tiles by up to 15 additional years! Pretty impressive, huh? A fresh coat not only helps to protect your roof against moisture damage, but most are also mould and mildew resistant to increase durability further.
Higher Property Value & Increased Buyer Interest
Selling your home and looking for a way to boost property value? A fresh coat of roof paint can do just that. A newly painted roof will give potential buyers the impression that the property has been well-looked after and won’t require strenuous renovation once they move in. The idea of lower energy bills and better savings can also be very appealing, especially in the modern eco-conscious market where energy efficiency is a huge selling point.
Environmental Benefits
That brings us onto our next point. Whilst using less energy is a brilliant way of saving you money, it is also hugely beneficial to the environment and can help to reduce your carbon footprint significantly over the years.
Are all Roof Tiles Suitable for Painting?
So you are drawn to the idea of painting your tiles but are wondering – is it right for my roof? Well, that will depend on the type of roof tile you have fitted.
Generally speaking, clay roof tiles are often too porous to be painted so it is not recommended that you try. Some experts suggest that it is possible for clay tiles to be painted, but as the paint doesn’t adhere well long-term, consistent re-painting will be required which is often more upkeep than it is worth.
Concrete tiles, however, are far more suitable for painting and can actually benefit from a fresh coat. Painting porous concrete tiles is a practical way of enhancing their look whilst also helping to re-seal any small imperfections.
Which Type of Paint is Best for Roof Tiles?
The fundamental way of ensuring the best possible finish for your roof tiles is picking a high-quality paint appropriate for use on your roof tile. Water-based acrylic paints and latex paints are generally suitable for use in most conditions. They are the more eco-friendly choice and are typically easier for homeowners to get their hands on. There are a multitude of different variations available on the market, so it can be tricky to narrow down the right product for your tiles.
Here at Roofing Megastore, we stock the Britmet Roof Coat Paint in a selection of stylish colours. This high-quality roof paint can be used to paint a wide range of roof tiles with a smooth flexile texture that provides excellent durability and water resistance. Expertly formulated to withstand all kinds of weathering and temperatures, this top-grade roof paint keeps your roof tiles looking brand new long after application.
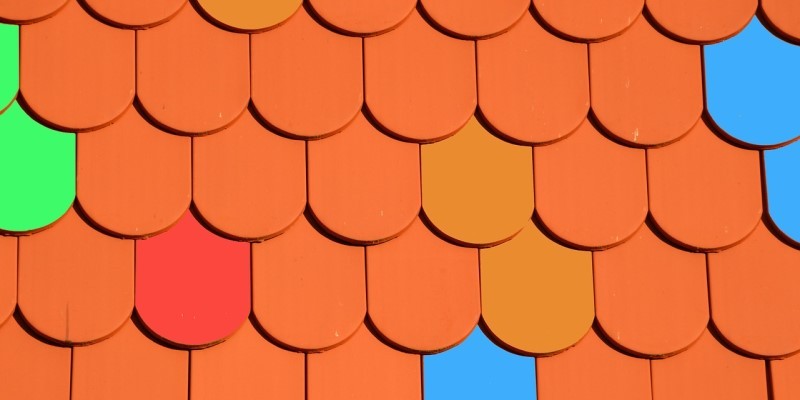
Choosing the Right Paint Colour for Roof Tiles
When choosing a paint colour, you will need to consider a few different factors. The first of course is the visual aesthetic of your home. To create a stylish look that balances well with the rest of your property, choose a colour that complements the rest of the build.
Alternatively, you can opt for a contrasting colour to makes your roof stand out, however when doing this you may also need to consider the impact on surrounding houses. Although it is fantastic when homeowner’s implement a touch of their own personal taste into their home’s architecture, you may need to consider the general appearance of other properties nearby to preserve the aesthetic flow throughout the neighbourhood.
The colour of your roof will also have an impact on the energy efficiency of the home. As lighter shades such as white reflect the sun’s warmth, these may be better suited to hotter climates where keeping the house cool is a priority. Darker shades are therefore perfect for colder conditions as they can help to trap the heat inside throughout chilly weather spells.
What Will I Need?
With your perfect paint and colour chosen, you are now ready to get the project started! As well as your paint, you will need a few other tools and materials at the ready:
- Masking tape
- Moisture meter
- Paint sprayer
- Suitable primer
- Ladder
- Safety Harness
- Suitable footwear
- Plastic sheeting
- Painter’s tape
- Plywood
- Old carpet
- Rust remover
- Pressure washer OR garden hose & scrub brush
Things to Bear in Mind
Now you are almost ready to paint, here are a few things to keep in mind in order for the process to run as smoothly as possible:
Check the Forecast
Weather can be temperamental at the best of times, especially in the UK. However, we do recommend that you check the weather forecast for any chances of rain downpour as rain and roof painting don’t really mix. The optimum conditions for painting your roof tiles are a dry but cool day as excessively hot temperatures can be a little troublesome too.
PPE
As roof painting involves walking across the roof at height, make sure to equip yourself with a suitable pair of non-slip boots or shoes with enough grip to combat the steep surface. A safety harness will also provide enhanced security and help to prevent any dangerous falls or slips.
Helping Hand
Painting an entire roof by yourself not only takes a while but can be a little impractical. If you can, we recommend that you enlist the help of a friend to help you perform tasks such as holding ladders as well as passing and moving equipment.
Hold on To Leftovers
We highly advise that you keep hold of any leftover paint for touch-up work in the future. Store leftover paint in a safe, dry place in accordance with manufacturers instructions to ensure the product does not spoil.
How to Paint Roof Tiles – Step by Step
You are now ready to begin!
Step 1 – Roof Harness
A roof harness is a fundamental piece of equipment for keeping you safe and secure whilst working at height. Make sure your harness is properly functioning and fit for purpose before getting up onto the roof.
Set up your ladder on a firm and level ground surface, making sure to leave 3 feet of ladder extending above the edge of the roof. After ensuring the ladder is completely secure in place, attach the harness to the opposite side of the roof along the lip of the gutter and then back to the ladder.
Step 2 – Wash & Prep
To correctly prepare your roof tiles for painting, you must remove all traces of dirt, debris, algae, and moss as well as any existing flaking paint. A fast and easy way of doing this is by using a pressure washer.
Pressure washers are fantastic for achieving quick and clean results; however they do come at a risk of damaging the roof tiles when used incorrectly. You need to ensure that your roof structure and tiles are in a strong enough condition to withstand the pressure of water without breaking. If you are unsure, we always recommend that you consult an expert for a professional inspection prior to cleaning.
If suitable for use, make sure to familiarise yourself with the functions of your pressure washer before use and keep the pressure at a moderate setting to avoid damage.
For any build-up that the washer is unable to remove, we also suggest using a strong scrub brush and garden hose. You could also utilise a store-bought or homemade cleaning solution to combat dirt further. A basic chlorine, water & soap mixture is often recommended by professionals – simply water the area before and after applying to water down the solution.
Step 3 – Inspect, Check & Repair
With your tiles spotlessly clean, it’s now time to give your roof a thorough inspection. If you notice any damaged or missing tiles, you will need to carry out appropriate repairs before painting can commence. Leakages and weak areas will also need to be fixed to avoid structural issues.
After cleaning, you need to ensure your roof is completely dry before applying any paint. An easy way of checking this is by using a moisture meter. If the meter shows less than 15% moisture content, then your roof is suitable for painting.
Another final check to carry out is by applying a line of masking tape across the dried tiles. If as you remove the tape, you find no debris, particles etc stuck to it, then your roof is ready for painting. Leftover particles indicate that your roof may need re-washing and a powdery substance typically means that a specialist bonding liquid may be required to make sure the tile surface is sealed enough to hold the paint. This is called a Fire-Earth Bonding Liquid.
Step 4 – Preventing Damage
As roof painting requires a considerable amount of foot traffic, you will want to protect the roof surface as best as you can from potential damage. A great way of helping to distribute your weight more evenly is with plywood and carpet boards.
After cutting a few plywood boards into 2’ x 2’ pieces, adhere old sections of carpet onto the board surface. These can then be positioned (carpet side down) onto the roof and fixed safely into place, ready to walk across.
Step 5 – Rust Removal & Protection
All exposed sections of iron should be sprayed with an appropriate rust remover to prep and clean. Any part of the roof you don’t wish to paint, make sure to cover up using plastic sheets, then tape into place using painter’s tape.
Step 6 – Spray to Prime
The easiest way of applying paint primer to your roof is by using a sprayer wand. Fill the sprayer with your chosen primer and mix with water if needed (when using a water-based primer). Ask your helper to turn on the machine, then begin evenly coating the roof tiles, starting at the ridge, and working down the slope of the roof.
Make sure to hold the sprayer want at least 1 foot from the roof tiles and apply using sweeping motions, moving from side-to-side carefully. Spray until the entire roof space has been evenly coated.
Leave the primer to dry for the appropriate timeframe in accordance to manufacturer’s instructions.
Step 7 – Paint & Finish
With your roof tiles prepped and primed, you are now finally ready to paint! If you plan on using the same paint sprayer for paint application, clean the gun and hose using paint thinner, then re-fill with your chosen paint.
Once again, ask your helper to turn on the machine and begin applying in smooth, sweeping strokes across the roof surface. Follow the same method used to apply the primer, working evenly from one section of the roof to the other.
When you are happy you have reached an even first coat, turn off the sprayer and leave to dry for the recommended time period. As a primer has been used, a single coat will suffice for many types of roof paint. However, we always make sure to follow manufacturer’s guidance and apply a second coat if required.
And You're Finished!
And that’s it! Your roof tiles are now freshly coated and should last you for up to 10-15 years before needing a repaint. Pretty simple, right?
If this post has inspired you to start your very own roof painting project and you are wondering where to start, why not have a browse through our high-quality range of roofing materials, tools, and equipment available now at Roofing Megastore. We stock virtually everything you’ll need including paints, roof-safe footwear, ladders and more.
For any further help or questions, don’t hesitate to get in touch with our friendly customer service team who will be more than happy to help. Just give them a call on 01295 565565, email [email protected], or use the handy live chat.