How to Build a Stud Wall
Stud walls are a great option for those looking to create an extra room or split one room into two. In fact, stud walls are so popular, that many internal walls on the first floor of a home will be made up of studwork already. Although building a stud wall yourself may seem a little daunting, it’s well within reach with the right tools and a little know-how, even as a DIYer.
What is a Stud Wall?
In simple terms, stud walls are internal structures created from a frame (normally either timber of steel) with plasterboard screwed over the top. This frame is secured to ceilings floor and connecting walls for added structural security. Beyond being quick to build, they are perfect when dealing with plumbing and electrics as pipes and wires can be run within the wall’s hollow cavities.
What You’ll Need to Build a Stud Wall
One of the most appealing aspects of building your own stud wall is the complete lack of specialist kit you’ll need. With only the basic tools listed below and, of course the materials and fixings you can create stunning stud wall of your own:
- Spirit Level
- Panel Saw
- Drill
- Wooden Mallet
- Chisel
- Carpenter’s Pencil
- Tape Measure
- PPE (gloves and masks)
- Scrim Tape
- Suitable joining compound
- Materials and Fixings
Things to Consider
Timber or Steel Frame?
The first question you will need to answer is whether you need a timber or steel frame. To answer this let’s look at the advantages and disadvantages of both. Steel frames are designed be stronger and last longer but are generally more expensive and harder to install. In fact, as steel can be such a difficult material to work with, it is recommended that only the most experienced fit steel frames. Timber on the other hand, is far more flexible and a frame can be constructed on site without the need to purchase a kit. Beyond being cheaper and easier to source timber is also a fully natural product, making it by far the better option for the environmentally conscious. Of course, timber is weaker than steel, but not so weak that it can lead to significant damage when properly fitted and maintained. All of this means that, for the majority of DIY projects, timber will be the better option, offering high quality performance at a cost-effective price.
Insulation
The one big drawback of stud walls is their limited soundproofing. Being internal walls, they are, relative to the rest of your house, quite thin. Uninsulated, it is likely that any sound - muffled as it may be - will travel through the wall without much issue. A major downside, especially if you’re creating a new living room or bedroom. To avoid this, acoustic insulation such as Knauf’s Earthwool, is a must. This is especially true for new builds as building regulations require a minimum sound resistance of 40 decibels between walls.
Checking for Wires and Pipework
Internal walls cannot be installed wherever you want. Getting halfway through a build only to realise that there is a pipe in the way is a nightmare scenario none of us what to experience. So, before any work begins make sure that there are no pipes or wires that will get in the way of your new wall.
Step-by-Step Guide to Constructing a Stud Wall
The first thing to do is measure the area where you want your wall and purchase materials and fixings. Both 75mm x 50mm and 100mm x 50mm sawn timber, along with 3inch wood screws and 32mm drywall screws, can be used to create the frame you’ll need. Once you have your measurements, tools, and materials your ready you can get to work.
Remove Any Skirting
If you are building this new wall as part of a conversion or refurbishment, the first job will be to remove any skirting protruding from the area you want your new wall to connect to. This can be done by carefully peeling it off with a hammer and chisel.
Mark Out and Fit the Floor Plate
The floor plate is the first piece of wood that should be fitted. After marking out how far you would like the wall the extend, cut the wood to size (you should a cut second piece for the ceiling as well) and secure with screws at roughly 900mm centres. Depending on your choice of screws you may need to drill pilot holes to ensure the wood does not split.
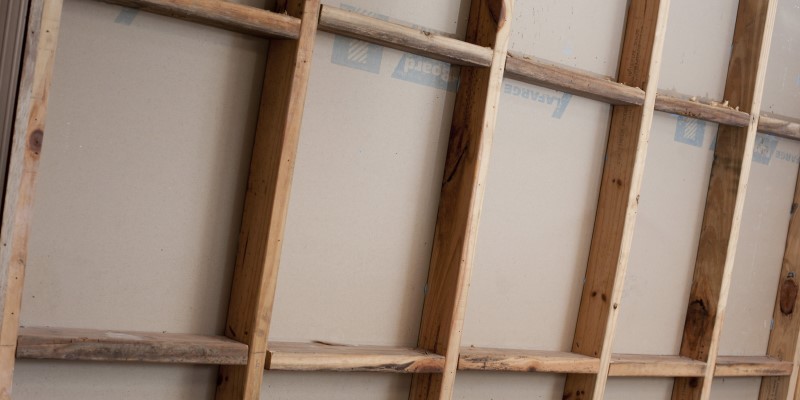
Create Vertical Studs
These studs will fit in-between the floor and head plate and provide an area for the plasterboard to be screwed in to. Place the ceiling plate (timber that will be secured to the ceiling) on top of the floor plate and measure to the ceiling. This will give you the length of your vertical studs. These should be fit at 400mm centres when using 9.5mm plasterboard and at 600mm centres when using 12.5mm plasterboard, with one at each end of the wall. With this in mind, cut the necessary number of vertical studs to size and mark where the centre of these verticals will be on the floor plate.
Fit the Head Plate
Hold the second piece of timber you’ve cut in place on the ceiling (you will likely need a second pair of hands for this) and use a mallet to knock two vertical studs to either end of the wall, creating the wall studs. This should hold the headplate steady so that it can be screwed into place. If you can’t see the trusses in your ceiling or don’t know where they are, it may be necessary to go upstairs or into your loft to remove a floorboard or two so you can locate them. Again, securing your fixings at 900mm centres. This should leave you with a four sided timber frame.
Fit the Vertical Studs
Using the markings you made previously, insert your vertical studs into the frame. Using a spirt level make sure that all the vertices studs are level and plumb. For any adjustments lightly tap with the wooden mallet. Once they are level, secure all studs by drilling in screws at a 45 degree angle through both the floor and ceiling plates.
Fit the Noggins
Noggins are smaller pieces of timber which fit in-between the vertical studs to prevent wobbling. These should be secured using screws where pasteboards will join and at slightly alternate heights to provide easier access when screwing. Noggins at the wall end should be secured with angled screws.
Run Through Any Necessary Wiring or Pipework
Any pipes or wires that need to be run through the wall should be done now, before the plasterboard is fitted. Similarly, if working on a new build the ceiling plaster should be fitted before the walls.
Fit the First Side of Plasterboard
Your plasterboard should be cut to fit so that they can be joined at the centre of the noggins. Screws should be used at 150mm centres at either end of the board.
Fit Insulation
With one side of the wall bordered up you can now install your insulation simply by tightly packing it into the wall cavity. When working with fiberglass insulation be sure to always wear appropriate PPE (gloves and masks).
Fit the Second Side of Plasterboard
As with the first side, the plasterboard should be cut so that they join at the noggins and can be securely supported.
Seal Joins to Finish
The final step is to tape over the joins in the pasteboard using scrim/joining tape before applying a suitable joining compound.
With that, your new stud wall should be complete. A secure and sound resistant start to a new bedroom, office, or bathroom that will almost certainly add great value to your home.