How to Calculate Roof Batten Spacing
Battens play a key role in any pitched roof structure. As the supporting base for your roof tiles or slates, it’s critical that your roof battens are installed correctly to ensure a safe, durable, and aesthetic finish. The first step in doing so is figuring out what roof batten spacing you need. This can be confusing at first, particularly if it’s your first roofing project. Thankfully, calculating the distance between roof battens is actually quite straightforward.
Table of Contents
- What Are Roof Battens?
- How to Calculate Batten Spacing for Roof Tiles
- How Many Metres of Battens are Needed?
- How to Calculate Batten Spacing for Other Kinds of Roof
- Roof Batten Spacing for Slates
- Batten Spacing for Cedar Shingles
- Batten Spacing for Rosemary Roof Tiles
- Batten Spacing for Plain Tiles
- Batten Spacing for Marley Modern Tiles
- Redland 49 Batten Spacing
- Batten Spacing for Concrete Roof Tiles
- Batten Spacing for Corrugated Roof
- Batten Spacing for Polycarbonate Roofing
- Counter Batten Spacing
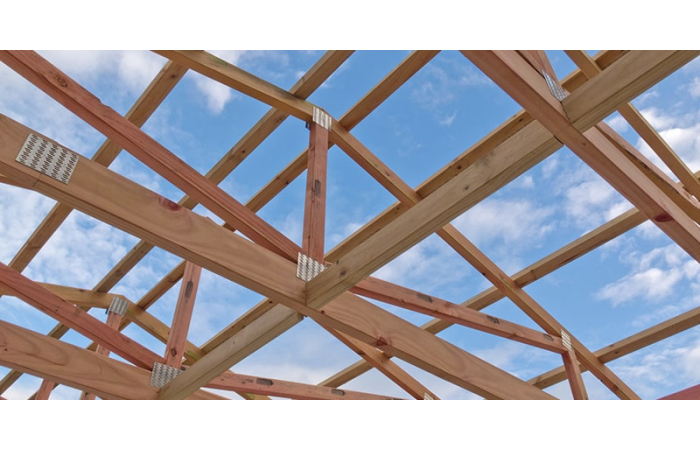
What Are Roof Battens?
Roof battens are lengths of wood that are fixed along the trusses of a roofing structure to form a base on which roof tiles can be hung. As well as providing a robust anchor point for the nailing of slates and tiles, battens can also help to increase ventilation and weather resistance, reduce ice damming, and even reduce heat loss and gain. Battened roofs are also easier to maintain and are capable of withstanding harsh winds without faltering.
How to Calculate Batten Spacing for Roof Tiles
There’s no question that working out the right roof batten spacing is a critically important step, whether you’re building a pitched roof on a new build, or finishing off a refurbishment project by tiling the roof.
The distance between roof battens is often referred to as the batten gauge. Below, we’re going to talk you through a simple and practical method for calculating the correct roof batten spacing for your tiled roof.
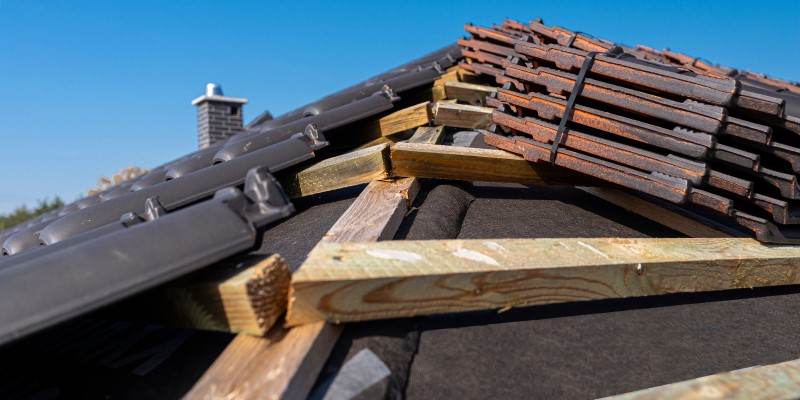
- Start by establishing the position for the first roof batten at the eaves (the lowest point on the roof). Lay a sample tile (not fixed) so that the bottom edge overhangs the fascia and guttering by the amount suggested in the manufacturer’s guidelines. The bottom edge of the tile should stop just short of the gutter centre.
- Measure the length of the tile and note this down. Then, measure the tile nib (from the top of the tile down to the bottom of the nib), and note this measurement down too.
- Subtract the length of the nib and the length of the overhang from the total length of the tile. This will give you the correct distance between the first and second batten, which you can now fix in place.
- Position a batten just below the ridge (the top of the roof) and lay another sample tile onto it. Make sure that the batten is placed so that the ridge tiles will overlap the top course of roof tiles by around 75mm. Once you’re happy that this is correct, fix the batten into place.
- Measure from the top of the lowest batten to the top of the highest batten, then divide this number by the maximum gauge recommended by the manufacturer, and round this up to the nearest whole number. This will tell you how many courses are needed to tile your roof.
- Divide the distance between the top and bottom battens by the number of courses. This will give you the batten spacing for your roof, or its batten gauge.
Example:
- 400mm (length of tile) - 75mm (overhang) – 25mm (nib) = 300mm (distance to next batten)
- After measuring, the distance from top of the bottom batten to top of top batten is 5200mm.
- 5200mm (distance from bottom to top) ÷ 330mm (maximum tile gauge) = 7mm rounded up to 16mm
- 5200mm (distance from bottom to top) ÷ 16mm (number of tile rows) = 325mm
Therefore, the batten spacing for this roof should be 325mm.
How Many Metres of Battens are Needed?
To ensure you have enough battens to cover the square metreage of your roof, you’ll also need to calculate the total length of batten material required. You can do so by following this easy method:
- Measure the length of the eaves for each section of the roof. Note these measurements down separately but do not add them together.
- Multiply the number of rows in each section of the roof by the length of the eaves for that specific section. This will give you the total length of battens needed for each side of the roof. We recommend splitting up your notes to make this step easier.
- To calculate the total length of batten material required for the entire roof structure, add together the lengths of the battens needed for each section. We suggest adding on a few extra lengths of batten to accommodate any potential damage or mistakes.
- If you have measured in feet, convert the measurement to metres.
Example:
- I am measuring a standard two-sided roof structure. Each side has an eaves length of 7m (7000mm) with 15 rows of tiles.
- 7m (eaves length) x 15 (tile rows) = 105m (as both eaves are equal, this is the same calculation for both sides)
- 105m (roof side 1) + 105m (roof side 2) = 210m
For my roof structure, I would need 210 metres of batten material in total (not including extra for damages/mistakes).
How to Calculate Batten Spacing for Other Kinds of Roof
Roof Batten Spacing for Slates
Calculating the batten spacing for roof slates is thankfully quite easy. Simply use the formula below:
Length of Slate – Headlap / 2 = Batten Spacing for Slates
Batten Spacing for Cedar Shingles
The batten spacing for cedar shingles should be the standard batten gauge plus half the thickness of your battens. For a 45° roof, the batten spacing would therefore be 137mm.
Batten Spacing for Rosemary Roof Tiles
The minimum batten spacing for rosemary roof tiles is 88mm, with the maximum spacing being 115mm for a 90° roof.
Batten Spacing for Plain Tiles
When using plain tiles, battens should be fixed to rafters no more than 600mm apart, and should span across at least 3 rafters. We’d recommend using timber battens that are at least 1.2m long. For batten gauges over 200mm, no more than one in four courses of battens should join over a truss.
Batten Spacing for Marley Modern Tiles
The maximum batten gauge recommended for Marley Modern Tiles is 345mm.
Redland 49 Batten Spacing
For Redland 49 roof tiles, we’d recommend batten spacing between 257mm and 307mm, depending upon the pitch of your roof.
Batten Spacing for Concrete Roof Tiles
Just like plain tiles, concrete roof tiles should have a batten spacing of 600mm maximum. If your batten gauge is over 200mm, ensure that only one in four batten courses joins over a truss.
Batten Spacing for Corrugated Roof
When installing a corrugated metal roof, battens (or purlins) should be spaced no further than 1.2m from one another for metal roofing sheets that are 0.7mm thick, and 1m for 0.5mm thick sheets.
Batten Spacing for Polycarbonate Roofing
Most polycarbonate roofing projects will also require battens or purlins to support the sheets. We’d recommend purlin spacing between 800mm and 1000mm for corrugated polycarbonate roof sheets.
Counter Batten Spacing
Counter battens should be installed with the same spacing as the joists in your roof, which is typically no more than 4000mm.
Conclusion
And that’s how you calculate batten spacing! Although it may seem simple, it’s worth taking the time to do this carefully, and double-check your work, as getting the wrong distance between battens can severely affect the aesthetics and longevity of your new roof.
If you’ve still got questions about our range of BS 5534 compliant timber battens, or anything else, get in touch with our award-winning customer service team. Call them on 01295 565 565, email [email protected], or use the handy live chat below.