How to Add a Roof to An Existing Timber Pergola

A timber pergola looks great in the garden, but most are built with an open top - perfect for summer, not so useful when it rains.
The answer? A quick roofing job to transform it into a more usable year-round structure. If the structure is suitable, it’s a pretty easy DIY job.
But if you're not a roofer day-to-day, you'll want to make sure you’ve done the proper planning and know exactly what you need to look out for before you get started. Keep reading for all you need to know about choosing and installing pergola roofing.
In this article:
Before you start: can your pergola support a roof & which roof covering is best?
Prepping the pegola frame for a roof
People commonly come to us for polycarbonate roofing to add to their pergola and this is definitely the most suitable option if you’ve got a basic, timber garden set-up that you picked up from a DIY store (or similar).
If you’ve got a really sturdy timber or metal frame you might have a couple more options like shingles. In general though, polycarbonate is the material you want, to add a quick basic roof.
But not every pergola is built to take any solid roof - and most flat-pack kits are lighter and weaker than they may first appear.
A solid covering adds wind load, which can twist or lift a frame that isn’t firmly anchored.
Your pergola may not be suitable for a fixed polycarbonate roof if:
-
The posts are under 9 × 9 cm, or the frame moves when you push it.
-
The posts sit on top of slabs or spikes rather than being set into the ground or metal post supports.
-
The roof timber beams are very thin or widely spaced, and the top flexes when you press on it.
-
It’s made from untreated softwood or has started to rot where it meets the ground.
These aren’t strict rules, but they’re good indicators. If in doubt, it’s safer to choose a fabric canopy or speak to a professional.
Which polycarbonate is best for a pergola roof?
As mentioned, polycarbonate is generally the safest roof choice for a basic pergola – but there are a few options here.
Corrugated polycarbonate - the straightforward option
This is the best bet for most lightweight, timber pergolas and infrequent or beginner roofers.
It’s light, flexible and easy to fix straight to timber with roofing screws – but it does carry a “cheaper” look that some people don’t like.
Thickness: likely to be around 0.8 - 1mm.
Note: most corrugated polycarbonate/plastic sheets have a blue tinge that isn’t always noticeable in images. They’re still see-through but the slight colour hue often veers towards blue rather than grey.
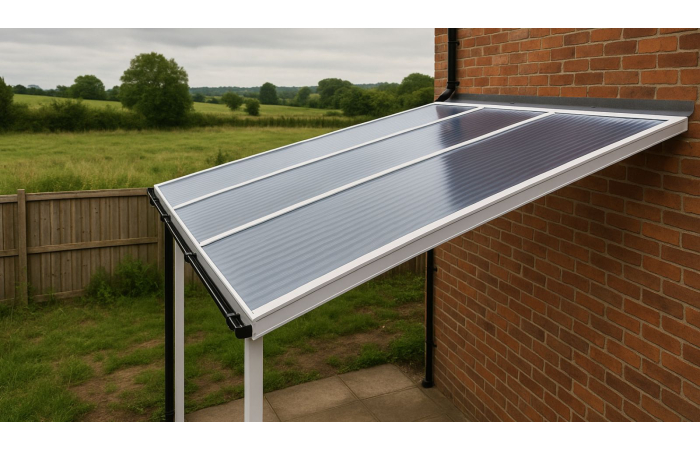
Twinwall Polycarbonate – the neater upgrade
You can use twinwall polycarbonate but it’s better for sturdier, well-built pergolas.
It’s thicker and more rigid than corrugated sheeting, which means it needs glazing bars to fix in place and tighter support spacing underneath.
Thickness: probably 10mm or up to 16mm if the frame is very solid.
PVC vs polycarbonate for a pergola:
You could also use PVC corrugated sheets for your pergola roof – they're a little cheaper and they install in much the same way, but they're not as durable. For a long-lasting roof that can withstand wind and weather, polycarbonate is usually the better choice.
Your pergola wasn’t designed for a roof so it’s important to prep it properly if you want that roof to last a while.
There are 2 main things you probably need to do – create a small slope (assuming the pergola top is currently flat) and add additional supports if necessary.
1. Add a gentle slope to help drainage
A flat roof on your pergola will collect rainwater puddles and cause problems.
You only need a small lean - around 5 to 10 cm of drop per metre of roof depth.
Here’s how to build it in:
-
Choose the right direction – which way do you want the water to run away to?
-
Raise the side – when you’ve chosen the direction, screw an extra length of treated timber (around 25–50 mm thick) on top of the beams along the side you want the water to run down from.
-
Check the fall - use a spirit level or straight edge to make sure the slope runs evenly from one side to the other.
Adding a little height difference is a crucial step to make sure your roof doesn’t end up sagging and failing in (and after) heavy rain.
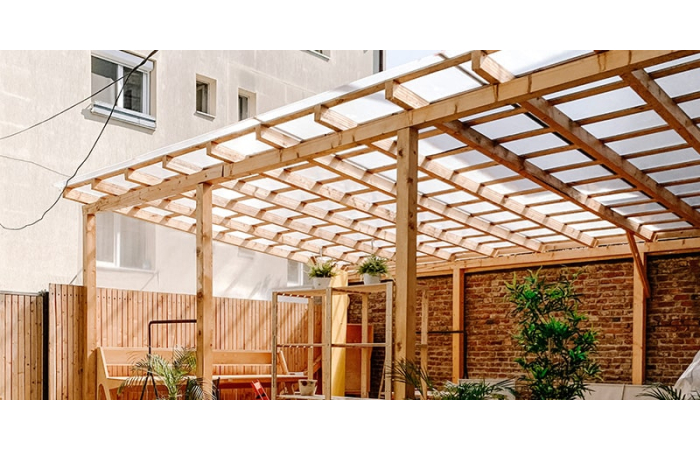
2. Add roof supports
The simple pergolas we’re talking about it in this article may come in a few different configurations across the top. Many will have a single set of beams that run between 2 sides, others might have a more criss-cross pattern.
In general, most of these structures probably need additional supports for the roof sheets – if there’s too much of a gap under the sheets, they’re going to sag and crack.
For polycarbonate sheets, you usually want to fix every 40-60 cm or so (check the manufacturers guidelines for your specific sheets).
For the purpose of this guide we’ve assumed that you’re going for corrugated polycarbonate. These roofing sheets must be overlapped slightly to stay watertight. Here’s what you need to keep in mind:
-
Sheet direction: Corrugations run down the slope. Keep the smooth, UV-protected face upwards and leave the protective film on until the roof is fully fixed.
-
Overlaps: Sheets should usually overlap by one ridge at the sides. Most pergolas only need one sheet per slope - but if yours is deeper, you’ll need a second row with a 150–200 mm end overlap (upper over lower).
-
Fixings: Drill through the peaks of the corrugations, not the valleys. Holes should be slightly wider than the screw shaft to allow for movement in warm weather.
-
Supports: Sheets should be fixed into each batten or support, spaced roughly 400–600 mm apart along the slope.
-
Trims and gutters: If you want a cleaner finish or better water control, you can add side trims or a short gutter along the lower edge.
-
Wall detail: For pergolas fixed to a wall, a simple flashing strip will help stop water tracking in behind the top edge.
-
Sealant and timber protection: A clear outdoor sealant can help close small gaps where sheets meet the frame. Once the roof’s on, it’s worth giving the timber a fresh coat of preservative or paint — it’ll stay wetter for longer under a roof.
Always check the manufacturer guidance for your chosen sheets for the most accurate guidance.
Step 1: Position the first sheet
- Start at the lower edge of the pergola, where rainwater will run off.
- Set the first sheet in place with the correct side overlap and check that the bottom edge runs straight across the front.
- Add one or two temporary fixings to hold it in position.
Step 2: Add the next sheet
- Position the next sheet alongside the first, overlapping by one ridge.
- Check that the lower edge lines up cleanly before drilling and lightly fixing it.
- Once both sheets are aligned, go back and finish fixing the first sheet.
- Don't over-tighten the screws.
Step 3: Fix as you go
- Work across the width of the roof, one sheet at a time.
- Keep checking alignment as you go to prevent the line drifting.
Step 4: Finish the edges
Fit any trims you’ve chosen - side fascia, drip trims, or guttering - once all sheets are fixed. For pergolas that meet a wall, install a flashing strip across the top edge to prevent water tracking behind the sheets.
Step 5: Seal and protect the timber
Apply a clear bead of exterior sealant where needed between the sheet edges and the frame. Once the roof is complete, recoat the timber with wood preservative or paint to protect it from prolonged moisture exposure.
In general, as long as you’ve overlapped and fixed the sheets properly, plus made sure there’s a slope for water drainage, most lightweight roofing like polycarbonate will handle the British weather just fine.
Strong wind can lift them if fixings aren’t in properly or have come loose so keep an eye on them and give them a check before winter hits.
Heavy snow isn't usually too much of an issue for most of the UK but if it's very heavy and prolonged, it could cause sagging and cracking. Clear build-up early and regularly (where possible) and add more timber supports across the top of the pergola before adding the roof if you think snow could be an issue.
Where to next?
Adding a roof to a pergola doesn't have to be a professional roofing job, it just takes planning. Pick a light covering, give it a proper slope and fix it firmly. Do that and you’ll have a covered garden space that stays bright, dry, and ready to use all year round.
Explore more guides or shop products below.