How to Install Metal Roofing – And Decide if You Should DIY or Hire a Pro
Thinking about fitting metal roofing yourself? It’s a solid option in some cases for confident DIYers or generalist trades - but it’s not a job to wing.
This guide is designed to help you understand the typical steps involved - how to plan properly, how to install safely and, crucially, how to decide if it’s something you should take on - or leave to a professional.
In this article:
It’s possible to fit metal roofing yourself - and many people do - but only where the structure, tools and conditions are suitable. It’s not like putting up a shed. The sheets are heavier, the fixings more precise and there’s more that can go wrong if your layout or handling is off.
If you’ve done basic roofing before - or you’re a confident DIYer or generalist tradesperson - you might find it a manageable step up but make sure you’re clear about what’s involved:
-
You’ll need help: Metal sheets are long and sharp-edged - often 3m or more. You can’t lift, align or fix them safely on your own.
-
You’ll be working at height: A step ladder won’t cut it. You’ll need proper access - like a scaffold tower or mobile platform.
-
You’ll need a solid, level base: The roof structure must be suitable for metal sheets - not just “close enough”.
-
Precision matters: Small mistakes with spacing or fixings can lead to leaks, rust or wind damage.
-
Mistakes can void warranties: Many manufacturer warranties depend on sheets being installed to spec - including overlaps, fixings and support spacing.
If you’re roofing a single-storey garage, lean-to or small outbuilding and you’ve got some DIY experience, it may be doable with planning and help.
For larger roofs, taller buildings, or exposed sites, it’s often more sensible to hire a roofer - or at least bring in someone experienced to help.
(!) This guide outlines a general install method. It doesn’t cover every variable or site-specific risk. It’s your responsibility to ensure that any work is carried out safely and appropriately for your structure. If unsure, always seek professional advice.
This part is critical. Success doesn’t come down to how well you drill - it’s about planning properly.
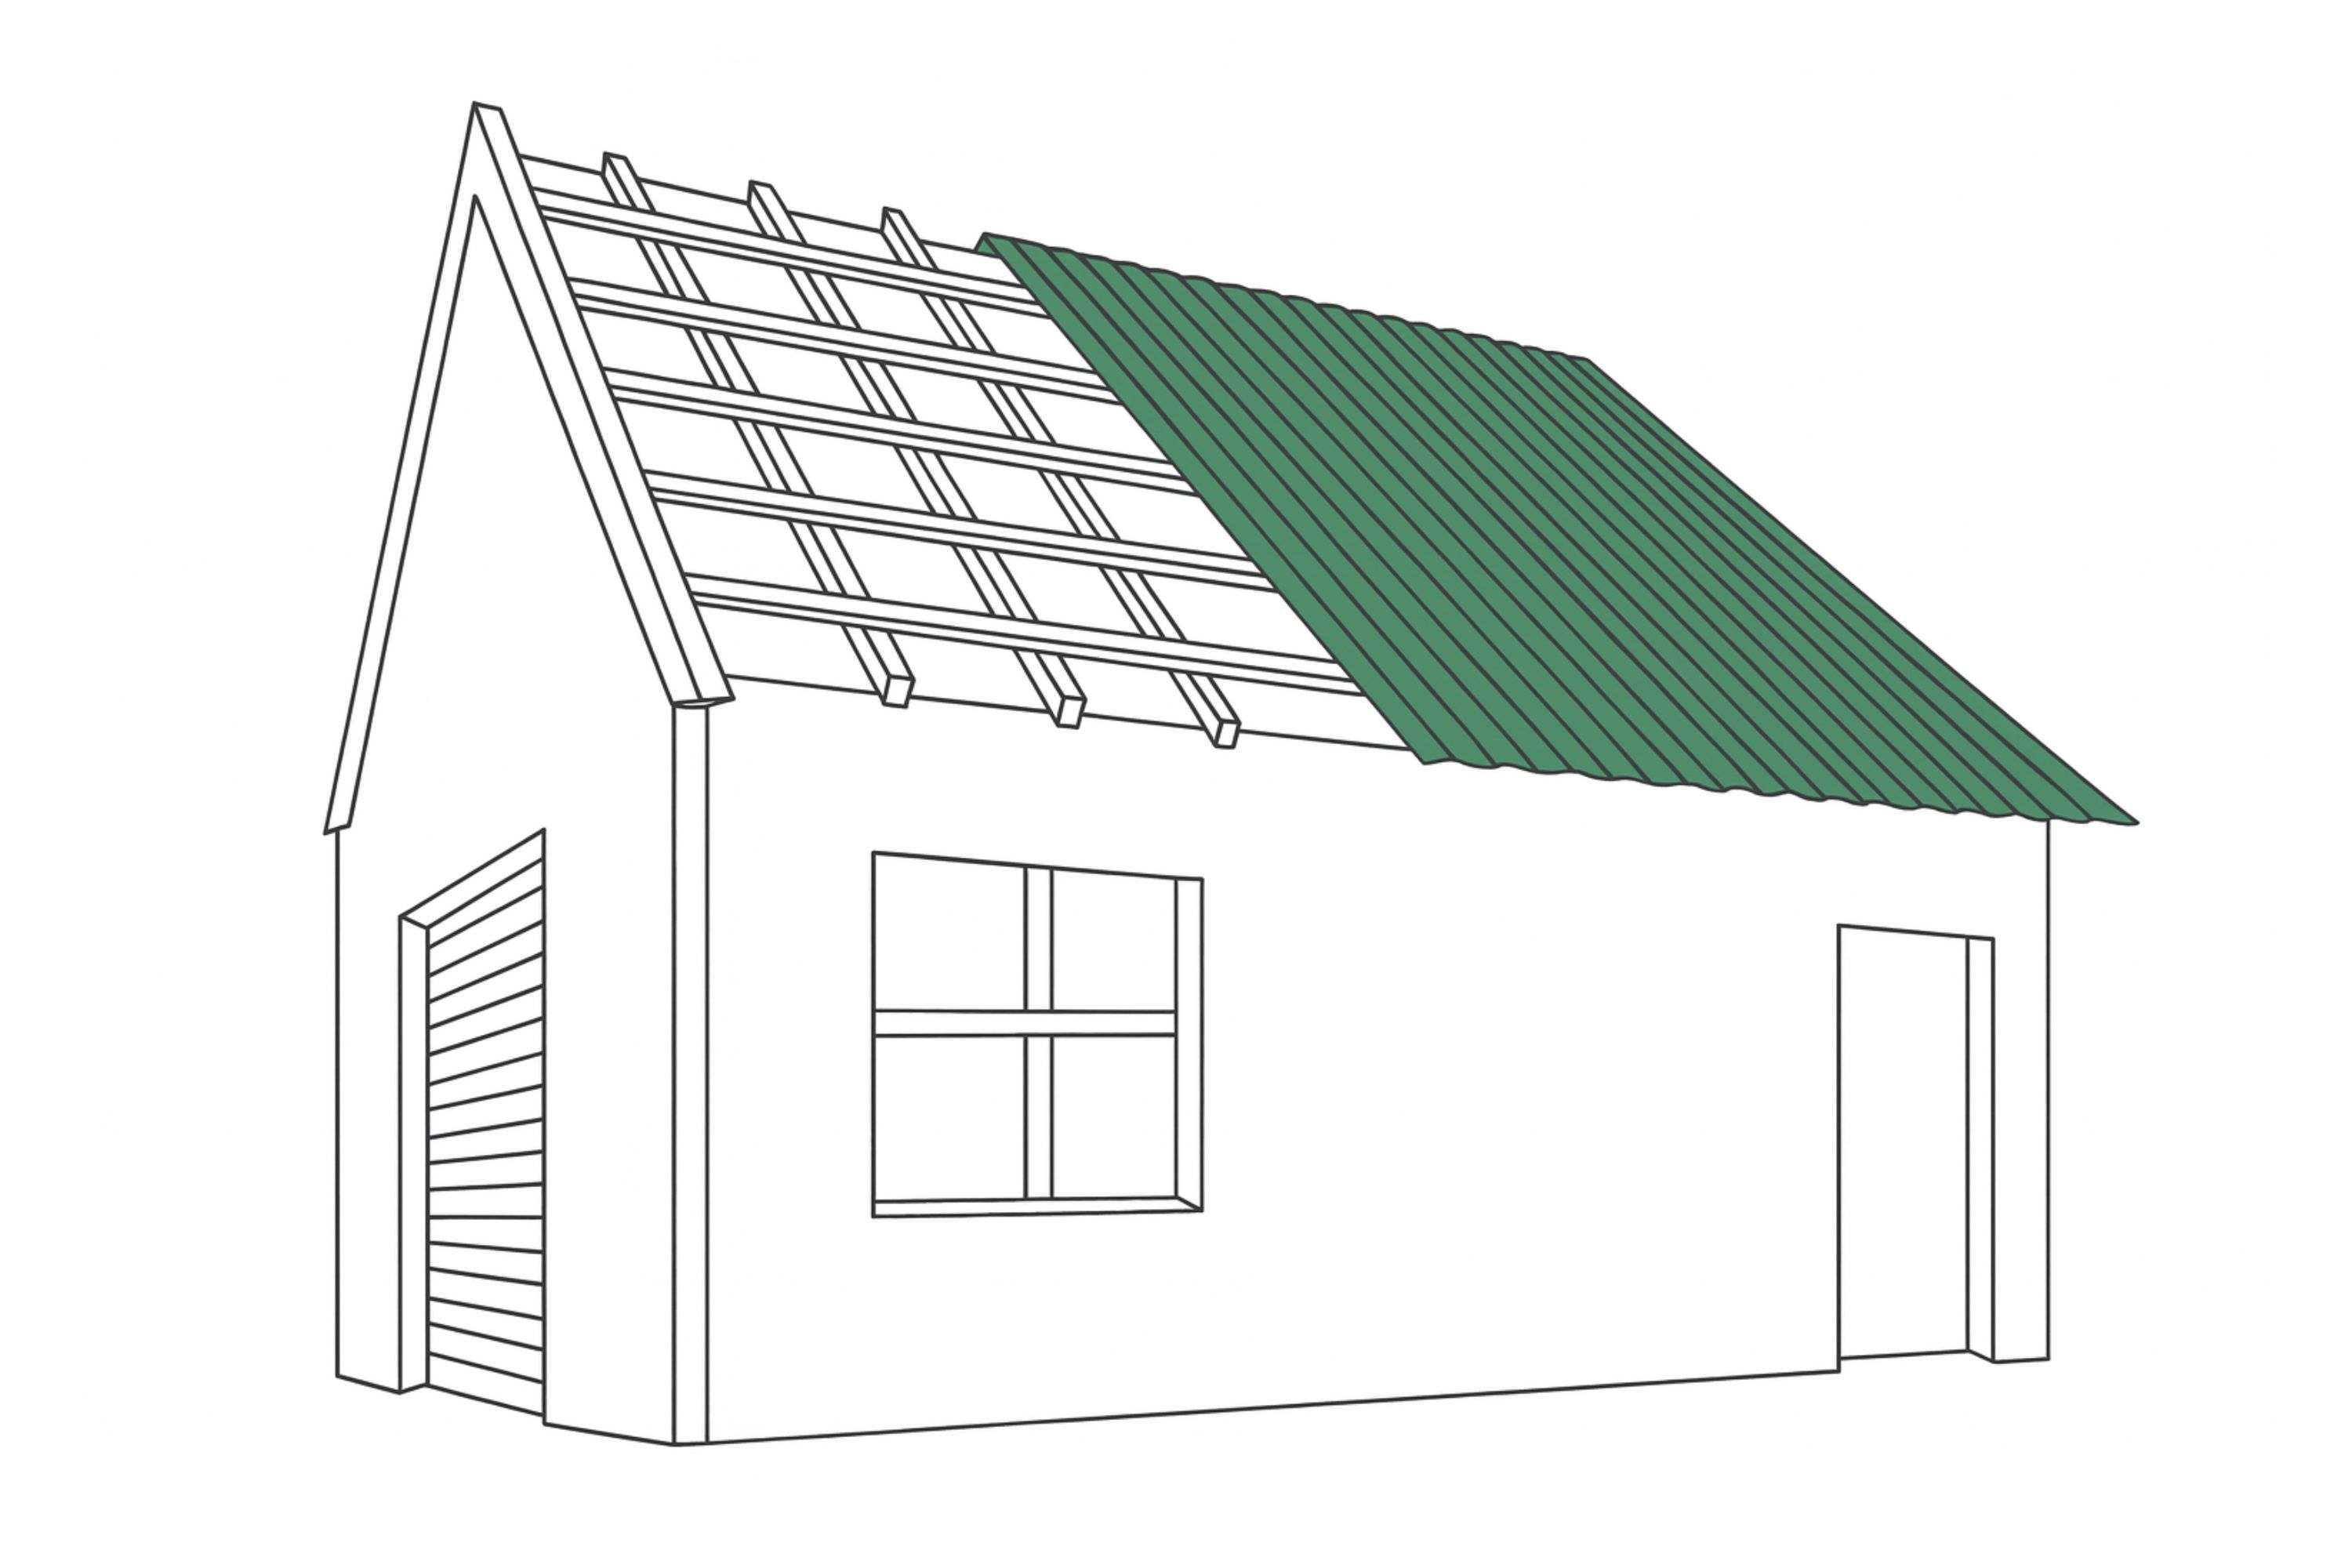
Metal sheets are designed to overlap – it’s what enables them to shed water effectively, (provided they’re installed to spec and suited to the build). You need to plan this in from the start, as it affects how many sheets you need, your batten layout (see next section) and where trims or cuts will be required.
-
Side overlaps: you will overlap each sheet by one full corrugation (for corrugated sheets) or one full rib (for box profile).
-
End overlaps: If the roof is taller than one sheet, allow at least 250mm where one sheet overlaps another. The join must land on a batten.
-
Eaves overhang: allow 50–70mm at the bottom to guide rain into the gutter or away from the wall.
Note when buying sheets – Always check the cover width, not just the total width. This is the actual coverage once the side overlaps are taken into account and it’s what you should use when working out how many sheets you’ll need. Most sheets have standard widths, but lengths can often be cut to size when ordering – in any case, it’s always the “cover” dimensions you need to look out for.
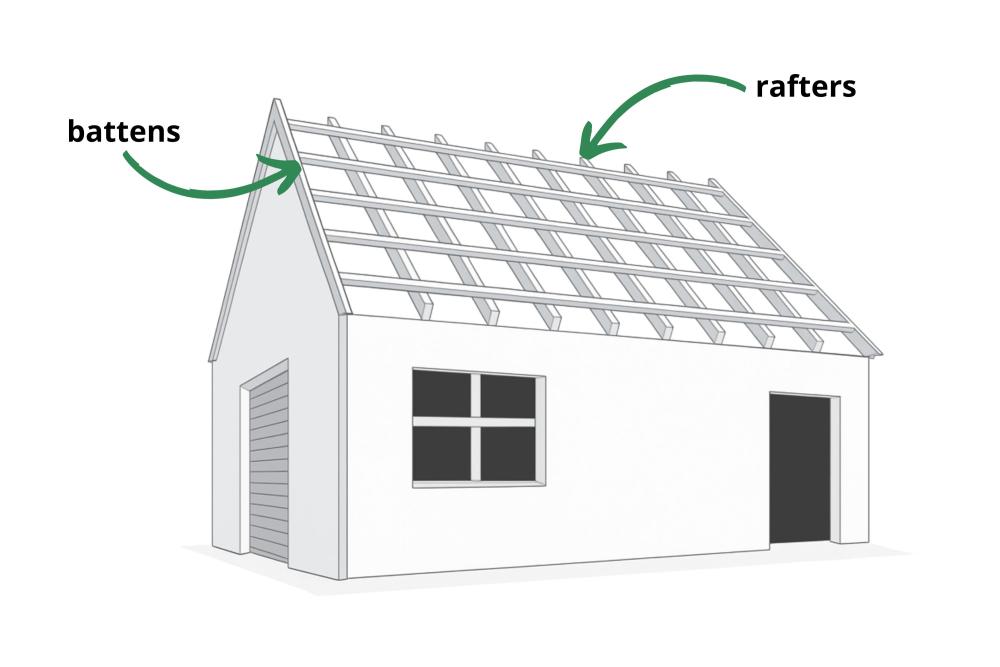
You can’t fix metal sheets straight onto rafters. You need horizontal supports underneath - usually timber battens, or in larger builds, purlins - to give you solid fixing points.
Battens vs Purlins
- Battens are smaller timber supports fixed across rafters - common on sheds, lean-tos and garages.
- Purlins are chunkier (often steel) supports that span wider gaps - usually found on barns or industrial unit roofing.
Both do the same job: they’re what you screw your sheets into.
What you’ll need depends on the structure you’re working with:
|
Project Type |
What You’ll Likely Find |
What You May Need to Do |
|
New builds |
Rafters only |
Add battens across the rafters |
|
Replacing felt/tiles/bitumen |
Battens may already be in place |
Check spacing, timber strength, and fixings |
|
Barns or industrial/commercial units |
Timber or steel purlins |
Confirm they’re secure and evenly spaced |
|
Over-sheeting old roofs |
Battens may be fixed over old roof |
Reuse only if flat, level and fully secure |
Batten spacing:
-
For 0.5mm sheets → max 1m
-
For 0.7mm sheets → up to 1.2m
Tip: If your roof has a peak (where two sides meet at the top), make sure there’s a batten running underneath it.
You’ll need this as a secure fixing point for the ridge caps (the pieces that cover and seal the top of your roof). It’s especially important on open or windy sites where weatherproofing matters most.
Your sheets should be cut to size before you begin installation - either when ordering or as part of your prep. That said, you may still need to trim a few during fitting (e.g. around vents or at the roof edge).
When trimming during fitting:
• Use tin snips for small or awkward cuts
• Always wear gloves - cut edges are sharp
• Brush off filings to prevent rust
• Only trim when safely positioned - never cut while balancing or crouched on the roof
Use proper roofing screws - the type with rubber washers. They’re made for jobs like this and help seal the sheet down tight. Don’t use general-purpose fixings - they’re not made for roofing and often don’t grip or seal well enough.
For Corrugated Sheets:
-
You’ll fix through the ridge (high point) - this avoids water pooling around the screw in the dips
-
In most cases you’ll need longer screws: 60–75mm- long enough to fix from the ridge and through overlapping sheets
-
Fix every 3rd ridge per batten
-
At the eaves: fix every ridge
For Box Profile Sheets:
-
You’ll fix through the valley (flat section) - water runs off quickly, so fixings won’t trap moisture
-
In most cases you’ll need shorter screws: 35–50mm - long enough to fix from the valley and through overlapping sheets
-
Fix every 2nd valley per batten
-
At the eaves: fix every valley
Finishing Elements to Plan For:
These extras help seal and protect your roof - make sure you’ve got the right type for your sheet profile and roof shape.
-
Foam fillers: Sit under the sheet at the eaves and beneath ridge caps. They block wind, rain and pests from getting through the profile gaps.
-
Ridge caps: Used to cover and seal the peak on pitched roofs.
-
Barge boards: Fitted at the gable ends (the vertical sides of a pitched roof) to close off the sheet edges and stop wind lifting the roof. Not needed on mono-pitch or lean-to roofs without gable ends.
This installation method can be suitable for smaller jobs - like garages, lean-tos or outbuildings - where access is straightforward and risks are low.
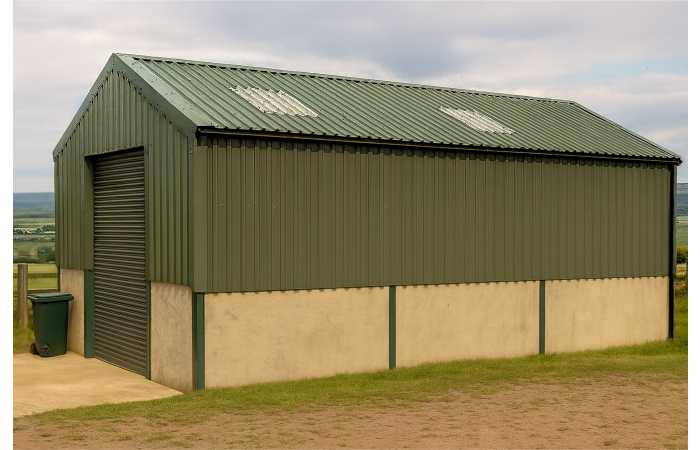
If you're roofing larger or taller buildings (such as agricultural buildings or warehouses), the basic steps may still apply, but the scale, handling and safety requirements often make it a job best left to a professional.
1. Start at the Bottom Corner
-
Begin on the bottom edge of the roof, starting in the corner most sheltered from the wind
-
Overhang the eaves by 50–70mm
-
Line the first sheet up carefully and check it’s square - this sets the direction for the rest
2. Lay and Fix the First Row
-
Work across the roof from your starting sheet
-
Overlap each one by:
→ 1 full corrugation (corrugated)
→ 1 full rib (box profile)
-
Fix to the battens as you go:
→ Corrugated: through the ridge, every 3rd ridge
→ Box profile: through the valley, every 2nd valley
-
At the eaves, fix every ridge or valley
-
Check alignment every few sheets to stay on course
3. Continue with the Second Row
-
Overlap each upper sheet over the one below by at least 250mm
-
This joint should land on a batten so it can be securely fixed
-
Follow the same fixing pattern as row one
-
Work upwards in full rows
4. Trim Sheets Where Needed
-
If you reach a wall, vent, or beam, trim sheets in place using tin snips. Only trim sheets when working from a stable, supported surface - never attempt cutting while standing or crouched on an unsupported roof area.
-
Always clean away filings and handle with care - cut edges can be sharp
5. Add Trims and Finish
Once your sheets are fixed, add the final elements to seal and protect the roof:
-
Foam fillers: Fit under the sheets at the eaves and under ridge caps if you’re capping a ridge.
-
Ridge caps: Overlap each one by 150mm and fix through the high points of the sheets. Ideally, fix into a ridge batten. If no ridge batten is present, fixing through both sheets may be necessary - but take extra care to ensure a watertight and secure seal.
-
Barge boards: Fit at the gable ends to close off the sides and reduce wind uplift. Fix through the sheet high points and into the battens behind, or into a structural frame if no batten is available.
Fix all trims securely - they’re designed to support the roof’s shape and help protect against the weather when installed properly
-
Crooked first sheet: If the first sheet’s not straight, the whole roof will follow its line. Use a chalk line and check alignment before fixing.
-
Too little overlap: Go shorter than 250mm (end) or one full corrugation/rib (side) and you risk leaks.
-
Overtightened screws: If the washer’s crushed or split, it won’t seal - tighten just enough to compress it.
-
Dragging sheets: Always lift and place - dragging can scratch the coating, which can lead to rust.
-
Skipping fillers: Gaps under the sheet shape can let in draughts, pests and water. Use foam fillers at the eaves and ridge to block them.
(!) Note: Manufacturer warranties may only apply if sheets are fixed to the correct spec - including spacing, overlaps and recommended fixings. Always check before starting.
Done Right, It’s a Solid Roof for Years
Fitting metal sheets isn’t always straightforward - but with careful planning, the right setup and some prior experience, it can be achievable for smaller projects.
This guide outlines the general steps, but every roof is different. Always make sure your approach is safe and suitable for your specific build. If you’re unsure at any point, it’s worth getting expert advice.
Where to next?
Ready to shop metal roofing products? Browse here:
If you’re still choosing your sheets, or need more detail on materials, we’ve got guides to help: