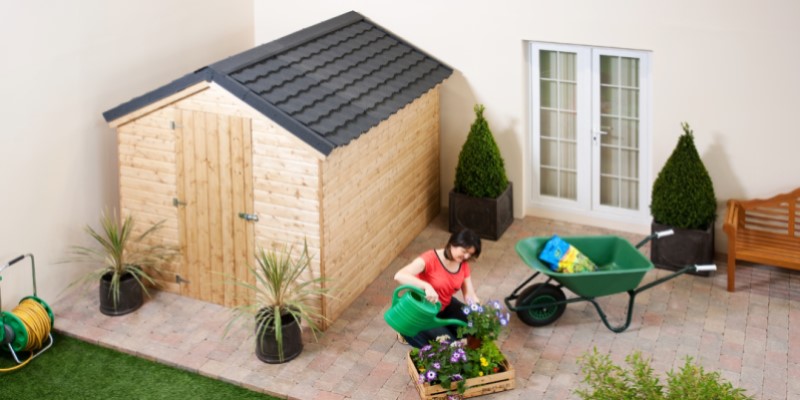
How to Roof a Shed With Corrugated Sheets
Boasting a number of functional benefits and practical properties, corrugated roofing sheets are the perfect roofing solution for a multitude of different structures. A highly durable build, long-lasting reliability and easy installation make corrugated roofing sheets a widely utilised material by both professional roofers and seasoned DIYers. Spotted in gardens, allotments and other outdoor areas across the country, corrugated sheets are frequently fitted on garden shed roofs.
Why is Corrugated Roofing a Popular Option for Sheds?
Garden sheds require a robust and durable roofing solution that is still lightweight enough for the structure to withstand. Corrugated roofing sheets are perfect for this. The “wriggly” profile of corrugated sheets not only creates a traditional look, but also significantly enhances impact resistance, whilst protecting the contents of your shed from harsh weather conditions. This type of sheet can weigh as little as 5kg per sheet, so is ideal for even the lightest of timber structures.
In terms of affordability, corrugated roofing sheets are one of the most cost-effective roofing materials for this type of project. They run as cheap as £5 per square metre and require no professional installation meaning fitting and labour costs are slashed also. Corrugated roofing can last from 10 anywhere up to 100 years with correct fitting and care, meaning you won’t have to worry about constant replacement and repairs.
So, How Do I Install Corrugated Roofing on a Shed?
As previously mentioned, one of the fundamental advantages to corrugated roofing is its ease of installation. In this article, we will talk you through the step-by step process of how to roof a shed with corrugated sheets. The two types of corrugated roofing we will focus on are metal and bitumen sheets.
How to Replace a Shed Felt Roof with Corrugated Roofing Sheets
If you are upgrading your existing shed felt roof with corrugated roofing sheets, you may be able to keep the current material in place. This will depend on its condition and the type of corrugating roofing you are installing.
Traditional roofing felt is often fitted below corrugated material as a layer of ‘insulation’ for the shed roof. If you have existing felt in place that is undamaged and in good condition, then you can simply skip the re-felting stage.
However, if your shed felt is in need of replacement or is not needed for the type of sheets you are using, then you will need to remove them.
This is a quick and easy process as shown below.
- Locate & Pry Old Nails
Firstly, you need to remove the old nails securing the felt to the roof. Using a claw hammer or small pry bar, pry loose the existing nails. Ensure you wear goggles and protective gloves whilst doing so.
If any of the nail heads break off whilst prying, simply hammer them below the surface to hide.
- Rip up Old Felt
Using a Stanley knife, cut into the old felt and begin ripping up in sections. Be careful not to damage the structure beneath.
- Remove Grit, Dirt & Debris
Remove any leftover nails, grit, dirt or debris from the shed roof.
How to Install Corrugated Metal Roofing on a Shed
What Will I Need?
- Corrugated metal roofing sheets
- Workbench
- Pencil/pen
- Tape measure
- Tin snips/straight edge snips
- Roofing felt
- Screwdriver
- Utility knife
- Roofing staples
- 1 1/2 inch screws & washers
- Roofing caulk/cement
- Polyurethane sealer
Step-by-Step
- Measuring the Roof
To ensure you have the right sized metal corrugated roof sheets for your shed structure, you will first need to measure up the roof space. Simply measure the slope length and width of the roof using a tape measure, then multiply these measurements together. For roof structures with a peak, you will need to take measurements for both of the different sides.
To account for overlap, make sure you measure for slightly more sheet material than would precisely fit your roof. A practical overlap to aim for is around 4 inches.
To help you out in finding the right size corrugated sheets for your project, why not have a go of our handy roofing calculator. Just input the slope length and width of your roof, select your required sheet thickness, colour and finish, and then let the calculator do the rest of the work for you.
- Cutting to Size
After purchasing your corrugated metal sheets, you may find that they need to be cut to size perfectly to fit your shed roof. There are a few different tools you could use for this, although the easiest option for DIYers is tin snips for aluminium sheets and straight edge snips for steel.
After securely positioning the sheet on a stable workbench surface, measure it carefully and mark up a guideline. Use the appropriate tool to cut along the cutting line, making sure to double-check your measurements beforehand.
For more information on how to cut your corrugated sheets, check out our guide on ‘How to Cut Corrugated Roofing’ here.
- Roofing Felt
Fitting a layer of roofing felt prior to installing the corrugated metal will act as a layer of insulation for your shed roof structure. Measure the roofing felt to fit the roof space and cut to size using a utility knife.
Lay the felt horizontally across the deck of the roof and secure using roofing staples. For a robust and secure fit, overlap the layers of felt by a minimum of 4 inches.
- Beginning Installation
Position the first corrugated metal sheet in the bottom corner of the roof. Making sure it overhangs by at least 4 inches, add screws every 8 inches along the outside edge and bottom of the sheet. Use a screwdriver to fix the 1 1/2 inch screws, sliding washers onto each and screwing just tight enough to hold the sheet in place securely.
- First Side
After fitting the first sheet, continue working across from the bottom corner. Overlap the next sheet with the previous by at least one rounded corrugation to help weatherproof the structure. Once again, add the screws 8 inches apart into the overlapped edge and the bottom of the sheet.
When you reach the final sheet in a row, you may find that you need to further cut the sheet to size. Remembering to keep at least 4 inches of overlap, use a saw, tin snips or straight edge snips to cut carefully.
Continue adding rows until you have covered the first side of your shed roof. When fitting a row above another, overlap the row underneath by 4 inches.
- Second Side
Now it’s time to repeat the process on the other side of your shed roof. Remember to overlap the sheets when installing to increase the resilience and weatherproofing of the structure.
- Ridge Cap
With both sides completed, you now need to provide protection for the top of the shed roof. You can do this by fitting a peaked ridge cap. To install, position carefully in place on top of the roof, making sure the cap overlaps the rows of sheeting below on each side. Securely fix into place using the same 1 1/2 inch screws and washers.
- Roof Seams & Sealer
To make sure no seams are exposed, use roofing caulk or cement to fill. Leave this to dry for at least 12 hours. Although this step is optional, to ensure optimum durability and protection for your shed roof, you may want to paint or spray the structure with a clear-coat polyurethane sealer.
How to Install Corrugated Bitumen Roofing on a Shed
What Will I Need?
- Corrugated bitumen roofing sheets
- Tape measure
- Straight edge ruler
- Pencil/chalk
- Workbench
- Tin snips/Stanley knife/course bladed saw/circular saw
- Nails
- Hammer
Step-by-Step
- Measuring the Roof
The very first step is to measure out the slope and width of your roof. After finding the slope, you can pinpoint the minimum level of support required underneath the sheets, as well as the corrugation ends and amount of fixings needed for installation.
For roof slopes 15° and higher
- Fix on purlins at maximum centres of 61cm
- Corrugation end lap – 17cm
- Corrugation side lap – one corrugation
- Amount of nails per sheet - 20
For roof slopes 10° to 15°
- Fix on purlins at maximum centres of 45cm
- Corrugation end lap – 20cm
- Corrugation side lap – one corrugation
- Amount of nails per sheet – 25
For roof slopes 5° to 10°
- Laid on fully supporting roof deck
- Corrugation end lap – 30cm
- Corrugation side lap – two corrugations
- Amount of nails per sheet - 20
How Many Sheets?
To work out how many corrugated bitumen sheets you will require as well as fixings, you should look to using a roofing calculator. Simply enter your roof slope and width then let the calculator work out the tricky bit for you.
Remember you can always cut sheets to size, so it is always better to go slightly larger than smaller.
- Roof Preparation
Before fitting the bitumen corrugated sheets, you must make sure that the roof is fully prepared for installation. When working with a solid decked roof, inspect to ensure the structure is in good condition.
Check that the deck is at least 20mm thick to provide a solid base to accept the nails when fixing. If the thickness is below 20mm, you can fix battens, boarding or just substitute the nails with screws.
You might need to install an extra purlin at the ridge point to hold the ridge fixings later on in the installation process.
- Cutting to Size
After purchasing and positioning the sheets, you may find that they need to be cut to size. All you need for cutting is a tape measure, straight edge ruler, pencil or chalk, workbench surface and a cutting tool.
Use the measuring tape to carefully measure out the sheet, then create markings at each end. Join the marks straight across using your ruler, ensuring optimum accuracy whilst doing so.
For cutting into a more complex shape it is best to use well-oiled tin snips. Alternatively, for cutting lengthwise use a Stanley knife or course bladed saw and for cutting across the width, use a course bladed saw or circular saw.
- First Sheet
Now you are ready to fit the first sheet. You need to make sure that the sheets overhang by at least 5cm to form a drip edge. Reducing the fixing centre up to the first purlin from the eaves will help you to accommodate this 5cm overhang.
Position the sheet square to the eaves line and verge, remembering to allow for the overlap. Nail the sheet edges first.
To secure the bitumen sheet, fix a nail through the washer from on top of the sheet down into the beam beneath. The nail should penetrate the purlin by around 20mm. Clip the integral cap onto the washer to seal.
- Continue the First Side
Referring to the previous roof slope guide, continue fitting the rest of the bitumen sheets across the first side of the shed roof with the required side lap. Remember to position square to the line of the eaves and verge.
- Verge Barge Board
There are two possible methods for fixing the verge barge board:
- Position the verge barge board within the last sheet corrugation. Fix into place, then fold over the board. Secure into the board using 10mm galvanised clout nails at 15mm centres.
- Position the verge barge board level with the top of the purlins and fix. Overlap the bitumen sheet by 5mm off of the roof edge, then fix with nails at every purlin.
- Second Side
Repeat the installation method for the second side of the shed roof. When both sides are completed, secure the sheets to the ridge line.
- Ridge Board
Next, it’s time to install the ridge piece. Using the pre-formed end lap grooves on the ridge piece, define the end lap and fix onto the roof. Secure to one side of the roof slope, then carefully bend the ridge over to the opposite side. Fix the ridge pieces with nails at every other corrugation.
- Timber Finial
Mark and cut out a treated timber finial to complete the ridge end. Position the timber finial so that the ridge piece overlaps. Then, fix onto the verge barge boards to finish.
To Conclude
Quick and easy to install, corrugated roofing sheets provide the perfect solution for DIY shed roof replacement. If this post has inspired you to start your own corrugated roofing project, why not take a look through the fantastic range of corrugated roofing now available at Roofing Megastore. We stock a variety of corrugated sheet materials from leading brands at brilliantly affordable prices.
For any further questions or queries, just get in touch with our friendly customer service team who will be more than happy to help. Simple give them a call on 01295 565565, email [email protected], or leave a message in our handy live chat.