How to Install Corrugated Bitumen Roof Sheets
Corrugated bitumen sheets are one of the more straightforward roofing materials to work with if you're not a roofing specialist - this guide will help you work out what you need to prep, what the general installation steps are and whether it's realistically a job you want to take on yourself.
In this article:
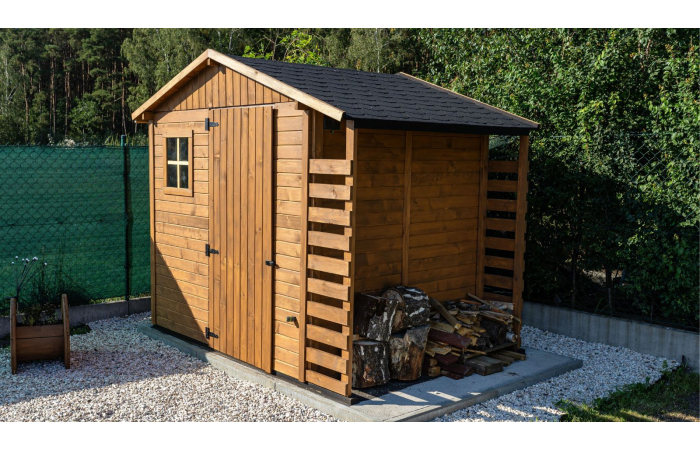
Bitumen sheets are often used for smaller DIY jobs like re-covering a shed or lean-to, so it’s quite common for them to be fitted by homeowners.
But if the roof needs any kind of rebuilding (like replacing the underlying support structure) or you’re not confident working at height, it might be worth bringing someone in. You don’t necessarily need a roofing specialist - a lot of handymen or general builders should be able to fit bitumen sheets as part of a wider job (depending on the size of the project).
(!) The information in this guide is general advice – always follow manufacturer guidance for the sheets you buy and if in doubt, consult a professional.
Before you buy your sheets, there are a few key checks to keep in mind.
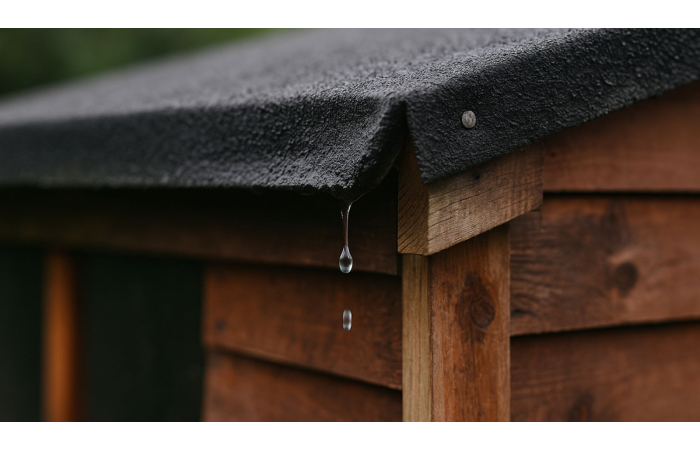
Bitumen sheets should only be used on a pitched roof - at least a 5° slope minimum, but ideally 10–15° for better longterm performance. Anything flatter will struggle to shed water and is likely to leak over time.
Bitumen sheets are lightweight but not that rigid, so they can’t span very wide gaps and they need a lot of support underneath. This is usually in the form of solid timber boards (like OSB or planks), or closely spaced timber battens (thinner strips of wood) no more than 40 cm apart. Most sheds and garden buildings already have boards, which are fine for fitting onto.
If the existing boards are obviously sagging, cracked or otherwise look unstable, you’ll need to get these replaced before you can do any sheet fitting.
If you’re re-roofing an existing shed, you can sometimes fit over old roofing felt - but only if the existing structure setup is completely sound, as above.
In most cases it’s safer and easier to strip everything back to the boards before starting. Never try to fix new bitumen sheets over old ones.
When you come to install, each bitumen sheet will overlap the next one, both side-to-side and up the slope (if you're using more than one row of sheets - unlikely for most small garden building roof jobs.).
The sheet width that shows once they’re overlapped is called the cover width. This is the dimension you need, to work out how many sheets to buy - don’t get it confused with the total width of the sheet, which is often shown first on a product page.
Measure the width of your roof and divide it by the cover width to work out how many sheets you’ll need across.
Where applicable, you'll also need about 15–20 cm overlap where one row sits above another.
If your measurements show the last sheet would only leave a thin strip (for example, less than 30 cm wide), adjust your layout before cutting. You can trim a small amount off the first sheet and last sheet, so both edges finish with similar-sized sheets rather than one narrow piece at the end.
This plan should be made before ordering but also double-check your measurements again before you start cutting or fixing.
For the easiest way to work out what you need, try our bitumen sheet calculator here – you can e-mail your results and refer back to them easily at any time.

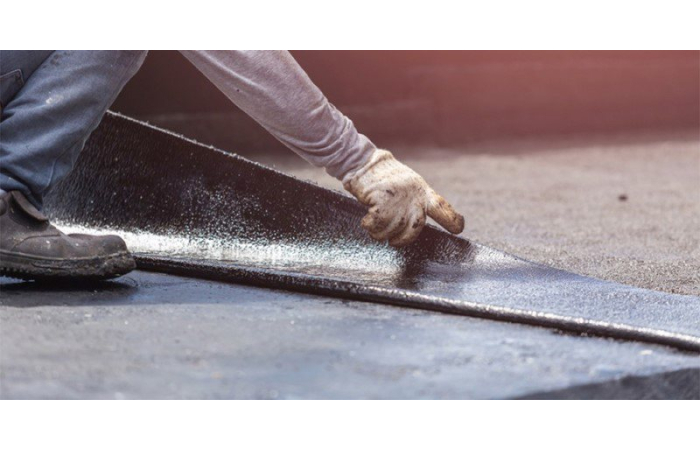
Bitumen sheets most often come in standard sizes and can usually be cut with basic tools where needed. But these sheets are reasonably flexible and can split or fray if handled roughly or cut while unsupported, so due care is needed.
If you’re not sure how your sheets will handle, test a small offcut first or check the manufacturer’s guidance before cutting.
Important before you start:
-
Always wear gloves and eye protection - edges can be sharp and some sheets may shed fibres
-
Only cut from a safe, stable surface - never attempt to cut a sheet that’s loosely supported or part-fixed
-
Avoid power tools unless you’re experienced - they can snag or melt the material if used incorrectly
Best tools for DIY cuts:
-
For most jobs, a coarse-toothed, standard handsaw is the easiest and safest tool
-
A Stanley knife can work on thinner sheets, but it takes pressure and control
-
For small notches or awkward shapes, tin snips give better precision
Score and snap?
Some online guides mention scoring with a utility knife and snapping the sheet. In reality, this only works well on thinner sheets and even then, it takes force and control. It’s not always straightforward or safe and can result in sharp, uneven edges or uncontrolled breaking, so it's not recommended for beginners.
Bitumen sheets need the right fixings and a few extra parts to seal the roof properly.
-
Ridge pieces - for apex roofs, to cover the join at the top
-
Verge trims or bargeboards - close off the sides and help stop wind lifting the edges
You’ll normally need all of these, even on a simple shed roof. Skipping them can leave the roof exposed to wind or rain damage later.
This fitting method is a general approach that applies to re-roofing small, single-storey structures like sheds, lean-tos and garden stores. It assumes you’ve already planned your layout, checked the roof structure, prepared your sheets and fixings - and chosen a suitably calm and still day (never try and fit roof sheets in windy weather). Always ensure you take appropriate safety precautions when working at height and refer to the product manufacturer’s fitting instructions for specific guidance when you purchase your sheets.
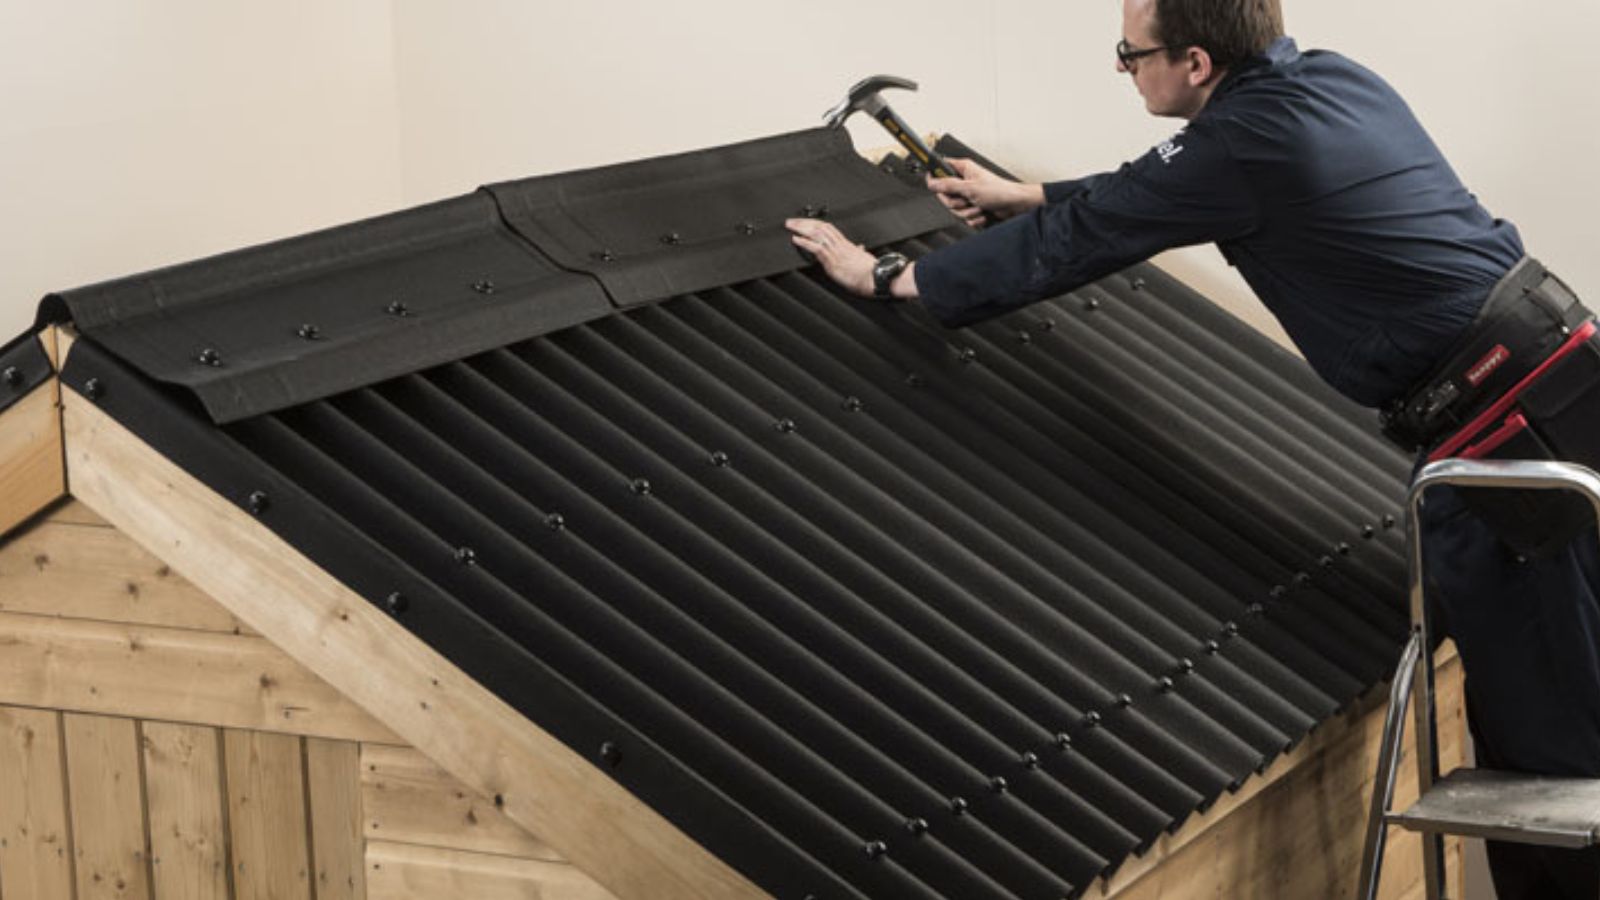
1. Start at the bottom edge
- Begin at the lowest part of the roof, where rain will run off
- Start from whichever side makes most sense to you - usually the left-hand side if you're right-handed.
- Place your first sheet so it overhangs the wall by about 5 cm, to help water drip clear.
- Check the overhang at both ends to make sure it’s straight.
- Once the sheet is straight, add a few initial fixings to hold it in place - (if starting from the left) one near the left-hand edge, one halfway across the width and one about halfway up the sheet height.
Don’t place any fixings within one full corrugation from the right-hand edge - that’s where the next sheet will overlap. You’ll fix through both sheets at the next step.
These early fixings just keep the sheet steady while you check the fit or position the next one. If anything’s off, it's easier to remove a few fixings rather than all of them.
2. Complete the first row
- Work across the roof, adding the rest of the sheets in the bottom row and putting in those initial fixings.
- Each sheet should overlap the one before it by one full ridge (the raised part of the corrugation) - in some cases, it might be 2 corrugations, refer to the manufacturer guidance.
- Once the full row is in place and straight, add the rest of the fixings:
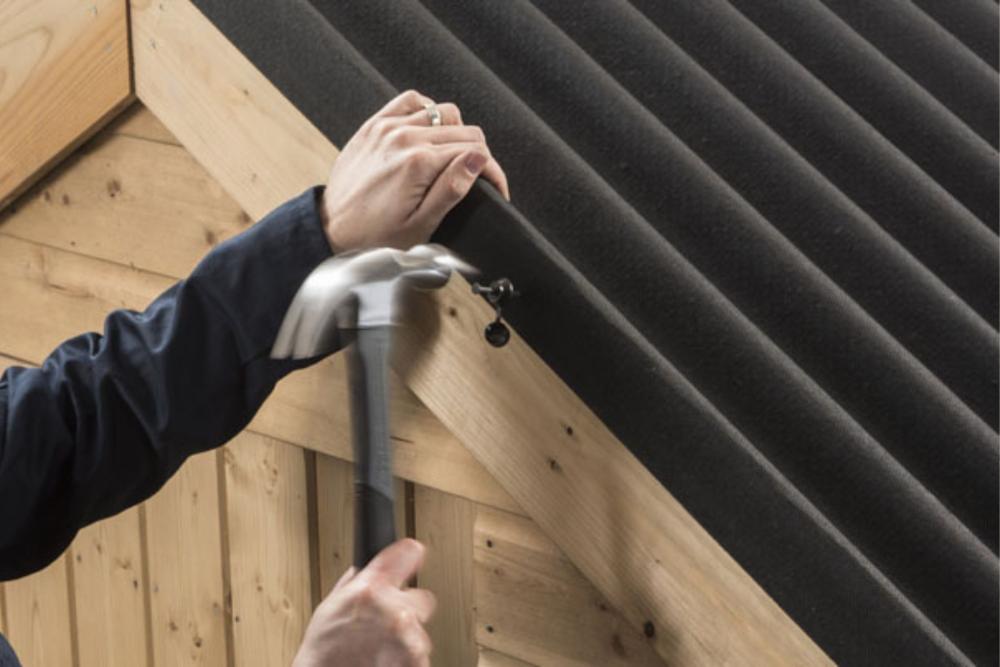
- Along the bottom edge (eaves), fix through every ridge into the boards or timber below.
- Add a second line of fixings to every other ridge roughly halfway up the sheet - make sure there is support underneath.
- If you’re only using one row of sheets, you should also fix each ridge near the top of each sheet to keep the upper edge secure - then go to step 4.
If you’ll be adding another row above, don’t add fixings within the top 200mm - that area will be covered by the overlap of the sheet above.
3. Add an additional row (if applicable)
Most small roofs only need one row of bitumen sheets. But if you are adding a second row above:
- Start directly above the first row and overlap each sheet up the slope by 15–20 cm.
- Make sure the overlap lands on solid timber underneath so both sheets can be fixed securely.
- Repeat the fixing steps for each sheet:
- Along the bottom edge (where it overlaps the sheet below), fix through every ridge
- Across the middle of the sheet, about halfway up, every other ridge
- Near the top of the sheet, add another line of fixings - again through every ridge.
- Keep the side overlaps aligned with the row below so the ridges stay consistent up the roof.
4. Fit ridge and verge trims
Once the sheets are fitted, add the finishing pieces:
- Ridge pieces (for apex roofs): sit over the peak and overlap the top of each side. Fix into the high points into a ridge batten.
- Verge trims or bargeboards: close off the sides of the roof to stop wind getting under the edges.
- Foam fillers (optional): insert at the eaves or ridge to block gaps under the corrugations and keep out draughts and pests.
- Fix all trims securely - these help to stop wind, rain and debris working their way under the roof.
- Fixing through the dip - fixings should always go through the high point of the corrugation
- Starting out of square: If the first sheet is wonky, the rest will follow it. Use a spirit level to keep things straight.
- Too little overlap: Sheets need room to shed water - side and end overlaps are essential.
- Wrong fixings: Standard screws or nails can let water in or pull loose. Use fixings made for corrugated bitumen.
- Overdriven fixings: Crushing the washer can split the sheet or break the seal. Tighten just enough to hold firm.
- Missing trims: Skipping ridge or verge trims leaves your roof exposed to the elements.
Where to next?
Bitumen roofing is one of the most forgiving types to fit - if the structure is sound and the basics are followed.
Explore more install guides and information about bitumen sheets or shop related products, below.