How to Install A GRP Roof
GRP stands for glass reinforced polyester, a composite material which is created by strengthening plastic with strands of glass called fibres. GRP roofs are also sometimes referred to as fibreglass roofs and are a popular and commonly spotted type of flat roof all across the UK.
GRP is one of the most robust flat roofing materials, offering high durability, weatherproofing and chemical resistance. With correct installation, fibreglass roofs can really stand the test of time, boasting a lifespan of up to 30 years. But how easy are they to install? In this article, we will talk you through the step-by-step fitting process for GRP flat roofing, discussing the tools and materials required as well as safety guidelines and post-installation maintenance tips.
Before You Begin
What Will I Need?
Below we have compiled a handy list of tools and materials needed for GRP roof installation:
- OSB3 timber decking
- PU Adhesive & skeleton gun
- 13mm galvanised clout nails OR staples with gas powered/compressed air stapler
- Resin & catalyst
- Chopped strand mat
- 2 1/2” roller
- 7” roller
- Stanley Knife
- Paddle roller
- Sanding pad & 40 grit sand paper
- Clear silicone sealant
- Topcoat & catalyst
- Colour pigment (if required)
Health & Safety
- Always wear the appropriate PPE including safety goggles, gloves, hi-vis jacket, helmet and dust mask.
- Do not smoke or expose any naked lights, oil burners or similar heating devices when working on a GRP roof.
- Check the roof is completely safe to walk and work on with no fragile or compromised sections.
- Make sure there is no asbestos in the roof.
- Ensure that all flammable materials such as timber boards are removed regularly with no build up of waste in the work space.
- Be aware that catalysts and resins are flammable and toxic so should be stored and disposed of appropriately. Leave unwanted resin in a safe place until it has cured, then dispose.
- If catalysts are spilled, dilute with large quantities of water instead of mopping up.
- Ensure there is adequate ventilation of the work area.
If you are inexperienced using any of the materials involved in this installation, we always recommend that you research and refer to manufacturer’s instructions and information before using.
How to Install A GRP Roof
1. Preparing the Deck – Overboard or Replace?
Before you can begin installation of your GRP roof, you first need to evaluate the condition of your roof deck. Industry standard timber decking boards are commonly used to create the support structure for GRP roofing. Although plywood can sometimes be used, the most popular and reliable option is the OSB3 timber decking.
What is OSB3?
OSB stands for Oriented Strand Board. It is a type of engineered wood formed through compressed layers of wood strands by adding adhesives. OSB boasts a variety of mechanical properties that make it suitable for load-bearing applications in roofing construction. The textured surface allows the resin to grip firmly, keying into the board. For an in-depth explanation of OSB, take a look at our handy guide here.
You will typically have two options at this stage of the process:
- Over boarding – Over boarding consists of fitting new 18mm OSB3 on top of the existing roof deck.
- Replacement – To replace, you will need to remove the old roof structure right down to the rafters and completely replace everything with brand new 18mm OSB3.
Which Option is Right for my Roof?
To determine whether your flat roof requires over boarding or replacement, you will need to inspect beneath the roof covering. If the timber beneath is sterling board, tongue and groove or plywood plus is 18mm, rot free and in a good, stable condition, then it is likely that you can simply overboard. If there have been issues such as leakages or ponding, then you may find that the wood is weak and flaky. In which case, you may need to carry out a full replacement. When removing an old deck, it is important to be careful and cautious when levering up the existing deck as not to damage the rafters and insulation beneath.
After removing the old deck, check that the roofing joists are stable and completely rot free. These may need replacing too.
2. Laying the Deck
Starting at the furthest edge from the drip, begin to lay the boards. The 18mm OSB3 boards should be laid lengthways at a 90° angle to the roof joists. Laying the boards with the writing side facing up will provide a better key for the laminate whilst encouraging resin flow into the board joints, helping to glue the boards together.
When laying along a wall, ensure you leave an expansion gap of 25mm. Line up the end of the board with the fascia, positioning subsequent boards from end to end. Trim the final board so that it is flush in the row with the fascia, then use this cut off to begin laying the next row. Fit the tongue into the groove of the existing row to create a staggered board pattern.
Once the first two rows are in place, you can line up the boards to run straight, following the same method as previously mentioned. When you reach the final row, cut off in line with the fascia.
3. Fixing Edge Trims
Edge trims boast two different sides – a high adhesion matt finish and a glossy finish. Always ensure you bond to the matt side.
Apply PU adhesive using a skeleton gun to the batten around the roof’s perimeter. Use a 30mm bead at 300mm centres and rub the trims into place. Next, holding the trim in place with the face vertical, drive fixings into each end. Repeat in the middle, then at 200mm centres following on. The fixings used should be either 13mm galvanised clout nails or staples.
To join the trim lengths together, apply a bead of PU adhesive to the inside of one length and secure so it overlaps the other by 50mm.
4. Resin Mixing & Catalyst Addition
After removing the lid, stir the resin thoroughly to make sure that any styrene and wax that may have settled at the bottom, is mixed in. You will find that GRP roofing resin is typically supplied in tins of 20kg or 18.1 litres. The ratio for resin to CSM (chopped strand mat) is 1.35kg of resin for every 1m2 of glass. It is advised that you allow 1.5kg for every 1m2 as this will adapt for any difficulties or waste.
Start by mixing just 1 or 2 litres of resin first to laminate the corners and bandage the trims. This will help you to estimate curing time and allows readjustments for the remaining resin if the incorrect amount of catalyst has been added.
When adding the catalyst, never use less than 1%/more than 4% and mix for at least a few minutes after addition. Remember that resins cure much quicker in direct sunlight and will not cure at below freezing. In the colder winter months use fast catalyst and in the summer use standard catalyst. You should aim for a curing time of between 20-30 minutes.
5. Lay the Chopped Strand Mat
You will see that the chopped strand mat has both a cut and feathered edge. When overlapping, position the feathered edge on top of the cut.
Begin rolling the mat out parallel to the drip trim, overlapping by a minimum of 50mm without going over the edge of the trim.
Continue rolling out each strip, making sure to overlap by at least 50mm. To create a straight edge, use a knife to cut off the ends into the corner of the trim. Leaving the rolls in position to differentiate the mats from each other, cut 200mm mat squares for the corners and 200mm strips of bandage for the trim joints.
6. Lay the Corners
Position a 200mm CSM square on to the face of the corner trim with the bottom edge on the radius of the trim. Fold around the corner and over the top of the trim, then use a 21/2 inch roller to feather into place. Bandage the joints in the trims using the same resin mix and technique. Bandage any join where the boards are not fully joined. Also, cover any nails that are holding the trims with a small section of mat. You do not have to wait for the corners and bandages to fully cure before moving onto lamination.
7. Laying the Laminate
Dip a 7”polyester roller into the catalysed base resin and drop 3 rollers worth onto the board. To achieve a ratio of 3:1, you will need to apply one third of the resin onto the board and the other two thirds onto the chopped strand mat. Coat 1 square metre.
8. Laying the Mat
Unroll the mat onto the board already coated with resin. Wet the mat in sections one roller width wide (7 inches) by dropping the roller in the middle of each run, pushing away to the end of the 1 metre then pulling back over towards you.
Continue this across the whole 1m2 then roll over the entire area once again for even coverage. Repeat the wetting out method for the next 1m2 board, remembering to apply one third of the resin onto the board and the other two thirds onto the mat.
Leave the resin to soak into the mat for 2-3 minutes. This will break down the emulsion binder.
9. Paddling
Roll a paddle roller back and forth, applying a small amount of pressure along the 2 edges and at the end of the wetted out mat. Next, roll the paddle roller once again over the entirety of the wet out mat, passing over at least twice.
You will know that the laminate has been correctly wetted out if it is completely transparent.
10. Top Coat Preparation
Use a sanding pad and 40 grit sand paper to lightly sand the corners and trim bandages. Next, cut any additional cured mat overhanging past the trim.
Use a clear silicone sealant seal edges with abutting walls, fit C100 simulated lead flashing and seal again with the same clear silicone sealant.
11. Top Coat Mixing
You have the option of using either the standard pre-pigmented grey or adding a pigment to create a coloured topcoat. For each 20kg tin of topcoat, 2kg of colour pigment will need to be added. When adding colour pigment, mix thoroughly to ensure smooth and even colour application.
Topcoat is applied at the rate of 0.5kg per m2. Add the required amount of catalyst based on this and stir well for at least a few minutes. Pour an appropriate amount of topcoat into mixing buckets to cover the full roof space including edge trims.
12. Top Coat Application
Cover the remaining laminate in the top coat using a 7” polyester roller. Coat with just enough topcoat so that the fibre pattern is visible, ensuring you don’t apply too thickly.
Coat the trims with top coat using a 2 1/2 inch polyester roller. Roll across the face of the trim, then hold the roller at an angle to the bottom of the trim, covering half of the radius return on the front. Finally, topcoat the radius on the underside of the trim.
Important Tips to Remember When Fitting a GRP Roof
- A GRP roof must be installed in dry, mild weather conditions or the resin and topcoat will not cure properly. (do not install in temperatures under 5°)
- If it starts raining during installation, cease fitting immediately and cover the roof as quickly as possible.
- Always check the temperature of the OSB timber before beginning GRP application. If they are above 30 degrees the wax in the topcoat will melt and create a tacky finish.
- Materials find it difficult to cure after sunset so plan time appropriately for each step, especially in winter when it gets darker much earlier.
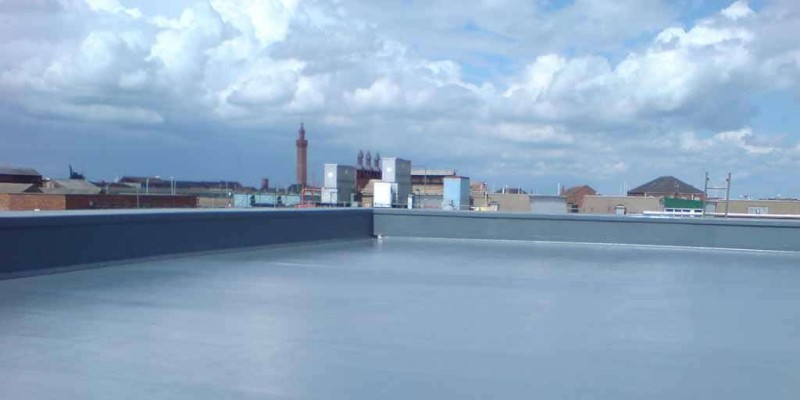
Finished!
And now you are finished! Your brand new GRP is installed and will last for at least 30 years or more with correct care and maintenance. We have compiled a list of handy maintenance tips to ensure your GRP roof reaches its full lifespan:
- Routine Checks – It is recommended that you inspect your GRP flat roof at least twice a year (once every 6 months) to check for damage. Catching small damages early will allow for far easier, faster and less expensive repairs.
- Cleaning – The simplest way to clean your GRP roof is by using a long-handled mop and bucket. You may also used a garden hose or pressure washer. If you are using a pressure washer, ensure you are not using hot steam as this can cause damage.
- Re-coating – If on inspection you notice pooling issues, this may be a sign that your GRP roof requires a new coat. There are both gel and acrylic coats available for this.
- Remove Debris – Remove all debris including twigs, stones, dirt, leaves etc from the roof surface and gutters to minimise the potential of damage and build-up.
- Surrounding Foliage – If surrounding trees overhang onto your flat roof, there is a high chance that debris may fall down from it onto the roof surface. Trimming back foliage away from the roof is a good way of preventing this.
To Conclude
If this post has inspired you to install your own GRP flat roof, then take a look at our top-quality range of GRP Roofing Kits available on Roofing Megastore now. For any further questions or queries, don’t hesitate to get in touch with our friendly customer service team who will be more than happy to help. Simply give them a call on 01295 565565, email [email protected], or just leave a message in our handy live chat.