How to Hang Roof Tiles Vertically
First practised throughout Kent, Surrey, and Sussex toward the end of the 17th century, vertical roof tiling has been a cladding technique utilised for hundreds of years. Although a contemporary style choice in the current building industry, originally clay plain tiles were used to enhance the weather protection of wattle and daub buildings.
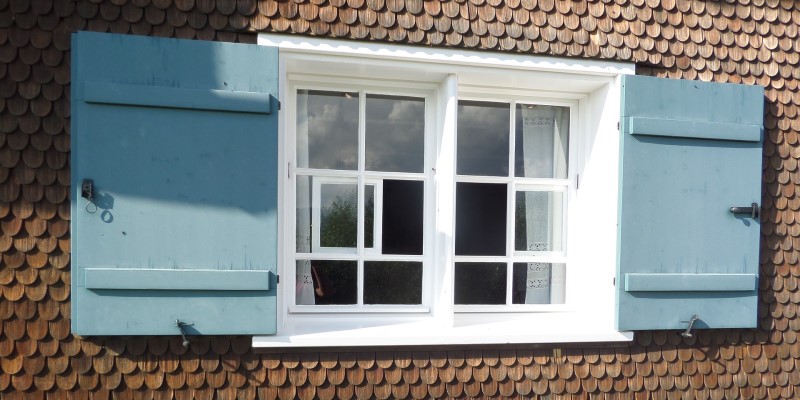
Now observed more as an eye-catching, aesthetic architectural approach, tile cladding creates a striking, contemporary look for any property. The continuation of roof tiles from the top to the front of the building produces clean, flowing lines for strong visual appeal and low-maintenance structural protection.
Which Tiles are Used for Vertical Tiling?
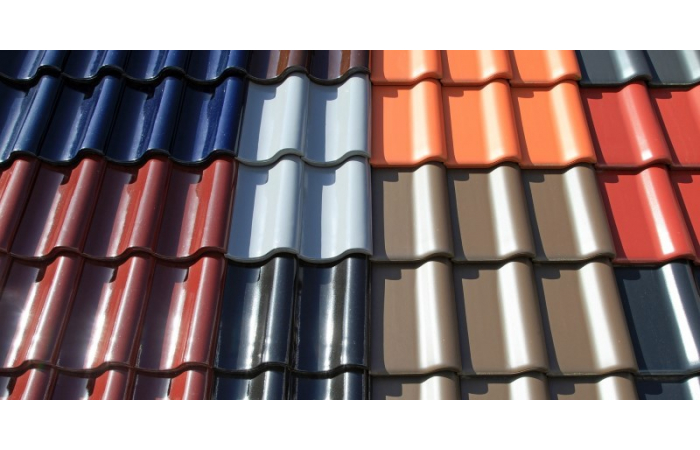
The typical type of roof tile used for vertical tiling is the standard plain tile. Specialist fittings such as internal and external corner tiles are available so that 90° and 135° angles can be accommodated during installation. Feature tiles are also popularly utilised for vertical tiling projects with a multitude of stylish shapes including Fishtail, Club, Bullnose and Arrowhead out there on the market.
Setting Out the Battens
To ensure a clean and professional-looking finish for your vertical tile cladding, the battens will need to be set out in a specific way.
Fixed Points
You will need to consider the top and bottom edge of the wall, as well as any openings such as windows. The top and bottom of the wall, as well as the top and bottom of any window are called “fixed points”. These fixed points allow you to calculate the batten gauge.
For example, on a wall with one window, you may use three different batten gauges. Firstly, the bottom edge of the wall and the bottom of the window are used to calculate the batten gauge between these two points, followed by the space between the bottom and top of the window, and finally between the top of the window and the top of the wall.
How to Hang Roof Tiles Vertically: Step-by-Step
This may be sounding a little confusing so let’s talk the process in easier-to-follow steps.
1. Starting from the Bottom
Starting from the bottom edge of the wall, position a full sized tile to cover the wall below it. Mark the underside of the nibs on the wall and repeat along the full width of the wall.
Try to ensure that this is all along a single line, however if you encounter an internal corner for example, use a single point as your basis. If tiles have to be laid at different heights, this will depend upon the tile gauge. Once you’ve set out the first batten, nail it into position.
2. Setting out the Top Course
Next, you need to set out the top course of tiles along the top edge of the wall. This will allow the head of the top tile to fit under the eaves of your roof.
With the top batten in place, you can then position the last full tile batten. So that the very top tile can fit into place with enough coverage for the final course of tiles, this should no wider than 38mm. Take all fixed points are taken into account, as this will ensure the tiles fit neatly and provide adequate coverage.
Something to Note! - If the distance between the eaves and the first fixed point is too short, longer flashing may have to be used, otherwise, it may be difficult to set a batten/tile gauge that can reach the windowsill.
3. Intermediate Battens
To set the gauge of intermediate battens, measure the overall gauge distance and divide it by 114mm. As long as your answer is less than 114mm (ideally as close as possible to this), and above 88mm, the measurement is suitable.
If your answer is not a whole number, round it up. Intermediate battens are required between the top of the first and last full tile courses of any fixed points along your wall.
4. Additional Guidance
All battens should be laid horizontally, with no sag in the middle. Your first course of tiles should be laid to equalise any gaps between the tiles, and line up neatly with corners, abutments, and window openings. Mark battens at every third or fifth joint to ensure that they have been laid correctly.
Tiles along the eaves are laid in a “broken bond” pattern to the first course of tiles, which may require the use of half tiles. You may also need to use half tiles along window reveals to maintain clean, perpendicular joints.
Tiling to Eaves & Windows
Below is a variety of installation methods that can be utilised for vertical tiling to eaves and windows:
Tiling to: Eaves with Soffit
- To accommodate installation of the top tile batten, finish the battens approximately 90mm below the soffit.
- Fit a code 4 lead flashing so that it laps over the top tile by at least 100mm. If there is no top tile, extended the flashing coverage to 150mm.
- Next, nail the bottom edge of the flashing along the top tile batten face, then dress into the top tile nip area below the soffit. After nailing the tops tiles, you can then dress the flashing onto the tile surface.
Tiling to: Eaves with Open Rafter
- Beneath the roof eaves, finish tiling with a continuous course of tops tiles. Then, install a code 4 lead flashing to cover.
- Make sure to maintain the air path to the grill using a vent tray between the rafters.
- Set the counter battens at maximum 600mm centres and extend up as high as possible.
- In-fill the area between the open rafters and top tiles using 19 or 25mm timber boarding. Fix the boards to vertical noggins, nailed into the sides of the open rafters. To reduce the risk of birds nesting in the rafters, this timber boarding can be extended up to touch the roofing underlay if eaves ventilation is not used.
Tiling to: Window Head
- So that the window can be removed or fitted after the vertical tile installation, make sure to position the eaves course above the window opening. Set the vertical tiling gauge between the window sill and the window head, so that you won’t need to cut the eaves tile course.
- Install a timber tilting fillet to the lintel face. This should be approximately 100 x 75mm in size so that is it big enough to provide support for the eaves course in the same plane as the rest of the tiling.
- Remove the counter battens just below the eaves tile batten so that the underlay can be positioned over the tilting fillet at a slight fall.
- Install a fire resistant board to the underside of the tilting fillet. This board should be at least 6mm in thickness.
Tiling to: Tiled Window Sill
- Finish the battens below the window opening, so that the top tile course can fit underneath the window sill.
- Then, fix the creasing tiles using the broken bonded method onto a bed of mortar. This will be 1:3 cement:sand. Make sure the creasing tiles overhang the vertical tiles by 38-50mm.
- Now, fit code 4 lead flashing into the mortar bed. After fixing the top layer of tiles, the flashing can then be dressed over the tile surface. This should cover the tops tiles by at least 100mm.
- If the tops tiles are not utilised, then the flashing can be extended to 150mm, covering at least 150mm beyond the jamb on both sides.
Tiling to: Timber Window Sill
- So that the top course of tiles can fit beneath the window sill, make sure to finish the battens below the window opening.
- Nail a code 4 lead flashing to the underside of the timber window sill, before it is positioned and fixed in place.
- After installing the tops tiles, the flashing can then be dressed onto the surface of the tiles.
- The flashing should cover the tops tiles by at least 100mm. If tops tiles are not utilised, then ensure the flashing is instead extended to 150mm, with a minimum of 150mm extending beyond the jamb on both sides.
Vertical Tiling Eaves
- First, install a timber tilting fillet to the lintel face. This should be an approximate size of 100 x 75mm to ensure it can support the eaves tile course in the same plane as the rest of the vertical tiling.
- Place the underlay over the tilting fillet at a slight fall, removing the counter battens just below the eaves tile batten to dress out.
- Fit a fire resistant board to the underside of the tilting fillet. Make sure the board is at least 6mm in thickness.
Key Tips for Vertical Tiling
To produce the best possible result for your vertical tiled cladding, here are a few important tips and guidelines to keep in mind during installation:
- Nail each of the tiles twice to ensure a secure fit.
- Always make sure that tiles do not obstruct or interfere with window or door openings.
- Ensure that all lead flashings installed around openings are utilised in complete accordance with the Lead Sheet Academy recommendations.
- Use double tile courses at the eaves – lay the first course of tops tiles with a course of full tiles over the top of it.
- Use counter battens over masonry construction to lessen the need for direct fixing.
Starting Your Own Project?
If you are starting your own project and are on the hunt for materials, look no further than our fantastic selection of top-grade roofing tiles available now at Roofing Megastore. We stock an extensive range of affordable, high-quality products from leading brands to ensure you can achieve professional-looking results.
For any further questions about roof tiles, or for help regarding any of our products, don’t hesitate to get in touch with our award-winning customer service team who will be more than happy to help. Simply call them on 01295 565565, email [email protected] talk to them via the online chat on our website.