How to Fit Plastic Roof Tiles
Plastic roof tiles are the perfect roofing solution for those who love the classic visual appeal of slates but want a more practical and lightweight alternative. One of the substantial benefits to plastic tiles is just how straightforward and inexpensive they are to install. Thanks to innovative manufacturer design, they can be easily fitted by both tradespeople and DIYers with no specialist tools or equipment required. But what exactly does the fitting process involve?
In this article, we will talk you through the step-by-step method of installation including preparation, tools and other handy tips to help you achieve the highest quality results for your roof.
What Tools Will I Need?
Ideal for DIYers, plastic roof tile installation utilises no specialist tools or equipment. The only tools required for this project are:
- Hammer/pneumatic nail gun
- Sharp utility blade or standard circular saw
- Tape measure
- Pry bar
- Tin snips
- Chalk line with blue chalk
How to Store Plastic Roof Tiles
Here are the advised guidelines for storing your plastic roof tiles prior to installation to ensure optimum results when fitting:
- Store on the existing pallet on a completely flat surface
- Store at a temperature of at least 7°C
- DO NOT double stack pallets containing roof tiles
- Cover the pallets with a protective covering material
- Do not store on roof decks as this could damage and deck & supporting structure
Conditions for Installation
Plastic roof tiles can be installed in low temperatures (as low as 0°C), however in conditions such as this, the tiles should only be hand fastened. You should also ensure to condition the tiles at a temperature of at least 7°C for 24 hours before installing.
Preparation
Before beginning the fitting process, it is vital to appropriately prepare your roof structure for tile installation. After thoroughly inspecting the roof surface, you should ensure that the area is flat, smooth, sound, clean and clear of all debris. Double-check that sheathing joints are completely supported by framing and blocking with metal flashing and any other specialist flashings in place.
Make sure that the substrate is sloped and anchored to the framing. Clean interlocking areas to minimise moisture and ice damming and make appropriate provisions for flashing and roof penetrations.
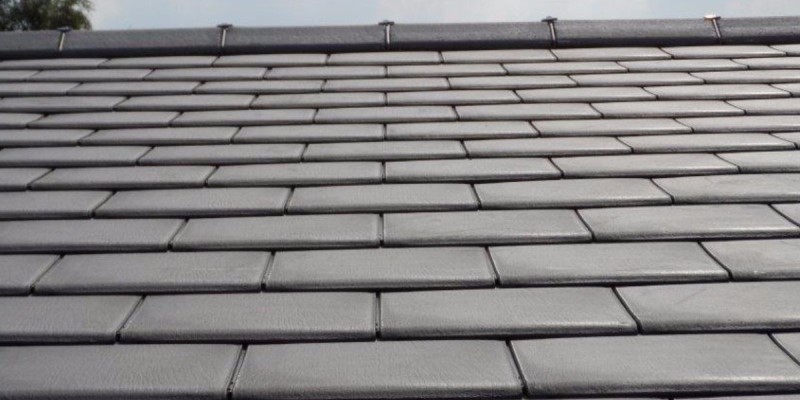
How to Install Plastic Roof Tiles
1. Fixing Battens
Begin by fixing the battens over the overlay to the required gauge. It is recommended that you use a treated battens at a minimum size of 50 x 25mm.
The first course and eaves course should extend over the fascia by at least 50mm, so ensure you place the first batten approximately 178mm centrally from the start of the roof. Next, you can place the second batten directly under the first course to support the eaves slate course. The top battens should be positioned so that the top slate course will be covered by the ridge cap.
2. Fixing Eaves
Fix the eaves (or starter) course using a 3/4 slate piece. You can cut this piece from a full size slate using a fine-toothed hand saw, circular saw or sharp utility knife.
The first course and eaves course must extend over the fascia by 50mm. This will allow rainwater to move easily into the middle of the gutter. Do not use the standard nailing guides for the eaves course, instead secure the fixings below.
3. Calculating Gauge
You can now calculate the required gauge and total number of courses. Remember, the first course should be positioned on top of the eaves course, with the double batten accommodating the eaves slates. Slates at the verge should extend over the brickwork or barge board by 40mm but may require cutting to size.
4. First Course
Lay the first course of slates over the eaves course and secure to the second batten. The first course and eaves courses should be laid “broken bond”. This means that the joints should not line up to aid weatherproofing.
5. Continue Laying
Continue laying the following courses, using the “broken bond” pattern. Remember, the slates should oversail the batten and should be step and cut accordingly.
Continue the second course with a full slate set back from the course below, with the finished edge facing the gable edge. Align the slate between the centreline locators from the previous course, then adjust the roof slate up or down to meet the exposure lines with the top edge of the lower course.
To create the offset from one course to another, use the provided centre mark on each slate and cut the slates lengthwise. This will ensure that the nail holes are covered with the next slate course with no through-joints exposed to the deck.
To make sure the slates are fitted straight, strike the chalk lines horizontally at the desired level of exposure. Spacer tabs are provided on each slate to maintain consistency in the spacing between the slates.
Each slate should be fastened with a minimum of two galvanised roofing fasteners at a minimum of 30mm long and 3mm in diameter with a 10mm diameter head. Use the two nailing targets on the slate to secure the fasteners, ensuring the decking is penetrated by at least 18mm. On sections such as an overhanging eave, be careful to ensure that the nails penetrate the roof decking but are not completely driven through the decking.
6. Ridge Cap Finishing
To finish the ridge caps, cut a standard slate at the end of the ridge into a triangle or diamond shape, ensuring it is the correct size to cover the end gap. Nail in place into the end battens and/or truss. Then seal using a silicone sealant or join to the ridge cap using a strong epoxy glue. You can hide the nail heads using coloured paint or sealant.
7. Valleys
Open Valley
For an open valley design, install a “W” or “I” seam valley at a minimum of 18mm wide. Fasten the valley every 0.6m using metal cleats, then slate over by covering flashing by a minimum of 102mm. Do not drive the fasteners from the slate into the valley flashing.
Closed Valley
A closed valley can be constructed by laying slates tight to the valley line, placing pieces of metal underneath. Each metal sheet should extend 51mm above the top of the slate course and be secured directly to the roof deck. Metal sheets should lap the sheet below by at least 76mm and should be wide enough to extend 178mm from the centre of the valley to the roof surface. Cut the slates in a straight line to fit no closer than 10mm against the slate of the adjoining roof slope.
8. Step Flashing
Step flashings are fitted under or over the roof coverings, turned up on the vertical surface. Flashings should have a minimum length of 229mm and must overlap by a minimum of 51mm.
9. Apron Flashing
Apron flashing is fitted over the slates and behind siding or counter/cap flashing. It can also be dressed into the brickwork or stonework.
10. Counter Flashing
To install counter flashing, cut a minimum of 25mm deep reglet into the masonry material, then bend the flashing to fit into the reglet. Fit the lowest piece first and work up, fastening the counter using expandable anchors or masonry screws.
11. Hip & Ridge
To fit the hip tiles, additional tiling battens will need to be installed.
First, cover the full length of the hip with 600mm underlay, spanning from eave to ridge. Ensure it overlaps the standard underlay on both sides of the hip. Next, position a hip tile in situ and mark nailing points at both the bottom and top of the hip. Secure a full length of tiling batten on both sides of the hip using the marks as a guide. Ensure the slating battens are fitted flush to the hip battens. After cutting slates to fit at the junction, fix the hip tiles using (a minimum of) 2” nails/screws. Ending at the eaves, install a cut hip tile and fill with a shaped piece of slate.
12. Ridge-to-Hip Intersection
It is important that you weatherproof the intersection where the ridge tile meets the hip tile. Fit a lead saddle over the intersection between the ridge and mitred hip tiles.
Finished!
And now you are finished! Your brand new roof is installed and can last for up to 40 years with correct care and maintenance. If this article has inspired you to transform your own roof, take a look at our high-quality range of plastic roof tiles from leading brands. We stock a fantastic range, providing our customers with some of the best roof tiles on the market.
Alternatively, if you have any further questions or queries, don’t hesitate to get in touch with our award-winning customer service team who will be more than happy to help. Simply give them a call on 01295 565565, email [email protected], or leave a message in our handy live chat.