How to Seal a Flat Roof
With winter on the horizon, the last thing you want to deal with is a leaking roof. Unfortunately, flat roofs are some of the most prone to nightmare leaks. So, to help you prevent any catastrophe when the snow comes, we’ve put together a brief guide on spotting potential leaks, and how to seal flat roofs to prevent any trouble in future.
Table of Contents
- Leaking Flat Roof Warning Signs
- Tracking Down the Problem
- How to Seal Your Roof
- Waterproofing Membranes Installation Guides
Leaking Flat Roof Warning Signs
Flat roofs are extremely popular thanks to their value for money, easy installation and simple maintenance. They’re most commonly seen atop extensions or outbuildings such as garages and garden sheds. Unfortunately, this also means that they may not be checked as often, so water has more time to seep in and wreak havoc with your roofing structure. Here we’ll take a look at some of the early warning signs that will let you know your flat roof needs to be repaired before it can be sealed.
Dark Brown Patches
Before any water begins dripping through, excess moisture will soak into your roof structure leading to very obvious patches of damp. If you spot this, then you are almost certainly dealing with a potential leak and will need to take the time to investigate.
Safety Tip: It is incredibly important that you do not start climbing onto your roof if you have any doubts about its strength. Instead consult a professional who will be able to advise on the best way to deal with your specific problem.
Tears, Ripples and Splits
Where there is damp, there will be a tear, ripple or split. When investigating your roof, you should be on the lookout for any inconsistencies in the roofline where water could be getting in. If your roof has taken a turn for the worse, simply sealing your flat roof will not be enough. Take photos of any issues you find and show these to a qualified roofer.
Tracking Down the Problem
Unfortunately, finding a roof leak is often not as simple as looking directly above any damp patches. This is because water entering your roof space can run along in any number of directions before leaking through the frame and into the room below.
To find the source of the problem, you should first wait until your roof has been dry for three days. This will allow rainfall to drain off and will make it far easier to identify any remaining damp. Your first choice is simply to wait until the evening as, after cooling down, the leak should release the heat that was stored up during the day.
If this doesn’t help, measure from the outside wall of the room, along the ceiling and across to the location of the damp or leak. By marking this area, you’ll narrow down your search considerably. Now, look to the topside of your roof above this marked area for anything that could be causing the leak, such as broken flashing. Once this has been repaired, you can now seal your roof. For more help on finding and fixing roof leaks, read our guide.
How to Seal Your Roof
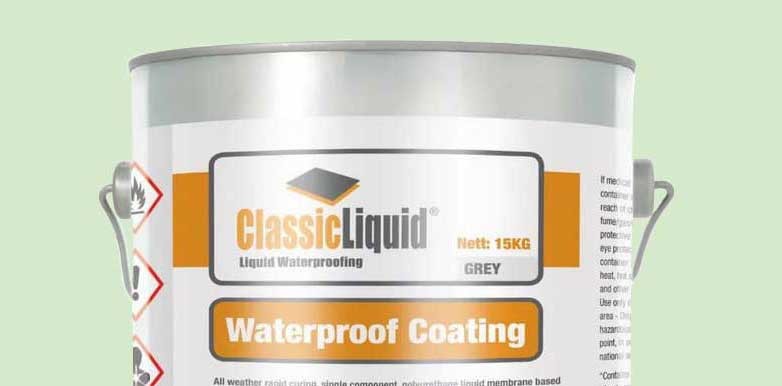
A very simple solution, suitable for a wide range of roofing types, is to apply a liquid waterproofing membrane such as Classic Liquid Top Coat. It can be used for the following applications:
- Metal roofing
- EPDM membranes
- GRP membranes
- Bitumen roofing
- Asphalt roofing
- OSB3 T&G structural roof decks
The longevity of this solution will depend on the thickness of the coat applied. What this means is that if you are coating your garage and have no intention of replacing the roof you will want to apply a thick coat (which can last up to 20 years). However, if you are working with a shed or other smaller garden building a thinner coat would likely be more than suitable. To give you an idea of how thick or thin your coats needs to be, consult this table:
|
Life Expectancy |
Thickness |
|
10 Years |
1.5Kg/sqm (15kg applied for every 10sqm) |
|
15 Years |
2.1Kg/sqm (15kg applied for every 7.2sqm) |
|
20 Years |
2.5kg/sqm (15kg applied for every 6sqm) |
With your coverage rate decided, you can start preparing your area and applying the liquid sealant.
What You’ll Need:
- Topcoat
- Primer
- Joint Sealer (if you need to fill in any cracks or gaps)
- Detailer (if your roof has any upright areas)
- Self-Adhesive Tape (for joints and seams)
- Broom or Stiff Brush
- Sponge
- Mastic Applicator Gun & Caulking tool (if using Joint Sealant)
- Long Handled Paint Roller (to apply Primer)
- Soft bristled long handled brush or broom (to apply Topcoat)
- Stirrer or piece of wood (for mixing Topcoat)
Cleaning Your Roof
An obvious first job, you should make sure that your roof is clean, dry and free of any dust, oil or debris (including twigs and moss). Any rips, tears or cracks that you may have found when investigating your roof will also need to be filled in along with any irregularities, joins or other gaps. This can be done using a mastic applicator gun with classic liquid joint sealant alongside some self-adhesive tape, if needed.
While doing this you may also find that your roof has some blisters. These occur when air has gotten underneath the membrane. Blistering doesn’t always need to be addressed, as long as you’re sure it’s not allowing any water ingress. You should double check to make sure blisters are not missing granules and that the area around them is worn, cracked or broken. If they are or it is, then as with the other issues, they will need to be repaired before proceeding. You should take special care if your roof receives any foot traffic and replace the entire affected area if there are multiple blisters causing issues.
Apply Primer & Detailer
Before using the Topcoat you should first lay down a layer of primer. This can be applied with a brush or roller. The exact amount required will vary depending on the porosity of your roofing material, but typically 0.1 – 0.3 litres should be used per square metre. This means that a 4-litre can will cover 20sqm.
Vertical areas such as upstands or pipe collars will require the use of a detailer. As opposed to a primer, this has fibres built into it to prevent the liquid from slumping. It should be applied at a minimum coverage rate of 18kg/sqm.
Before moving on, you should make sure that both the primer and detailer have dried completey. This should take around 2-3 hours.
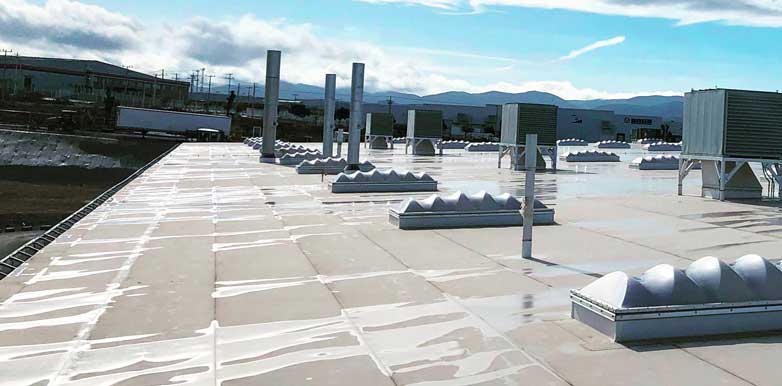
Apply Topcoat
With your roof fully prepared and dry, you can move on to the application of the liquid coating. First, mix the Topcoat using your stirrer until the mixture is even. This can then be simply applied to your roof using a long-handled brush or broom, be sure to cover your whole roof evenly when applying. If a second coat is required, ensure that the first is completely dry before doing so. After that, simply wait for the final coat to dry and your now sealed roof will be complete. Clear Liquid generally takes 24 hours to completely dry and be trafficable but is showerproof in 30 minutes. That being said, some other liquid applied sealants can dry a lot quicker so it is important that you do not mix more than you can apply in that timeframe.
Any bits of topcoat or primer that have fallen onto the floor can be soaked up by treading in some building sand over the top of it.
And that’s it, your flat roof should now be leak free, sealed and water resistant for decades to come.