How to Fit a Loft Hatch
Easy access to the loft is an important part of maintaining a healthy home. Whether you’re on the lookout for extra storage space, or damp and mould have you concerned about your roof space, being able to get into the loft is vital. The easiest way to do this is with a suitable loft hatch.
Older homes built before the early 20th Century often don’t even feature loft access, as it was thought there would never be a need to get into the roof space. Nowadays however, we understand the importance of proper roof ventilation and loft insulation, both of which often require you to enter the loft to install.
Fitting a loft hatch yourself can be a challenge, as you need to get the positioning just right to avoid any pipes, wires, or joists. However, with proper planning and a bit of careful work, it’s well within the reach of a handy homeowner to fit a loft hatch yourself. Read on to discover how.
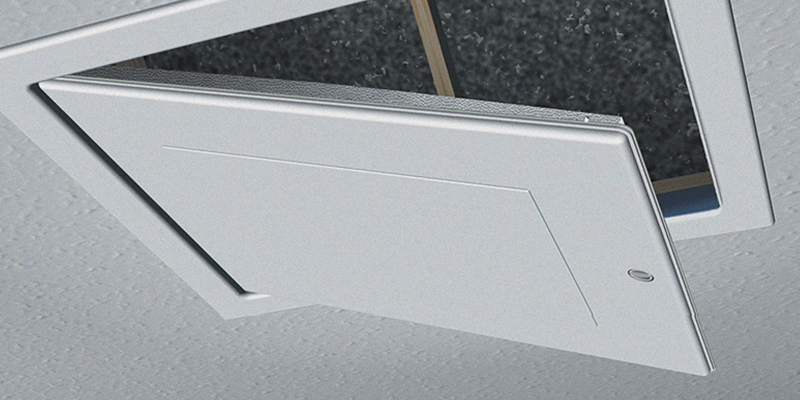
Choosing Your Loft Hatch
The first thing you’ll need to do is choose which type of loft hatch you want. Manufacturers craft a number of different options, and here are a few key questions you should ask yourself before making the decision.
- Pre-made or make your own? Depending on your own level of DIY experience, you may prefer to make your own loft hatch. However, if you’re new to DIY or simply low on time, we’d recommend buying a quality pre-made loft hatch.
- What size do you need? Loft hatches come in a number of different dimensions for lofts of all shapes and sizes. A larger loft hatch may mean easier access but could look unsightly depending on its location. It’s worth finding the hatch that offers the greatest balance of size, positioning, and aesthetics for your home.
- Any additional features? Some loft hatches come with a number of extras including insulation, draught sealing, and more. There are hatches that come available with locks, ideal for those with children, or built-in ladders for an all-in-one package.
Before You Fit Your Loft Hatch
Before you begin, it’s important to ensure that your ceiling beams and joists are able to support the loft hatch you’d like to install. Secondly, it’s vital to check that no pipes or wires are in the area you want to place your loft hatch.
If your loft hatch is going to be so large that a roof truss or more than two joists need to be cut or altered, we’d absolutely recommend you consult a professional as this can compromise the structural integrity of your property.
Other safety considerations include never cutting a joist connected to a roof strut or hanger, through two adjacent joists, or a strut, hanger, rafter, purlin, binder, or collar. Doing so could lead to serious issues, as these will have been designed to hold a certain weight as part of the whole roof system.
When it comes to positioning your loft hatch, ensure that it is centred between three joists, so that a section of the middle joist will need to be cut out. The best way to do this is to drill holes until you can easily insert a saw to cut out the necessary portion of ceiling and joist. Remember not to install a loft hatch or interfere with a centre joist where it is connected to a strut or hanger, nor should a hatch be installed under a binder or low collar.
How to Fit a Loft Hatch Step-by-Step
- First, measure the width between three joists, centred on one joist. Then, add twice the width of the support timbers (usually around 50mm) to accommodate the support beams which will be added later. These timbers need to be the same size as the joists in your ceiling. Once you have this measurement, this is the length that will be removed from the central joist later.
- On the side running perpendicular, screw the two lengths of timber across the three joists to serve as temporary support. These will be removed later. Once you’re certain that no pipes, wires, or other obstructions are in the way of your loft hatch to-be, fully cut out the opening and the length of joist marked earlier.
- Next, add timbers of the same width and depth as your joists to the border of your opening. The timbers attached to the joists should be screwed securely so they can support the weight of your loft hatch. Use four-inch screws at the top and bottom of the timbers, fixing each timber one by one. Be sure to position these so that the opening is square, with all sides equidistant.
- You can now fully cut away the ceiling opening and remove the original two temporary support timbers.
- Slide and secure your loft hatch into position to complete the process.
Conclusion
You should now have a fully fitted loft hatch giving you easy access to your roof space. If you haven’t got one already, we’d recommend investing in a ladder for your loft hatch. We stock a fantastic range of loft ladders to suit a variety of needs and property styles.